Introdução
Thank you for choosing the AEG L9WS99ÖKO Washer-Dryer. This manual provides essential information for the safe and efficient installation, operation, and maintenance of your appliance. Please read these instructions carefully before using the appliance and keep them for future reference. Proper use and care will ensure optimal performance and extend the lifespan of your washer-dryer.
Informações de segurança
Always follow basic safety precautions when using any electrical appliance. This section outlines important safety guidelines to prevent injury and damage.
- Segurança elétrica: Ensure the appliance is connected to a properly grounded outlet. Do not use extension cords or adapters. Disconnect power before any maintenance or cleaning.
- Segurança da Água: Ensure all water connections are secure to prevent leaks. Do not operate the appliance if there is visible water leakage.
- Segurança infantil: Keep children and pets away from the appliance during operation. Do not allow children to play with the controls.
- Instalação: The appliance must be installed on a firm, level surface. Ensure adequate ventilation around the appliance.
- Materiais Inflamáveis: Do not wash or dry items that have been soiled with flammable substances (e.g., cooking oil, gasoline).
- Manutenção: Only perform maintenance tasks described in this manual. For complex repairs, contact qualified service personnel.
Produto acimaview
The AEG L9WS99ÖKO is a versatile front-loading washer-dryer designed for efficient laundry care. It combines washing and drying functions in a single unit, offering convenience and performance.
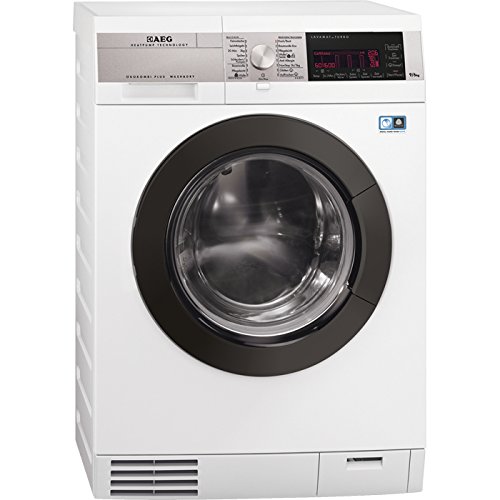
Image 1: Control panel of the AEG L9WS99ÖKO Washer-Dryer. This image displays the main rotary selector for programs, the digital LED display showing cycle information, and various touch buttons for additional functions and settings. The AEG brand logo and 'Heatpump Technology' are visible on the left.
Recursos do painel de controle:
- Seletor de Programas: Utilizado para selecionar o programa de lavagem ou secagem desejado.
- Telão LED: Exibe a duração do programa, o tempo restante, os códigos de erro e as opções selecionadas.
- Controles de toque: Buttons for functions such as temperature selection, spin speed, delay start, extra rinse, and drying options.
- Dispensador de detergente: Localizado no canto superior esquerdo, para adicionar detergente e amaciante de roupas.
Instalação
A instalação correta é crucial para o funcionamento seguro e eficiente do seu aparelho. Recomenda-se que a instalação seja realizada por um técnico qualificado.
Desembalagem:
- Remove all packaging materials, including polystyrene blocks and protective film.
- Remove the transport bolts from the rear of the appliance. Keep them for future transport.
Colocação:
- Coloque o aparelho sobre um piso sólido e nivelado.
- Ensure there is sufficient space around the appliance for ventilation. Dimensions: 600 mm (width) x 639 mm (depth) x 870 mm (height).
Nivelamento:
Adjust the adjustable feet at the bottom of the appliance to ensure it is perfectly level and stable. An unlevel appliance can cause excessive vibration and noise.
Conexão de água:
- Conecte a mangueira de entrada de água fria a uma torneira de água fria com rosca de 3/4 de polegada.
- Ensure the hose is securely tightened to prevent leaks.
Conexão de drenagem:
- Posicione a mangueira de drenagem em um tubo vertical ou na borda de uma pia, certificando-se de que esteja bem fixada para evitar deslocamento durante o escoamento.
- A mangueira de drenagem deve ser posicionada a uma altura entre 60 cm e 100 cm do chão.
Conexão elétrica:
- Conecte o aparelho a uma tomada elétrica aterrada.
- Ensure the power supply matches the appliance's requirements: 230 V AC, 10 A, 2200 W.
- Não use plugues adaptadores ou cabos de extensão.
Instruções de operação
1. Preparando a roupa:
- Separe a roupa para lavar por tipo de tecido, cor e grau de sujidade.
- Check garment care labels for washing and drying instructions.
- Empty pockets and close zippers and fasteners.
- Coloque a roupa no tambor, tomando cuidado para não sobrecarregá-lo. A capacidade máxima de lavagem é de 9 kg e a de secagem é de 6 kg.
2. Adding Detergent and Additives:
- Abra a gaveta do dispensador de detergente.
- Adicione a quantidade adequada de detergente ao compartimento principal de lavagem.
- Add fabric softener to the designated compartment (if desired).
- Feche a gaveta do dispensador com cuidado.
3. Selecionando um Programa:
Turn the Program Selector Dial to choose the desired wash or wash&dry program. The LED display will show the default settings for the selected program.
Available programs include:
- Algodão: Para peças de algodão normalmente sujas.
- Sintéticos: Para peças de tecido sintético ou misto.
- Delicate/Silk: Para itens delicados que requerem cuidado especial.
- Lã/Lavagem à mão: Para peças de lã e itens laváveis à mão.
- Ecológico: Programa de eficiência energética para o algodão.
- Anti-Allergy: For items requiring thorough rinsing to remove allergens.
- Vapor: For refreshing clothes and reducing wrinkles.
- Secagem rápida: For fast drying of small loads.
- Cotton Dry: For drying cotton items.
- Synthetic Dry: For drying synthetic items.
4. Ajustando configurações:
After selecting a program, you can modify settings using the touch controls:
- Temperatura: Ajuste a temperatura da lavagem.
- Velocidade de rotação: Select the desired spin speed (up to 1600 RPM).
- Rinse Plus: Adds an extra rinse cycle for better detergent removal.
- Início retardado: Set a delayed start time for the program.
- Nível de secagem: For wash&dry programs, select the desired drying level (e.g., cupboard dry, iron dry).
5. Iniciando o Programa:
Pressione o botão Iniciar/Pausar para iniciar o programa selecionado. A porta travará e o ciclo começará.
6. Fim do ciclo:
Once the program is complete, the appliance will signal with an audible alert, and the door will unlock. Remove laundry promptly to prevent wrinkles.
Manutenção e Cuidados
Regular cleaning and maintenance ensure the longevity and optimal performance of your AEG L9WS99ÖKO washer-dryer.
Limpeza do Exterior:
Limpe as superfícies exteriores com um pano macio, damp pano. Não use produtos de limpeza abrasivos ou solventes.
Limpeza do Dispensador de Detergente:
- Retire completamente a gaveta do dispensador de detergente.
- Remova todas as peças removíveis e enxágue-as em água corrente.
- Limpe o interior do compartimento do dispensador com uma escova.
- Reassemble and reinsert the dispenser drawer.
Limpando o Tambor:
Periodically run a maintenance wash cycle (e.g., a hot cotton wash with no laundry and a descaling agent) to clean the drum and internal components.
Limpeza do filtro de drenagem:
The drain filter should be cleaned regularly to prevent blockages. Refer to the appliance's front panel for the filter location, typically behind a small access door at the bottom.
- Place a shallow container under the filter to catch any residual water.
- Desaperte e remova cuidadosamente o filtro.
- Limpe o filtro em água corrente, removendo quaisquer fiapos ou detritos.
- Aperte bem o parafuso do filtro.
Vedação da porta:
Limpe a borracha de vedação da porta após cada lavagem para remover fiapos ou umidade, evitando mofo e odores.
Solução de problemas
If you encounter issues with your appliance, consult this section before contacting service. Many common problems can be resolved easily.
| Problema | Possível causa | Solução |
|---|---|---|
| O aparelho não liga. | Sem energia elétrica; porta não fechada corretamente; programa não selecionado. | Check power plug and fuse; ensure door is firmly closed; select a program and press Start. |
| Vazamento de água. | Loose hose connections; clogged drain filter; excessive detergent. | Check and tighten water inlet/drain hoses; clean drain filter; use correct detergent dosage. |
| Vibração/ruído excessivo. | Aparelho desnivelado; parafusos de transporte não removidos; carga desigual. | Adjust leveling feet; ensure transport bolts are removed; redistribute laundry in the drum. |
| Resultados ruins de lavagem. | Overloading; incorrect program/temperature; insufficient detergent. | Reduce load size; select appropriate program/temperature; use correct detergent amount. |
| Drying not effective. | Overloading; incorrect drying program; lint filter clogged. | Reduce load size; select appropriate drying program; clean the lint filter. |
If the problem persists after attempting these solutions, please contact AEG customer service or a qualified technician.
Especificações
| Número do modelo | 914 605 922 |
| Tipo | Freestanding Front-Load Washer-Dryer |
| Capacidade de lavagem | 9 kg |
| Capacidade de secagem | 6 kg |
| Velocidade máxima de rotação | 1600 RPM |
| Classe de eficiência energética (lavagem) | A |
| Classe de desempenho de lavagem | A |
| Consumo anual de energia (lavagem) | 154 kWh |
| Energy Consumption (Wash & Dry) | 3.64 kWh/ciclo |
| Consumo anual de água (lavagem) | 15600 eu |
| Water Consumption (Wash & Dry) | 80 L/ciclo |
| Dimensões (L x P x A) | 600 mm x 639 mm x 870 mm |
| Peso | 98 kg (216.05 libras) |
| Nível de ruído (rotação) | 75 dB |
| Fonte de energia | 230 V AC, 10 A, 2200 W |
| Tipo de motor | Sem escova |
Garantia e Suporte
For information regarding your product's warranty, please refer to the warranty card provided with your appliance or visit the official AEG website. For technical support, spare parts, or service requests, please contact AEG customer service. When contacting support, please have your appliance's model number (L9WS99ÖKO) and serial number ready.
Serviço de Atendimento ao Cliente da AEG: Refer to your local AEG contact information or the official AEG website para detalhes de suporte.


