1. Introdução
The AKAI Professional MPK Mini Play is a versatile, ultra-portable MIDI keyboard controller designed for musicians and producers. It features 25 velocity-sensitive mini keys, 8 backlit MPC drum pads, and a built-in sound module with 128 instrument sounds and 10 drum kits. This manual provides detailed instructions for setting up, operating, and maintaining your MPK Mini Play.

Figure 1: AKAI Professional MPK Mini Play Overview
2. Configuração
2.1 Ligando o dispositivo
The MPK Mini Play can be powered in two ways:
- Potência da bateria: For portable use, insert three (3) AA batteries (not included) into the battery compartment on the underside of the unit. Ensure the power switch on the rear panel is set to 'BATT'.
- Potência USB: Connect the MPK Mini Play to a computer using the included USB cable. The unit will draw power directly from the USB connection. Ensure the power switch on the rear panel is set to 'USB'.
- Connect one end of the USB cable to the USB port on the rear of the MPK Mini Play.
- Conecte a outra extremidade do cabo USB a uma porta USB disponível no seu computador.
- The MPK Mini Play is class-compliant and does not require special drivers for basic MIDI functionality. Your computer should recognize it automatically.
- Fones de ouvido: Connect 1/8-inch (3.5mm) headphones to the headphone output jack on the rear panel.
- Alto-falante externo/Ampmais vital: Connect the 1/8-inch (3.5mm) audio output to an external speaker, amplifier, or mixer using an appropriate cable.
2.2 Conectando a um Computador
To use the MPK Mini Play as a MIDI controller with your computer:
2.3 Saída de áudio
For enhanced sound or private practice:

Figura 2: Conexões do painel traseiro
3. Instruções de operação
3.1 Teclas do teclado
The MPK Mini Play features 25 velocity-sensitive mini keys. Use the OITAVA PARA CIMA e OITAVA PARA BAIXO buttons to shift the keyboard's octave range, allowing access to the full melodic spectrum.
3.2 pads de bateria
The 8 backlit MPC-style drum pads are velocity-sensitive and can be used to trigger drum sounds or samples. The pads are organized into two banks (A/B), providing access to 16 different sounds. Use the PAD BANK A/B button to switch between banks.
- Repetição da nota: Pressione e segure o NOTA REPETIR button while striking a pad to repeatedly trigger its sound. The rate of repetition is determined by the current tempo and time division settings.
- Nível completo: Pressione o NÍVEL COMPLETO button to make all pad strikes trigger at maximum velocity, regardless of how hard you hit them.

Figure 3: Drum Pads and Arpeggiator Controls
3.3 Controls (Knobs & Joystick)
The MPK Mini Play includes several controls for sound manipulation:
- Joystick de 4 direções: This joystick provides dynamic control over pitch bend and modulation, allowing for expressive performance.
- Botões atribuíveis: There are four assignable knobs (organized into two banks, A/B) that can be used to tweak internal sounds or control software parameters. Use the KNOB BANK A/B button to switch between banks.
- Dedicated Sound Controls: In standalone mode, dedicated knobs control Filter, Resonance, Reverb Amount, Chorus Amount, and Volume.
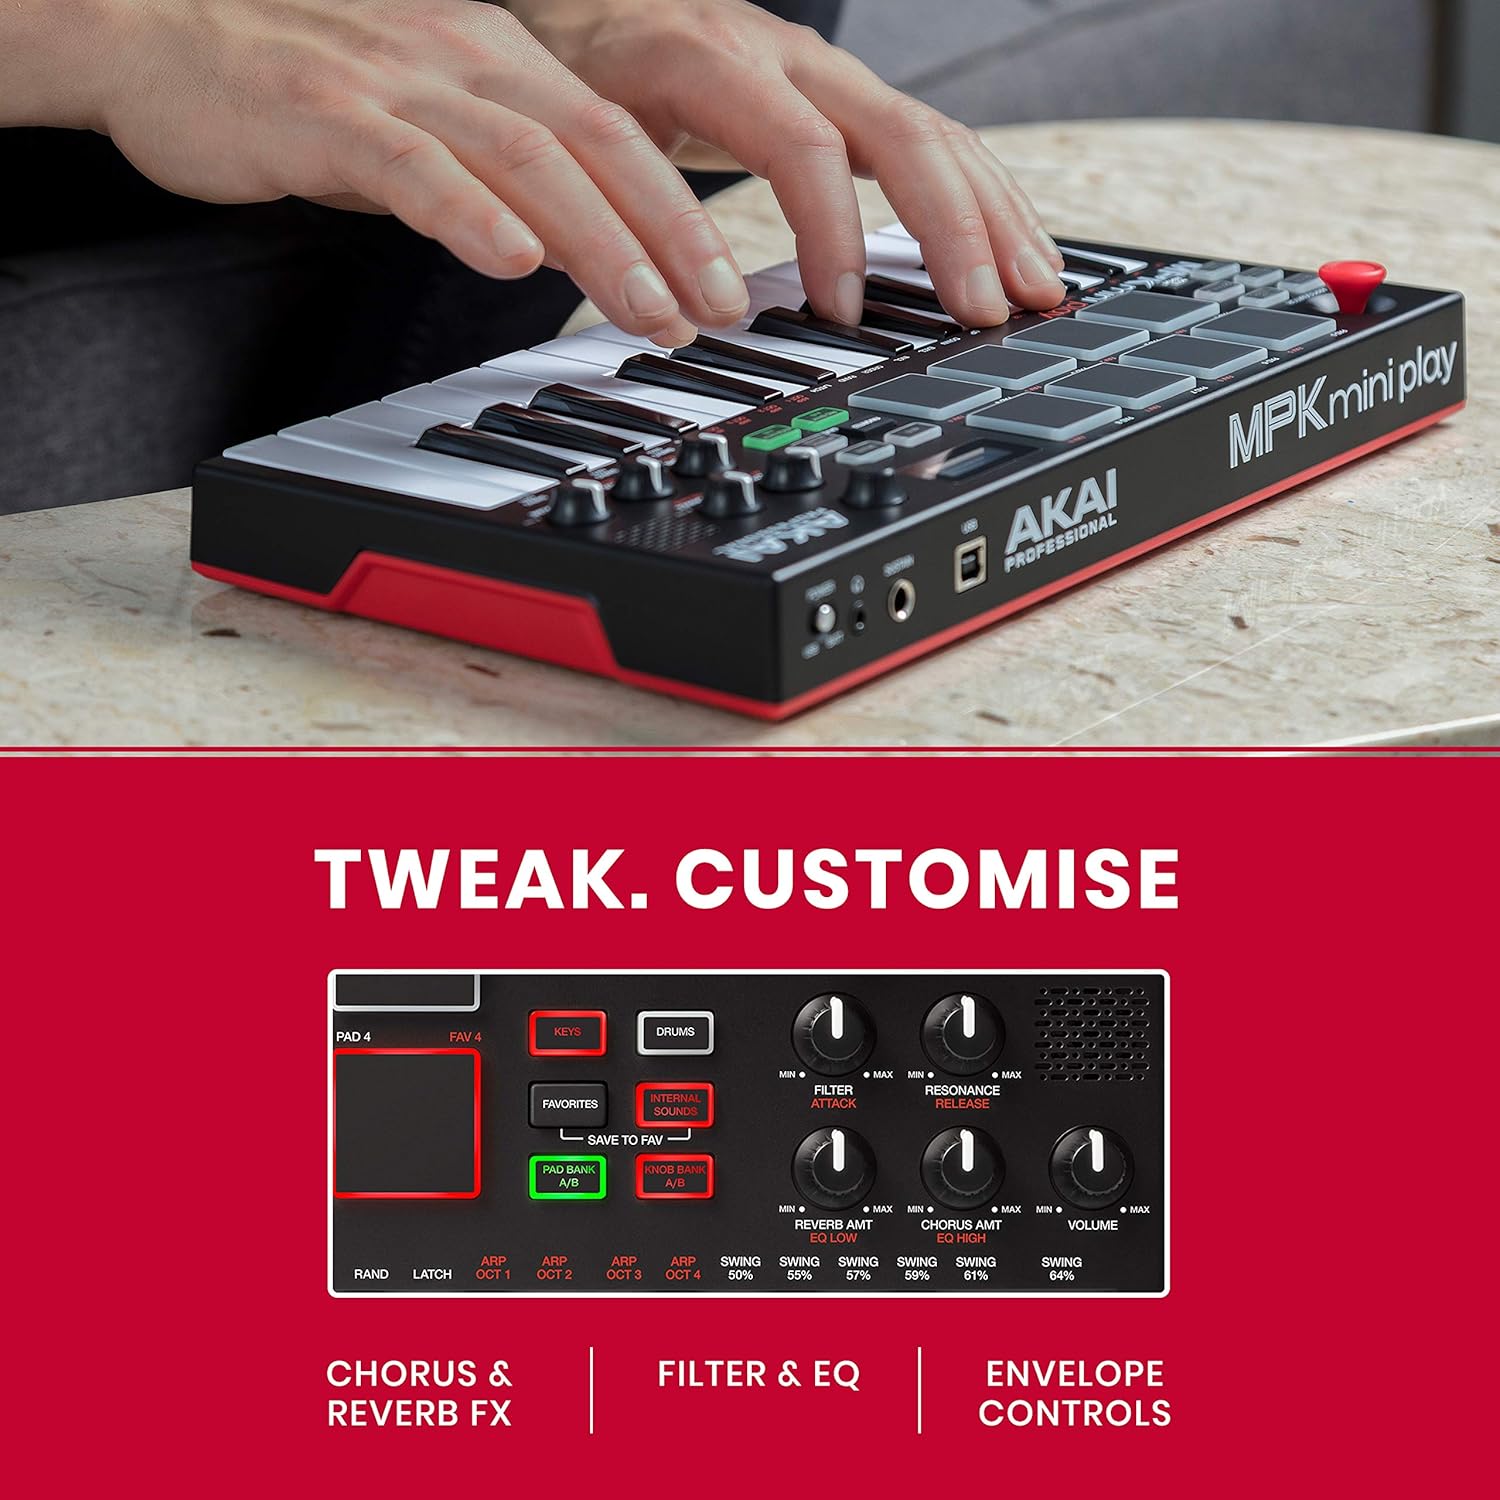
Figure 4: Sound Control Knobs
3.4 Internal Sounds
The MPK Mini Play comes with 128 internal instrument sounds and 10 drum kits. Use the CHAVES e BATERIA buttons to switch between instrument and drum modes. The OLED display will show the currently selected sound. You can save your favorite sounds using the SAVE TO FAV função.
3.5 Arpejador
The built-in arpeggiator can automatically play a sequence of notes based on the keys you hold down. Use the LIGADO/DESLIGADO button to activate/deactivate the arpeggiator and the TAP TIME button to set the tempo. Various arpeggiator modes and settings can be adjusted for creative effects.
4. Integração de software
The MPK Mini Play is designed to integrate seamlessly with Digital Audio Workstations (DAWs) and music production software. It includes a software suite to enhance your music creation experience.
4.1 MPC Beats Software
The MPK Mini Play comes with MPC Beats, a comprehensive beat-making software based on the legendary MPC workflow. This software allows you to program drum patterns, chop and edit samples, record melodic instruments, and utilize various instrument/plugin tracks and audio tracks. It also includes 3 MPC plugins (Bassline, Electric, Tube Synth) and over 80 Air Audio FX.
Video 1: Introducing MPC Beats Software
Este vídeo fornece um overview of the MPC Beats software, demonstrating its capabilities for beat making, sample editing, and instrument recording, highlighting its compatibility with MIDI controllers like the MPK Mini Play.

Figure 5: MPK Mini Play with MPC Beats
5. Especificações
| Recurso | Descrição |
|---|---|
| Nome do modelo | MPK MINI Play |
| Chaves | 25 mini teclas sensíveis à velocidade |
| Almofadas | 8 backlit, velocity-sensitive MPC-style pads (2 banks) |
| Maçanetas | 4 assignable Q-Link knobs (2 banks) |
| Controle de videojogo | 4-way joystick for pitch bend and modulation control |
| Sons Internos | 128 instrument sounds, 10 drum kits |
| Palestrante | Alto-falante embutido |
| Saídas | 1/8-inch (3.5mm) headphone output |
| Entradas | 1/4-inch (6.35mm) TS input for sustain pedal |
| Conectividade | USB-B port for MIDI and power |
| Poder | USB bus powered or 3 x AA batteries |
| Dimensões (L x P x A) | 12.29 x 6.8 x 1.83 polegadas (31.2 x 17.3 x 4.6 cm) |
| Peso | 1.64 libras (0.74 kg) |
6. Solução De Problemas
- No Sound from Built-in Speaker: Ensure the volume knob is turned up and the power switch is set to 'BATT' (if using batteries) or 'USB' (if connected to computer). Check if headphones are plugged in, as this will mute the internal speaker.
- No MIDI Signal to Computer: Verify the USB cable is securely connected to both the MPK Mini Play and your computer. Ensure the power switch is set to 'USB'. Check your DAW's MIDI settings to confirm the MPK Mini Play is recognized and enabled as an input device.
- Teclas/Teclados não respondem: Check if the unit is powered on. If using batteries, ensure they are fresh and correctly inserted. If connected via USB, confirm the connection is stable.
- Software Not Recognizing MPK Mini Play: Ensure your DAW or software is up-to-date. Consult the software's documentation for specific MIDI controller setup instructions.
7. Manutenção
- Limpeza: Use a soft, dry cloth to clean the surface of the MPK Mini Play. Do not use abrasive cleaners, solvents, or harsh chemicals.
- Armazenar: Store the unit in a cool, dry place away from direct sunlight and extreme temperatures. If storing for an extended period, remove batteries to prevent leakage.
- Manuseio: Avoid dropping the unit or subjecting it to strong impacts. Do not place heavy objects on top of it.
8. Garantia e Suporte
For warranty information and technical support, please visit the official Akai Professional webou entre em contato com o serviço de atendimento ao cliente. Guarde o comprovante de compra como prova para eventuais solicitações de garantia.
Akai Profissional Website: www.akaipro.com