1. Introdução
The Neewer Magnetic ND/PL Filter Kit (Model FL-4NL) is designed to enhance the photographic and videographic capabilities of your DJI Osmo Pocket 1 or Osmo Pocket 2 camera. This kit includes four specialized filters: ND8/PL, ND16/PL, ND32/PL, and ND64/PL. These filters combine the benefits of Neutral Density (ND) and Polarizing (PL) filters, allowing for precise light control and reflection management in various lighting conditions.
Each filter is crafted from high-quality optical glass with a multi-coated finish and features a lightweight aviation aluminum frame for durability and optimal performance without affecting gimbal operation.

Image 1.1: The Neewer Magnetic ND/PL Filter Kit, including four filters and a protective carrying case.
2. Configuração e instalação
The Neewer Magnetic ND/PL filters feature a magnetic attachment system for quick and secure installation on your DJI Osmo Pocket camera.
2.1 Attaching the Filter
- Ensure your DJI Osmo Pocket camera is powered off or in a safe mode to prevent accidental gimbal movement.
- Gently align the desired ND/PL filter with the lens of your Osmo Pocket camera. The magnetic frame of the filter will naturally snap into place.
- Verify that the filter is securely attached and centered over the lens.
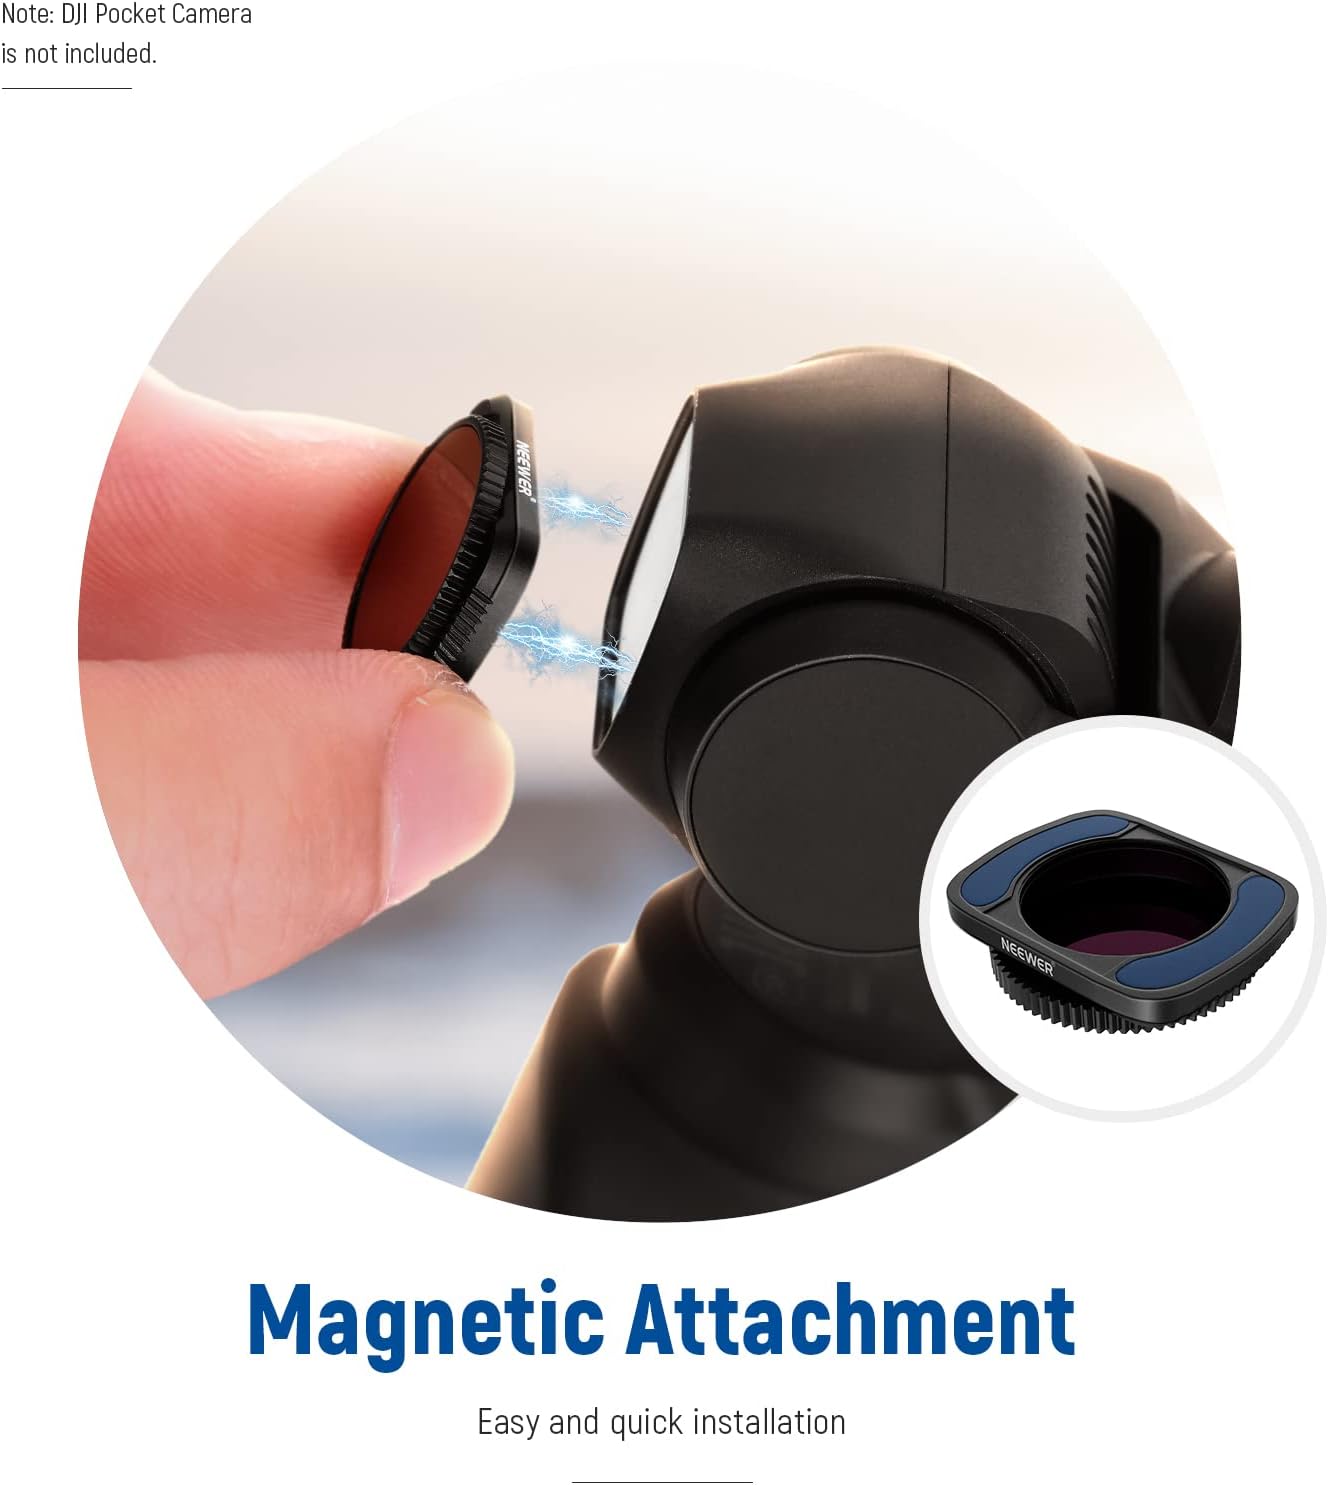
Image 2.1: Demonstrating the magnetic attachment of a filter to the DJI Osmo Pocket lens.
2.2 Removing the Filter
- Grasp the filter gently by its edges.
- Carefully pull the filter away from the camera lens. Avoid twisting or applying excessive force.
- Store the filter in its protective case to prevent scratches and damage.
Nota importante: Some users have reported that leaving filters attached when powering off the Osmo Pocket 2 can cause the gimbal to get stuck. It is recommended to remove the filter before powering off the camera to avoid potential issues.
3. Operating the Filters
The ND/PL filters combine Neutral Density (ND) and Polarizing (PL) functionalities to control light and manage reflections.
3.1 Understanding ND Filters
Neutral Density filters reduce the amount of light entering the camera lens without altering the color balance. This allows for slower shutter speeds or wider apertures in bright conditions, which is essential for achieving cinematic motion blur in videos or long exposure effects in photography.
- ND8/PL: Reduces exposure by 3 stops. Suitable for partly cloudy days.
- ND16/PL: Reduces exposure by 4 stops. Ideal for normal bright daylight.
- ND32/PL: Reduces exposure by 5 stops. Best for very bright conditions.
- ND64/PL: Reduces exposure by 6 stops. For extremely bright conditions, such as snow or beach scenes.

Image 3.1: Visual comparison of exposure reduction using ND8/PL, ND16/PL, ND32/PL, and ND64/PL filters on a waterfall scene.
3.2 Utilizing the Polarizing (PL) Function
The polarizing component of these filters helps to reduce glare and reflections from non-metallic surfaces like water, glass, and foliage. It also enhances color saturation and contrast, particularly in skies.
- Once the filter is attached, rotate the outer ring of the filter while observing the camera's live view.
- Rotate the filter up to 360 degrees to achieve the desired level of polarization, minimizing reflections and enhancing colors.
- Adjust until reflections are reduced and colors appear more vibrant.

Image 3.2: The filter's outer ring can be rotated to adjust the polarizing effect.
3.3 Achieving Smooth Motion Effects
By reducing light, these filters enable longer shutter speeds, which is crucial for capturing smooth motion blur in videos (e.g., 1/60s for 30fps video) and artistic long exposure photographs of moving subjects like waterfalls, clouds, or traffic trails.

Imagem 3.3: Examples of smooth motion effects achieved with ND filters, including waterfalls, traffic trails, and emphasizing a static subject.
4. Manutenção e Cuidados
Proper care ensures the longevity and optical performance of your filters.
4.1 Limpando os Filtros
- Use a soft, clean microfiber cloth specifically designed for optical lenses.
- Gently wipe the filter surface to remove dust and smudges. For stubborn marks, a small amount of lens cleaning solution can be applied to the cloth (not directly to the filter).
- Avoid using abrasive materials or harsh chemicals, as these can damage the multi-coating.

Image 4.1: The filter's water-repellent surface simplifies cleaning.
4.2 Armazenamento
- Always store the filters in their provided protective case when not in use.
- Keep the case in a dry, dust-free environment away from direct sunlight and extreme temperatures.
5. Solução De Problemas
| Emitir | Possível causa | Solução |
|---|---|---|
| Filter not attaching securely. | Debris on the camera lens or filter magnet. | Clean both the camera lens area and the filter's magnetic rim. Ensure proper alignment. |
| Gimbal gets stuck or malfunctions with filter attached. | Filter interfering with gimbal startup/calibration (especially Osmo Pocket 2). | Remove the filter before powering on or off the camera. Attach the filter after the gimbal has initialized. |
| Image appears too dark or too bright. | Incorrect ND filter strength selected for current lighting conditions. | Choose a different ND filter (e.g., lower ND number for brighter image, higher for darker). Adjust camera exposure settings. |
| Reflections still visible or colors not vibrant. | Polarizing effect not optimally adjusted. | Rotate the outer ring of the filter slowly while observing the live view until the desired effect is achieved. |
6. Especificações
- Modelo: FL-4NL
- Compatibilidade: DJI Osmo Pocket 1, DJI Osmo Pocket 2
- Tipos de filtro: ND8/PL, ND16/PL, ND32/PL, ND64/PL
- Material: Optical Glass, Aviation Aluminum Frame
- Revestimento: Multi-Coating
- Características: Waterproof, Oil-proof, Scratch-proof
- Anexo: Magnético
- Single Filter Weight: Aproximadamente 0.01 onças (0.3 gramas)
- Dimensões do produto: 2.87 x 2.87 x 0.1 polegadas (aproximadamente)
6.1 O que vem na caixa
- 1 x ND8/PL Filter
- 1 x ND16/PL Filter
- 1 x ND32/PL Filter
- 1 x ND64/PL Filter
- 1 x Carrying Box
7. Garantia e Suporte
Para informações sobre garantia e suporte técnico, consulte o site oficial da NEEWER. webou entre em contato diretamente com o serviço de atendimento ao cliente. Guarde o comprovante de compra para eventuais solicitações de garantia.
8. Vídeos de Produtos
No official seller-created product videos are available in the provided data for this item.


