Introdução

Figure 1: Amazon Basics Programmable Bread Maker. This image shows the black bread maker from an angled front view, highlighting its compact design, control panel with LCD display, and program settings listed on the top surface.
Obrigado pela compra.asing the Amazon Basics Programmable Bread Maker. This appliance is designed to simplify the process of making fresh bread, doughs, and jams at home. Please read this instruction manual thoroughly before first use to ensure safe operation and optimal performance. Keep this manual for future reference.
Instruções importantes de segurança
- Leia todas as instruções antes de usar o aparelho.
- Não toque em superfícies quentes. Use alças ou botões.
- Para se proteger contra choques elétricos, não mergulhe o cabo, os plugues ou o aparelho em água ou outro líquido.
- É necessária supervisão rigorosa quando qualquer aparelho for usado por crianças ou perto delas.
- Desligue da tomada quando não estiver em uso e antes de limpar. Deixe esfriar antes de colocar ou retirar peças.
- Não opere nenhum aparelho com o cabo ou plugue danificado, ou após o aparelho apresentar mau funcionamento ou ter sido danificado de qualquer forma.
- O uso de acessórios não recomendados pelo fabricante do aparelho pode causar ferimentos.
- Não utilize ao ar livre.
- Não deixe o cabo pendurado na borda da mesa ou do balcão, nem toque em superfícies quentes.
- Não coloque sobre ou perto de um queimador a gás ou elétrico quente, nem em um forno aquecido.
- Deve-se ter extremo cuidado ao mover um aparelho que contenha óleo quente ou outros líquidos quentes.
- Para desconectar, coloque qualquer controle na posição "desligado" e, em seguida, retire o plugue da tomada.
- Não utilize o aparelho para outro fim que não o pretendido.
Componentes do produto
Familiarize yourself with the parts of your bread maker before operation.

Figura 2: Acessórios incluídos. This image displays the bread pan with handle, a clear plastic measuring cup, a black kneading blade, a white double-sided measuring spoon (teaspoon/tablespoon), and a metal hook for removing the kneading blade.
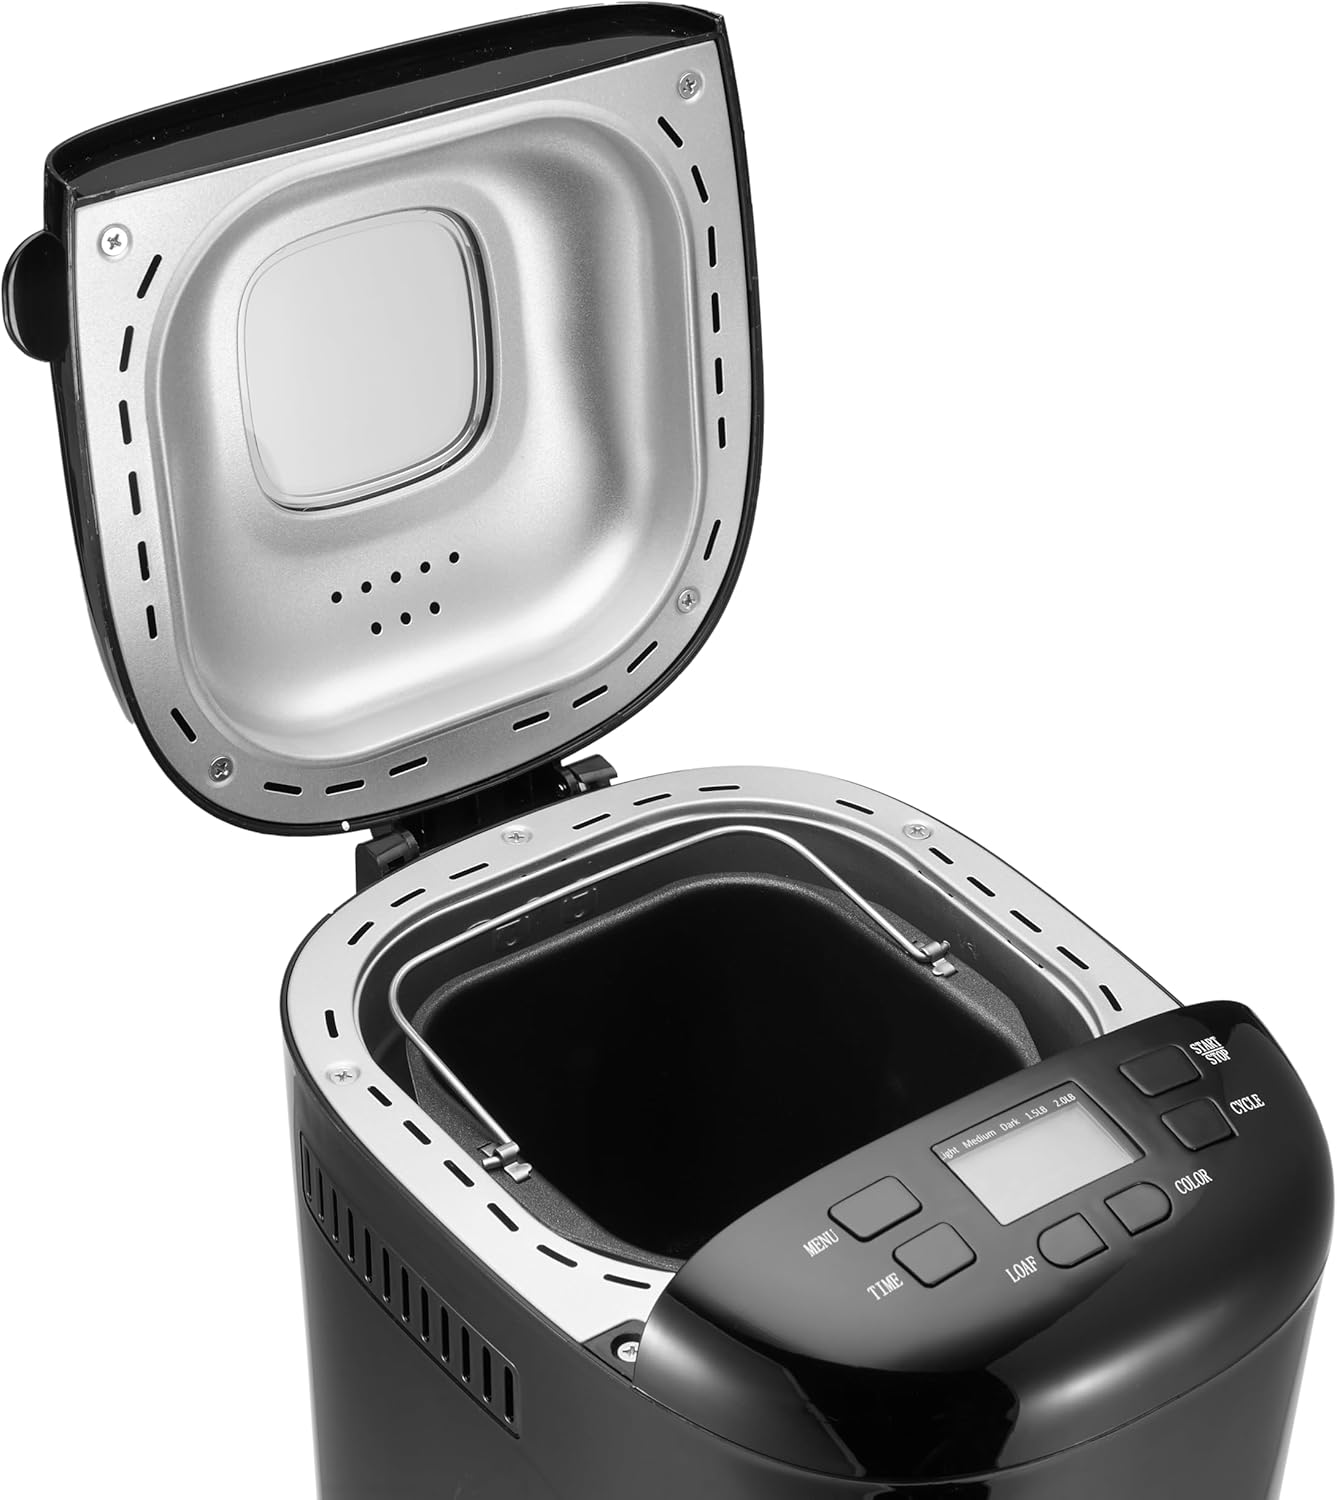
Figure 3: Bread Maker Interior. This image shows the bread maker with its lid open, revealing the heating element and the space where the bread pan is inserted. The control panel with its LCD display and buttons is visible at the front.
- Unidade principal: The primary housing of the bread maker.
- Painel de controle: Features an LCD display and buttons for program selection, time, loaf size, and crust color.
- Tampa: Cobre a câmara de cozimento, geralmente com um viewjanela de abertura.
- Forma de pão: Non-stick baking pan where ingredients are placed and bread is baked.
- Pá de amassar: Encaixa-se no eixo interno da forma de pão para misturar e sovar a massa.
- Copo de medição: For liquid and dry ingredients.
- Colher de medida: For smaller measurements (teaspoon/tablespoon).
- Gancho: Used to remove the kneading blade from the baked loaf.
Configuração e primeiro uso
- Desembalagem: Retire cuidadosamente a máquina de fazer pão e todos os acessórios da embalagem. Guarde a embalagem para armazenamento ou transporte futuros.
- Limpeza: Before first use, wash the bread pan and kneading blade with warm, soapy water. Rinse thoroughly and dry completely. Wipe the exterior of the bread maker with a damp pano. Não mergulhe a unidade principal em água.
- Queima inicial: It is recommended to run the bread maker empty for approximately 10 minutes on a "Bake" cycle (if available, or a short custom bake cycle) to burn off any manufacturing oils. Some smoke or odor may be present; this is normal. Ensure adequate ventilation. After this, allow the unit to cool completely and clean the interior again.
- Colocação: Coloque a máquina de fazer pão sobre uma superfície estável, plana e resistente ao calor, longe da luz solar direta e de fontes de calor. Certifique-se de que haja ventilação adequada ao redor do aparelho.
- Conexão de energia: Ligue o cabo de alimentação a uma tomada elétrica aterrada. O visor acenderá, indicando que o aparelho está pronto para uso.
Instruções de operação
This section guides you through the process of making bread with your appliance.
Painel de controle encerradoview
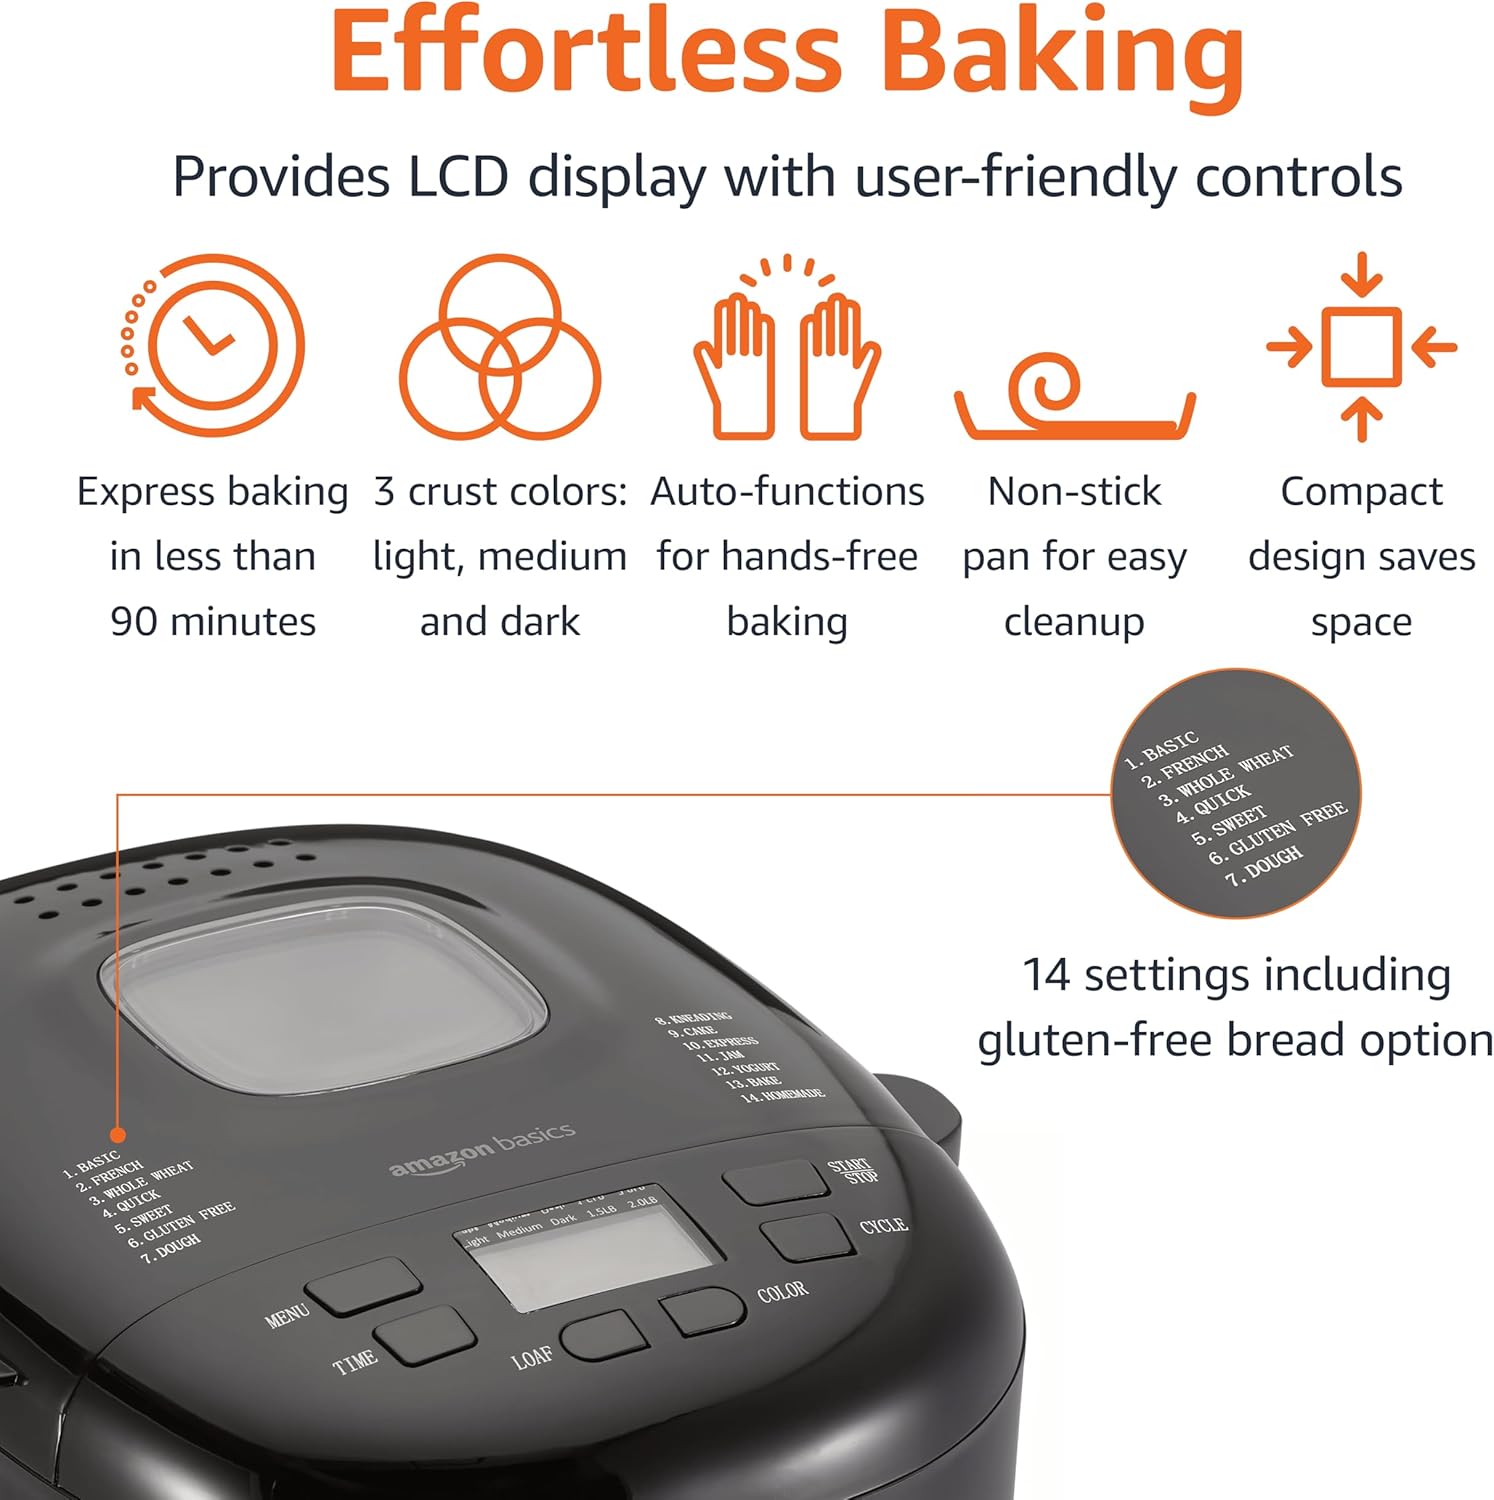
Figura 4: Painel de Controle. This image highlights the bread maker's control panel, featuring an LCD screen that displays program information. Buttons for 'MENU', 'TIME', 'LOAF', 'COLOR', and 'CYCLE' are clearly visible, along with a list of 14 program settings.
- Botão MENU: Selects one of the 14 available programs (e.g., Basic, French, Whole Wheat, Sweet, Gluten Free, Dough, Jam).
- TIME Buttons (+/-): Ajusta o temporizador de atraso para assar com atraso.
- Botão LOAF: Selects the loaf size (e.g., 1.5 lb or 2 lb).
- Botão COLOR: Selects the crust darkness (Light, Medium, Dark).
- CYCLE (Start/Stop) Button: Starts or stops the selected program.
- Tela LCD: Shows the selected program, time remaining, loaf size, and crust color.
Basic Bread Making Steps
- Insira a lâmina de amassar: Coloque a pá de amassar no eixo dentro da forma de pão.
- Adicione Ingredientes: Add ingredients to the bread pan in the order specified by your recipe (typically liquids first, then dry ingredients, with yeast last and separate from liquids/salt). Ensure accurate measurements.
- Coloque a forma de pão: Insert the bread pan into the bread maker, ensuring it is securely locked in place. Close the lid.
- Selecione o Programa: Pressione o MENU button to choose the desired program (e.g., "Basic" for white bread).
- Selecione o tamanho do pão: Pressione o PÃO button to select the appropriate loaf size (1.5 lb or 2 lb).
- Selecione a cor da crosta: Pressione o COR button to choose your preferred crust darkness (Light, Medium, or Dark).
- Iniciar o programa: Pressione o CICLO button to start the program. The machine will begin mixing.
- Monitoramento: During the kneading cycles, you may check the dough consistency by opening the lid briefly. If the dough is too dry, add a small amount of liquid; if too wet, add a small amount of flour.
- Conclusão: Once the program is complete, the bread maker will usually beep and switch to a "Keep Warm" cycle. Press the CICLO botão para parar a máquina.
- Retirar o pão: Using oven mitts, carefully remove the hot bread pan from the machine. Invert the pan onto a wire rack to release the bread. If the kneading blade remains in the loaf, use the provided hook to carefully remove it.
- Resfriamento: Deixe o pão esfriar sobre uma grelha por pelo menos 20 a 30 minutos antes de fatiar. Isso permite que a estrutura interna se firme.
Função de temporizador de atraso
The delay timer allows you to program the bread maker to finish baking at a later time, up to 13 hours. This is useful for having fresh bread ready in the morning.
- After selecting your program, loaf size, and crust color, press the TEMPO buttons to set the desired delay time. The displayed time includes the baking cycle duration.
- Pressione o CICLO button. The timer will count down, and the machine will start automatically when the delay time expires.
- Cuidado: Do not use the delay timer with recipes containing highly perishable ingredients like milk, eggs, or fresh fruit, as they may spoil before baking begins.
Orientação de receita
The Amazon Basics Bread Maker offers 14 settings for various types of baked goods. For best results, always use recipes specifically designed for bread makers and ensure accurate measurement of ingredients.
- Programas de Pão: Basic, French, Whole Wheat, Sweet, Gluten-Free, ExpressBake.
- Programas de massa: For pizza dough, pasta dough, or rolls.
- Programas de Especialização: Jam, Cake, Yogurt.
Refer to the recipe book that came with your bread maker or reliable bread machine recipe sources for ingredient quantities and specific instructions for each program.
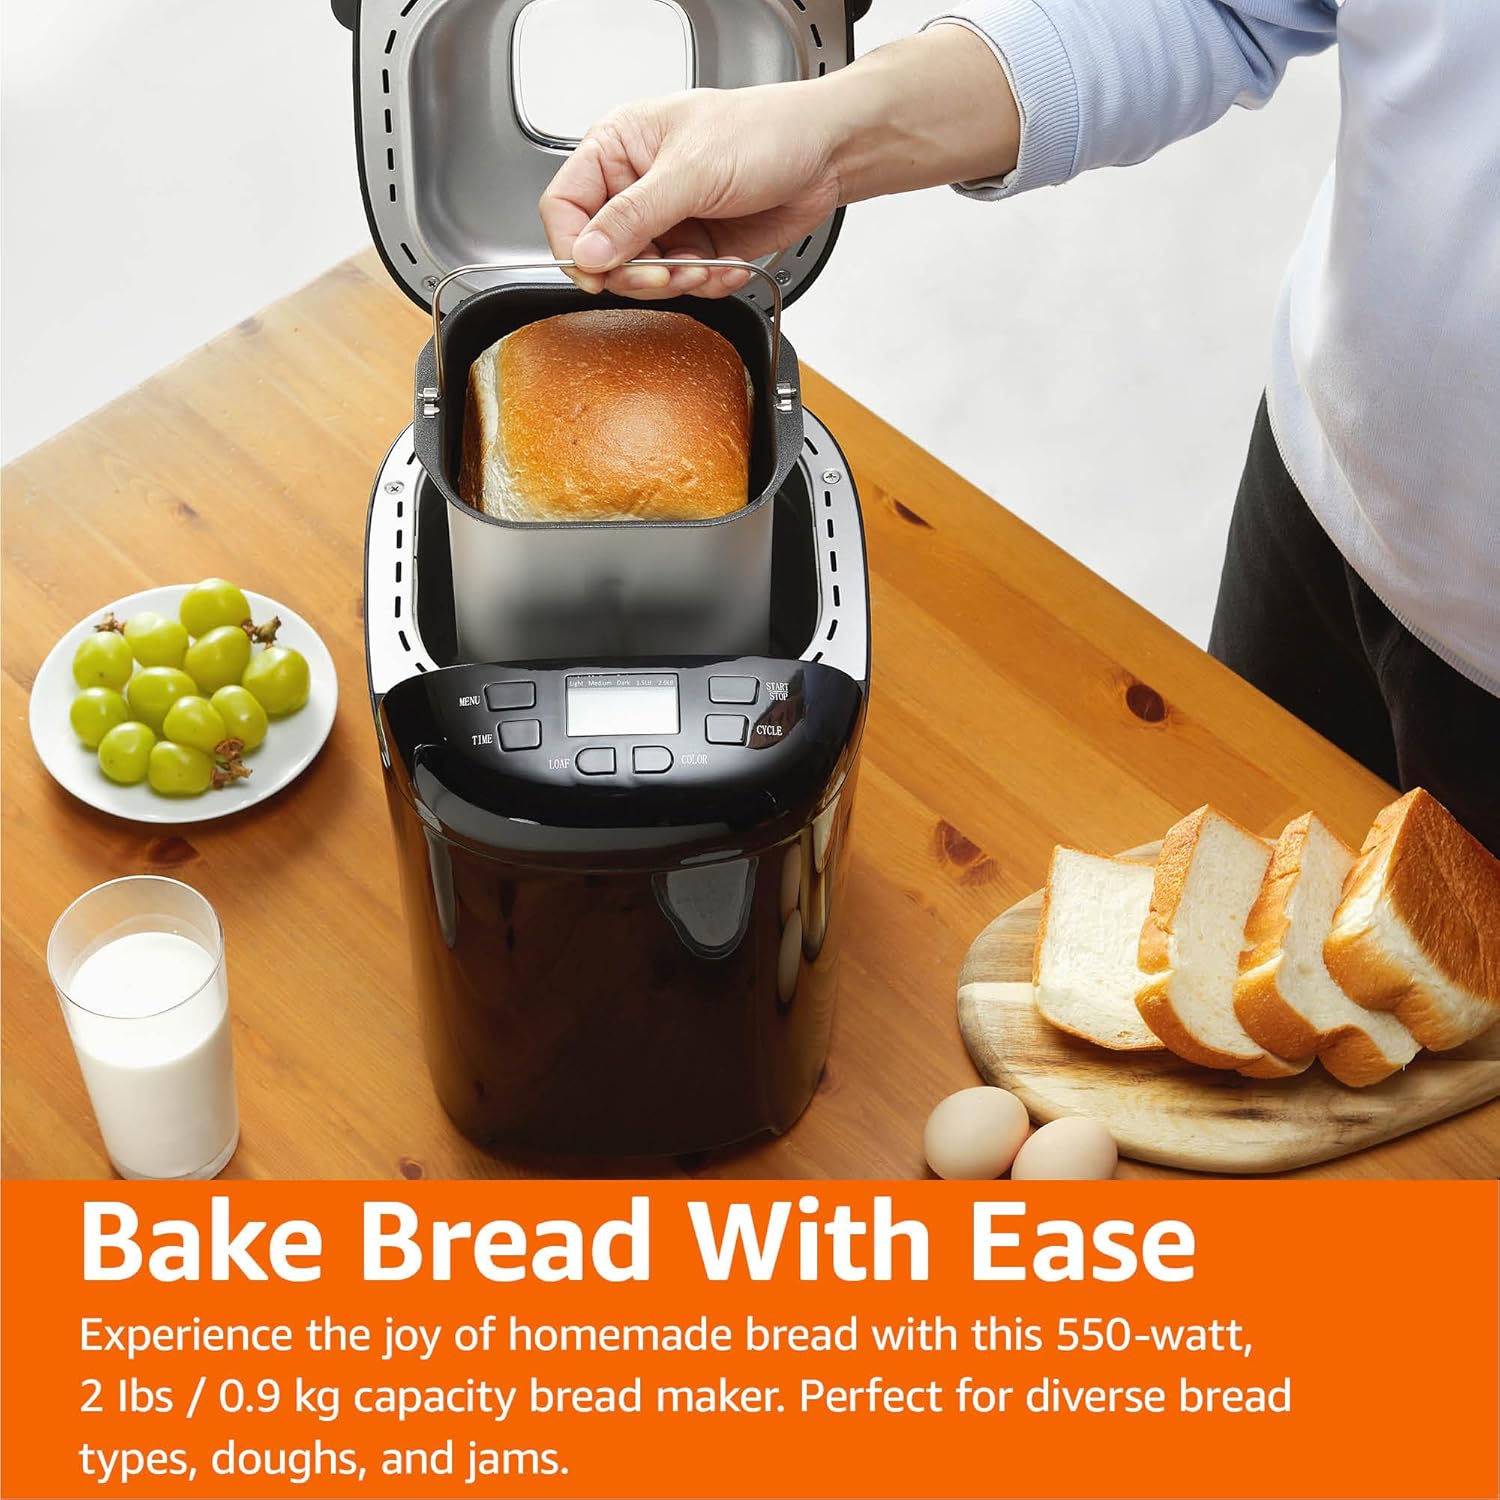
Figure 5: Freshly Baked Bread. This image shows a person carefully lifting the bread pan, containing a golden-brown loaf, out of the bread maker. Surrounding the machine are fresh grapes, a glass of milk, and slices of bread, illustrating the end result of the baking process.
Cuidados e Manutenção
A limpeza e a manutenção adequadas prolongarão a vida útil da sua máquina de fazer pão.
- Desconecte: Desligue sempre o aparelho da tomada e deixe-o arrefecer completamente antes de o limpar.
- Forma de pão e pá de amassar: Wash the bread pan and kneading blade with warm, soapy water. Do not use abrasive cleaners or metal scouring pads, as this can damage the non-stick coating. Rinse thoroughly and dry completely.
- Exterior: Limpe a parte externa da máquina de fazer pão com um pano macio e seco.amp pano. Não use produtos químicos agressivos ou produtos de limpeza abrasivos.
- Interior: Clean the interior of the baking chamber with a damp cloth. Remove any crumbs or residue.
- Armazenar: Store the bread maker in a clean, dry place. Ensure the bread pan and kneading blade are clean and dry before storing.
Guia de solução de problemas
If you encounter issues with your bread maker, refer to the following common problems and solutions.
| Problema | Possível causa | Solução |
|---|---|---|
| O pão não cresce. | Expired or inactive yeast, incorrect water temperature, too much salt, not enough sugar. | Check yeast expiration date. Use lukewarm water (105-115°F / 40-46°C). Ensure correct ingredient measurements. |
| O pão está muito denso ou pesado. | Too much flour, not enough liquid, incorrect yeast amount, high humidity. | Measure ingredients accurately, especially flour (use a scale if possible). Adjust liquid slightly in humid conditions. |
| O pão murcha durante o cozimento. | Too much liquid, too much yeast, high altitude, opening lid too often. | Reduce liquid slightly. Ensure correct yeast amount. Avoid opening the lid during baking. |
| A pá de amassar ficou presa no pão. | Ocorrência comum. | Use the provided hook to carefully remove the blade after the bread has cooled slightly. |
| A máquina não liga. | Sem estar conectado, sem energiatage, tampa não fechada corretamente, programa não selecionado. | Check power connection. Ensure lid is fully closed. Select a program and press START. |
Especificações do produto
Technical details for the Amazon Basics Programmable Bread Maker.
- Número do modelo: BM1349-UL-B
- Marca: Noções básicas sobre a Amazon
- Cor: Preto
- Poder: 550 Watts
- Capacidade do pão: Até 2 libras
- Número de programas: 14
- Dimensões do produto: 11.6"P x 8.8"L x 11.4"A
- Peso do item: 8 libras
- Fabricante: Amazon
- Instruções de cuidados: Limpe com um pano seco (para uso externo).
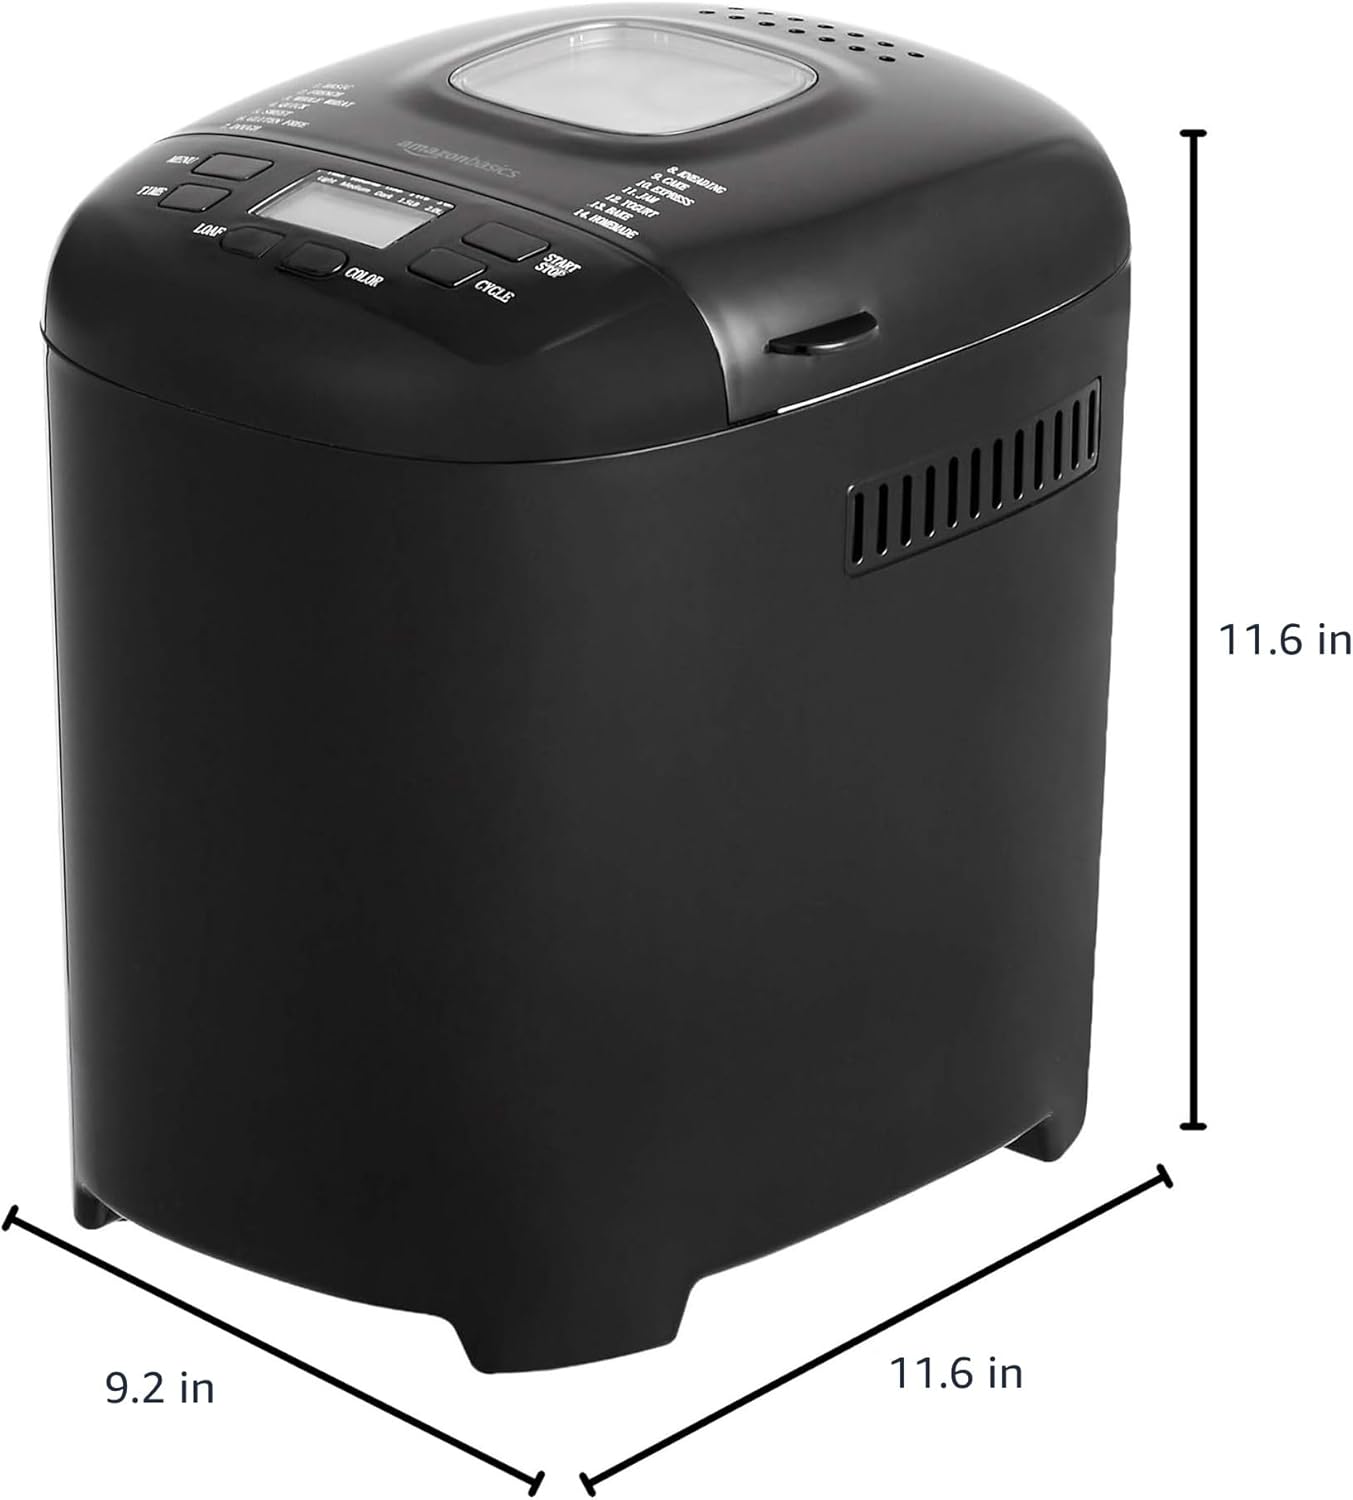
Figura 6: Dimensões do produto. This image provides a visual representation of the bread maker's dimensions, indicating a depth of 11.6 inches, a width of 9.2 inches, and a height of 11.6 inches.
Informações de garantia
For detailed warranty information, please refer to the warranty card included with your product packaging or visit the official Amazon Basics webA garantia normalmente cobre defeitos de materiais e de fabricação sob uso normal.
Suporte ao cliente
If you have any questions, require assistance, or need to report an issue with your Amazon Basics Bread Maker, please contact Amazon Basics Customer Service. You can typically find contact information on the Amazon website under the "Help" or "Customer Service" sections, or through your order details.
Para suporte on-line, visite: Atendimento ao cliente da Amazon


