1. Introdução
This manual provides essential information for the safe and efficient operation of your Einhell Cordless Impact Drill TE-ID 18 Li Solo. This tool is a high-performance member of the Einhell Power X-Change family, designed for drilling and impact drilling tasks. Please read these instructions carefully before first use and keep them for future reference.

Figure 1: Einhell Cordless Impact Drill TE-ID 18 Li Solo. This image shows the main drill unit with an auxiliary handle and depth stop installed, ready for use. A battery is shown faded in the background, indicating it is not included.
2. Instruções gerais de segurança
Always observe the following safety precautions when using power tools to reduce the risk of electric shock, fire, and serious injury.
- Segurança da Área de Trabalho: Mantenha sua área de trabalho limpa e bem iluminada. Áreas desorganizadas ou escuras são propícias a acidentes. Não opere ferramentas elétricas em atmosferas explosivas, como na presença de líquidos, gases ou poeira inflamáveis.
- Segurança elétrica: Evite contato corporal com superfícies aterradas ou aterradas, como canos, radiadores, fogões e geladeiras. Há um risco maior de choque elétrico se seu corpo estiver aterrado ou aterrado.
- Segurança pessoal: Always wear eye protection. Use hearing protection when operating impact drills. Wear a dust mask if drilling generates dust. Dress properly; avoid loose clothing or jewelry.
- Uso e cuidados com a ferramenta: Não force a ferramenta elétrica. Use a ferramenta elétrica correta para a sua aplicação. Desconecte a bateria da ferramenta elétrica antes de fazer ajustes, trocar acessórios ou guardar ferramentas elétricas.
- Uso e cuidados da ferramenta com bateria: Recarregue apenas com o carregador especificado pelo fabricante. Utilize ferramentas elétricas somente com baterias especificamente designadas para esse fim.
3. Componentes do produto
Familiarize yourself with the various parts of your Einhell Cordless Impact Drill for proper and safe operation.
- Mandril sem chave: Para trocas de bits rápidas e fáceis.
- Chave seletora de modo: To switch between drilling and impact drilling.
- Speed Control Trigger: For variable speed adjustment.
- Interruptor de avanço/reverso: To change rotation direction.
- Alça auxiliar: Proporciona maior aderência e controle.
- Parada de profundidade: Para um controle preciso da profundidade de perfuração.
- Interface da bateria: For connecting Power X-Change batteries (sold separately).
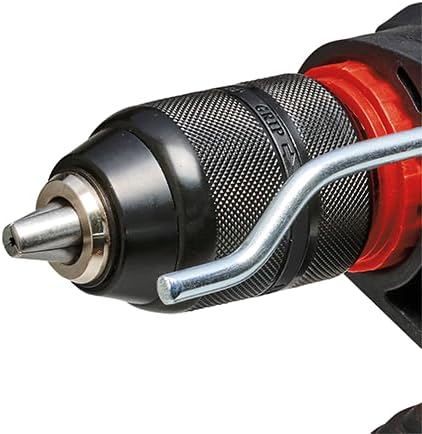
Figura 2: Close view of the 13 mm quick-change chuck. This component allows for tool-free bit changes.
4. Configuração
4.1 Battery Installation (Battery and Charger Not Included)
The Einhell TE-ID 18 Li Solo is part of the Power X-Change family and requires an 18V Power X-Change battery and charger, which are sold separately. Ensure the battery is fully charged before use.
- Align the charged Power X-Change battery with the battery interface on the base of the drill.
- Deslize a bateria no lugar até que ela se encaixe com segurança.
- Para remover, pressione o botão de liberação na bateria e deslize-a para fora.

Figure 3: Illustration indicating that the battery and charger are not included with the drill unit. These items must be purchased separately as part of the Einhell Power X-Change system.

Figura 4: Overview of the Einhell Power X-Change system, demonstrating the wide range of compatible tools that can use the same battery. This highlights the modularity of the system.
4.2 Auxiliary Handle and Depth Stop Installation
- Solte a alavanca auxiliar girando-a no sentido anti-horário.
- Deslize a alça para a parte frontal do corpo da furadeira.
- Insira o limitador de profundidade no orifício designado na alça auxiliar.
- Adjust the auxiliary handle to a comfortable position and tighten it by rotating clockwise.
- Ajuste o limitador de profundidade para a profundidade de perfuração desejada, deslizando-o para dentro ou para fora.
4.3 Instalação de Brocas
- Certifique-se de que a furadeira esteja desligada e a bateria removida por segurança.
- Gire o mandril no sentido anti-horário para abrir as garras.
- Insira a broca totalmente no mandril.
- Rotate the chuck clockwise to securely tighten the jaws around the drill bit. Ensure the bit is centered and firmly gripped.
5. Instruções de operação
5.1 Ligar/Desligar e Controle de Velocidade
The drill is activated by pressing the speed control trigger. The speed is variable, increasing with greater pressure on the trigger. To turn off, release the trigger.

Figure 5: Close-up of the drill's trigger and forward/reverse switch. The trigger provides variable speed control, and the switch above it controls the direction of rotation.
5.2 Rotação para frente/para trás
The forward/reverse switch, located above the trigger, controls the direction of rotation. Push it to the left for forward rotation (drilling) and to the right for reverse rotation (removing screws or jammed bits). Ensure the switch is in the central position to lock the trigger for safety when not in use.
5.3 Drilling and Impact Drilling Mode
The mode selector switch allows you to choose between standard drilling and impact drilling. For drilling into wood, metal, or plastic, select the drilling mode (drill bit symbol). For drilling into masonry or concrete, select the impact drilling mode (hammer symbol).

Figure 6: Close-up of the mode selector switch on the top of the drill. The left symbol indicates drilling mode, and the right symbol indicates impact drilling mode.
5.4 Dicas Gerais de Perfuração
- Sempre prenda a peça de trabalho com segurança.
- Start drilling at a low speed and gradually increase.
- Aplique pressão constante e uniforme. Não force a furadeira.
- Para furos profundos, retire a broca periodicamente para remover detritos.
- Use appropriate drill bits for the material.

Figure 7: A person demonstrating the use of the Einhell cordless impact drill for drilling into a wall. Proper grip and posture are shown, emphasizing safe operation.
6. Manutenção
A manutenção regular garante a longevidade e o desempenho ideal da sua furadeira.
- Limpeza: Keep the ventilation slots clean to prevent overheating. Use a soft brush or compressed air to remove dust and debris. Do not use water or chemical cleaners.
- Armazenar: Store the drill in a dry, secure place out of reach of children. Remove the battery pack before storage.
- Manutenção do mandril: Limpe periodicamente as garras do mandril para garantir a fixação adequada das brocas.
7. Solução De Problemas
| Problema | Possível causa | Solução |
|---|---|---|
| A furadeira não inicia. | A bateria não foi inserida corretamente ou está descarregada. | Certifique-se de que a bateria esteja totalmente inserida. Carregue ou substitua a bateria. |
| Potência ou velocidade reduzida. | Battery low or drill bit dull. | Charge battery. Replace or sharpen drill bit. |
| Drill bit jams. | Excessive pressure or incorrect bit for material. | Reduce pressure. Use appropriate bit. Use reverse rotation to free. |
| Superaquecimento. | Orifícios de ventilação obstruídos ou uso intenso e contínuo. | Clean ventilation slots. Allow drill to cool down. |
8. Especificações técnicas
| Recurso | Valor |
|---|---|
| Modelo | TE-ID 18 Li Solo (Part No. 4513960) |
| Marca | Einhell |
| Fonte de energia | Battery Powered (Power X-Change 18V Li-Ion) |
| Volumetage | 18 Volts |
| Velocidade Rotacional Máxima | 260 RPM |
| Tamanho Máximo do Mandril | 13 milímetros |
| Capacidade de perfuração de madeira | 25 milímetros |
| Capacidade de perfuração em metal | 10 milímetros |
| Peso do item | 1.65 quilogramas (3.63 libras) |
| Dimensões do produto (C x L x A) | 11.14" x 2.64" x 7.87" |
| Características especiais | Adjustable, Wireless, Speed Electronics, Forward/Reverse Rotation |
9. Garantia e Suporte
For warranty information and customer support, please refer to the documentation included with your purchase or visit the official Einhell webGuarde seu comprovante de compra para eventuais solicitações de garantia.
Einhell Official Website: www.einhell.com