1. Introdução
The Geek Smart Fingerprint Door Lock provides a convenient and secure keyless entry solution for your home, apartment, office, or hotel. With advanced biometric technology, you can unlock your door with a simple touch of your finger, offering quick and reliable access.
Os principais recursos incluem:
- Desbloqueio de impressão digital: Lock and unlock your door in a single motion by scanning your fingerprints as you grip the door handle. A lightning-speed 0.1 seconds is all that is required to open, much faster than any traditional key.
- Fácil instalação: No wires required. Fits standard-sized doors of 1-3/8'' to 2-1/8'' (35 to 55mm) door thickness, with an adjustable latch of 2-3/8'' (60mm) or 2-3/4'' (70mm). Suitable for both left and right-handed doors.
- Gerenciamento de usuários: Voice prompts guide you to set up to 20 fingerprints, including 2 admin-user fingerprints. Note: When 2 admin-user fingerprints have been collected, adding new ones will prompt normal-user fingerprint collection.
- Energia de emergência: The fingerprint door knob requires 4 AAA batteries, which can last for 12 months based on testing. There is a Micro USB emergency charge port for emergency unlock when the lock is out of battery, ensuring you are never locked out.
2. O que está na caixa
Your Geek Smart Fingerprint Door Lock package includes all necessary components for installation and operation:
- Front Handle (with fingerprint sensor)
- Rear Handle (interior side)
- Adjustable Latch (60mm or 70mm)
- Placa de ataque
- Parafusos de montagem (vários tamanhos)
- Rubber Gaskets (for door protection)
- Mechanical Keys (2 for emergency access)
- Micro USB Charging Cable (for emergency power)
- Reset Pin (for fingerprint setup)
- Manual do usuário (este documento)

Image: Backup Mechanical Keys. The lock comes with two physical keys for manual override in case of battery depletion or other issues.
3. Configuração e instalação
Follow these steps to install your Geek Smart Fingerprint Door Lock:
- Prepare a Porta: Ensure your door thickness is between 1-3/8'' to 2-1/8'' (35 to 55mm). The adjustable latch can be set to 2-3/8'' (60mm) or 2-3/4'' (70mm) to fit your door's backset.
- Instale a trava: Insert the latch mechanism into the door edge. Secure it with the provided wood screws.
- Alças de conexão: Feed the ribbon cable from the exterior handle through the latch mechanism and connect it to the interior handle. Ensure the connecting screws on the exterior handle align with the latch.
- Alças de segurança: Fit the interior handle onto the exterior handle, ensuring the connecting screws pass through the latch. Secure the handles using the provided screws.
- Instale as baterias: Unscrew the battery cover on the interior handle and insert 4 AAA batteries. Replace the cover.

Image: Installation Diagram. The lock is designed for easy DIY installation with just two screws.
Video: Official Installation Guide for Geek Smart L-B201. This video provides a detailed walkthrough of the installation process.
4. Instruções de operação
Fingerprint Setup (Admin & Normal Users)
To set up fingerprints:
- Locate the small reset pinhole on the interior handle.
- Insert the provided reset pin into the hole and press until you hear a voice prompt.
- Follow the voice prompts to place your finger on the sensor multiple times until the fingerprint is successfully registered.
- The first two fingerprints registered will be designated as admin users. Subsequent fingerprints will be normal users.
Video: Geek Smart Fingerprint Door Lock L-B201 Operation. This video demonstrates how to set up and use fingerprints.
Modo de Passagem
The lock features a passage mode, allowing the door to remain unlocked for free entry and exit. This is useful for high-traffic areas or when you don't require constant locking.
- To activate/deactivate passage mode, locate the mode switching button on the interior handle.
- Press the button to toggle between auto-lock and passage mode.
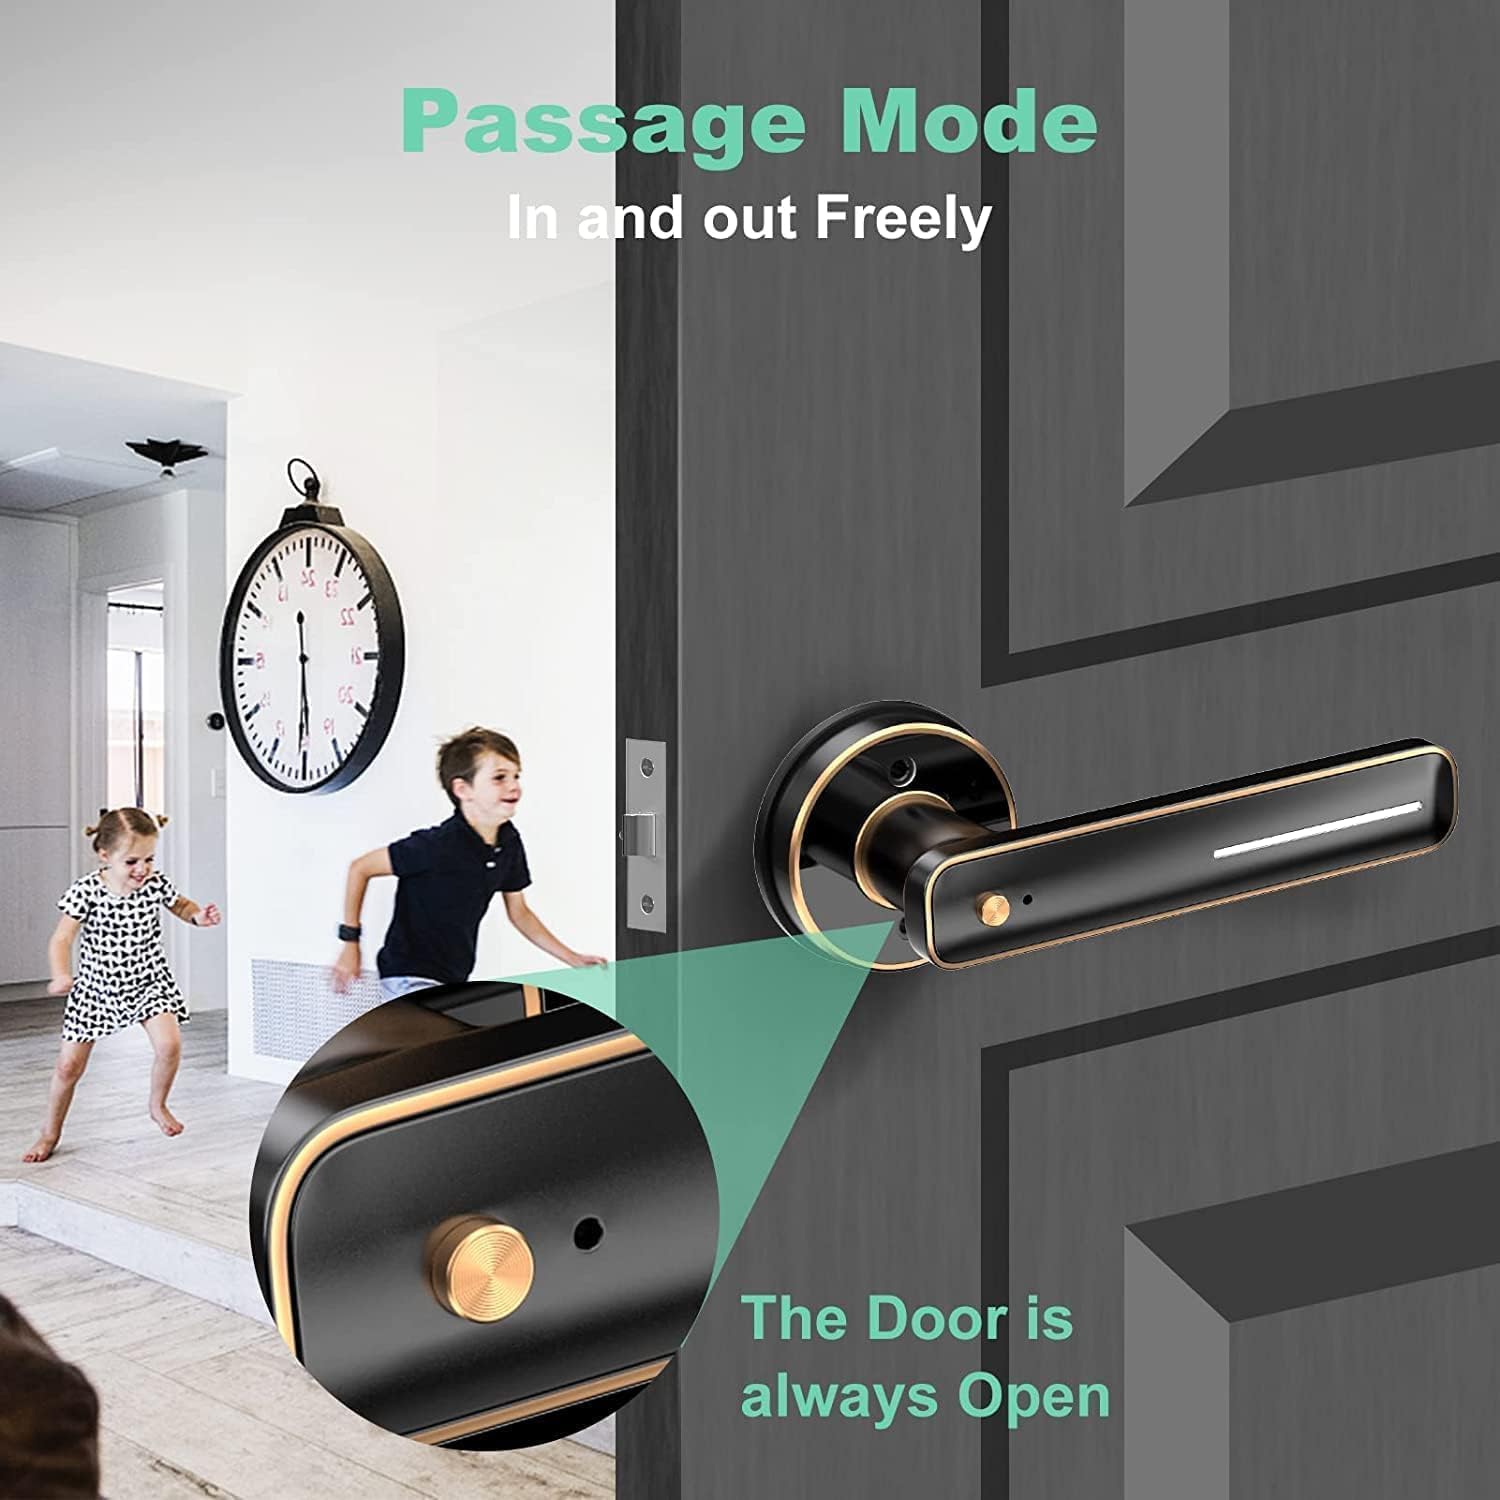
Image: Passage Mode. Allows the door to remain unlocked for free entry and exit.
Desbloqueio de Emergência
In case the batteries run out, you can still access your door:
- Chave mecânica: Use one of the provided mechanical keys to manually unlock the door. The keyhole is located at the bottom of the exterior handle.
- Micro USB Emergency Power: Connect a power bank to the Micro USB port located on the exterior handle to temporarily power the lock and use your fingerprint.
5. Manutenção
To ensure optimal performance and longevity of your Geek Smart Fingerprint Door Lock:
- Substituição da bateria: Replace the 4 AAA batteries approximately every 12 months, or when the low battery indicator appears.
- Limpeza: Wipe the fingerprint sensor and handle surfaces with a soft, dry cloth. Avoid using abrasive cleaners or solvents.
- Cuidados com o sensor de impressões digitais: Ensure your fingers are clean and dry when using the fingerprint sensor for best results.
6. Solução De Problemas
Aqui estão alguns problemas comuns e suas soluções:
| Emitir | Possível causa | Solução |
|---|---|---|
| Impressão digital não reconhecida | Wet or dirty finger, sensor dirty, fingerprint not properly registered. | Ensure finger and sensor are clean and dry. Re-register fingerprint if issue persists. Try different angles. |
| O bloqueio não está respondendo | Low battery, incorrect installation. | Replace batteries. Use emergency Micro USB power. Check installation steps. |
| A porta não trava automaticamente. | Passage mode is active. | Deactivate passage mode using the mode switching button. |
| Lock fails after 1 year | Product defect (rare), battery issues. | Contact customer service for support. Ensure regular battery replacement. |
Video: Fingerprint reader TAKES SEVERAL TRIES TO WORK. This video illustrates a common issue with fingerprint recognition.
7. Especificações
| Recurso | Detalhe |
|---|---|
| Número do modelo | L-B201 |
| Material | Metal |
| Cor | Preto polido |
| Espessura da porta | 1-3/8'' to 2-1/8'' (35 to 55mm) |
| Trava ajustável | 2-3/8'' (60mm) or 2-3/4'' (70mm) |
| Capacidade de impressão digital | Up to 20 (2 admin, 18 normal) |
| Velocidade de desbloqueio | 0.1 segundos |
| Fonte de energia | 4 pilhas AAA (não incluídas) |
| Duração da bateria | Aproximadamente 12 meses |
| Energia de emergência | Micro USB Port |
| Peso do item | 16 onças (1 libra) |
| Dimensões do produto | 6.03 x 2.56 x 2.82 polegadas |
8. Garantia e suporte
Geek Smart Team provides dedicated customer service for our smart door lock. For any problems with installation or technical issues when using the product, please feel free to contact us.
Refer to the warranty card included in your package for specific warranty terms and contact information.
You can also find additional support and installation videos on the Geek Smart YouTube channel by scanning the QR code provided in your user manual.


