1. Instruções importantes de segurança
Leia atentamente todas as instruções antes de usar o aparelho. Guarde este manual para futuras consultas.
- Segurança elétrica: Garantir o volumetagVerifique se a voltagem indicada no aparelho corresponde à voltagem da sua rede elétrica antes de conectar. Não utilize o aparelho com um cabo ou plugue danificado.
- Colocação: Place the dehumidifier on a stable, level surface. Maintain adequate clearance around the unit for proper airflow (at least 20 cm from walls or furniture). Do not block air inlets or outlets.
- Manuseio de Água: Always empty the water tank before moving the unit. Do not drink the collected water.
- Refrigerant Gas (R290): This appliance contains R290 refrigerant gas. R290 is a flammable gas. Handle with care and ensure the appliance is not damaged during transport or installation. Do not attempt to service the unit yourself if you suspect a refrigerant leak.
- Crianças e animais de estimação: Mantenha o aparelho fora do alcance de crianças e animais de estimação. Supervisione as crianças para garantir que elas não brinquem com o aparelho.
- Limpeza: Desligue a alimentação elétrica antes de limpar ou realizar qualquer manutenção.
2. Produto acabadoview
2.1 Componentes
- Painel de controle
- Air Inlet (rear)
- Air Outlet (top/front)
- Water Collection Tank (front/bottom)
- Removable Air Filter (side/rear)
- Casters for easy movement
2.2 Painel de controle

Imagem: Topo view do painel de controle.
O painel de controle possui um visor digital e botões sensíveis ao toque para diversas funções:
- Botão de energia: Liga ou desliga a unidade.
- Exibição de umidade: Shows the current ambient humidity level and the set target humidity.
- Botões de ajuste de umidade: Adjust the desired humidity level.
- Botão de velocidade do ventilador: Selects fan speed (if available).
- Botão do temporizador: Define o temporizador de 24 horas para funcionamento automático.
- Indicador Cheio de Água: Illuminates when the water tank is full, triggering automatic shut-off.
3. Configuração
3.1 Desembalagem
Carefully remove the dehumidifier from its packaging. Retain the packaging materials for future storage or transport. Check for any signs of damage. If the unit appears damaged, do not operate it and contact customer support.
3.2 Posicionamento
For optimal performance, place the dehumidifier in a central location within the room. Ensure the room size does not exceed 25 square meters for effective dehumidification.
- Place the unit on a firm, level surface to prevent vibrations and ensure proper water collection.
- Allow at least 20 cm of space around the air inlet and outlet to ensure unrestricted airflow.
- Evite colocar o aparelho perto de fontes de calor ou sob luz solar direta.
3.3 Conexão de Energia
Plug the power cord into a grounded electrical outlet. Ensure the outlet meets the power requirements of the dehumidifier (210W, 240V).
4. Instruções de operação
4.1 Ligar/Desligar
Press the Power button on the control panel to turn the dehumidifier on or off. The unit will start operating in its default mode or resume previous settings.
4.2 Definindo o nível de umidade desejado
The dehumidifier features a humidity sensor that detects the ambient humidity. Use the humidity setting buttons to adjust your desired humidity level. The unit will operate until this level is reached, then cycle on and off to maintain it. Recommended humidity levels are typically between 40% and 60%.
4.3 Utilizando a função Temporizador
Press the Timer button to set the 24-hour timer. This allows you to program the unit to turn on or off automatically after a set number of hours, providing flexible operation.
4.4 Gerenciamento do reservatório de água
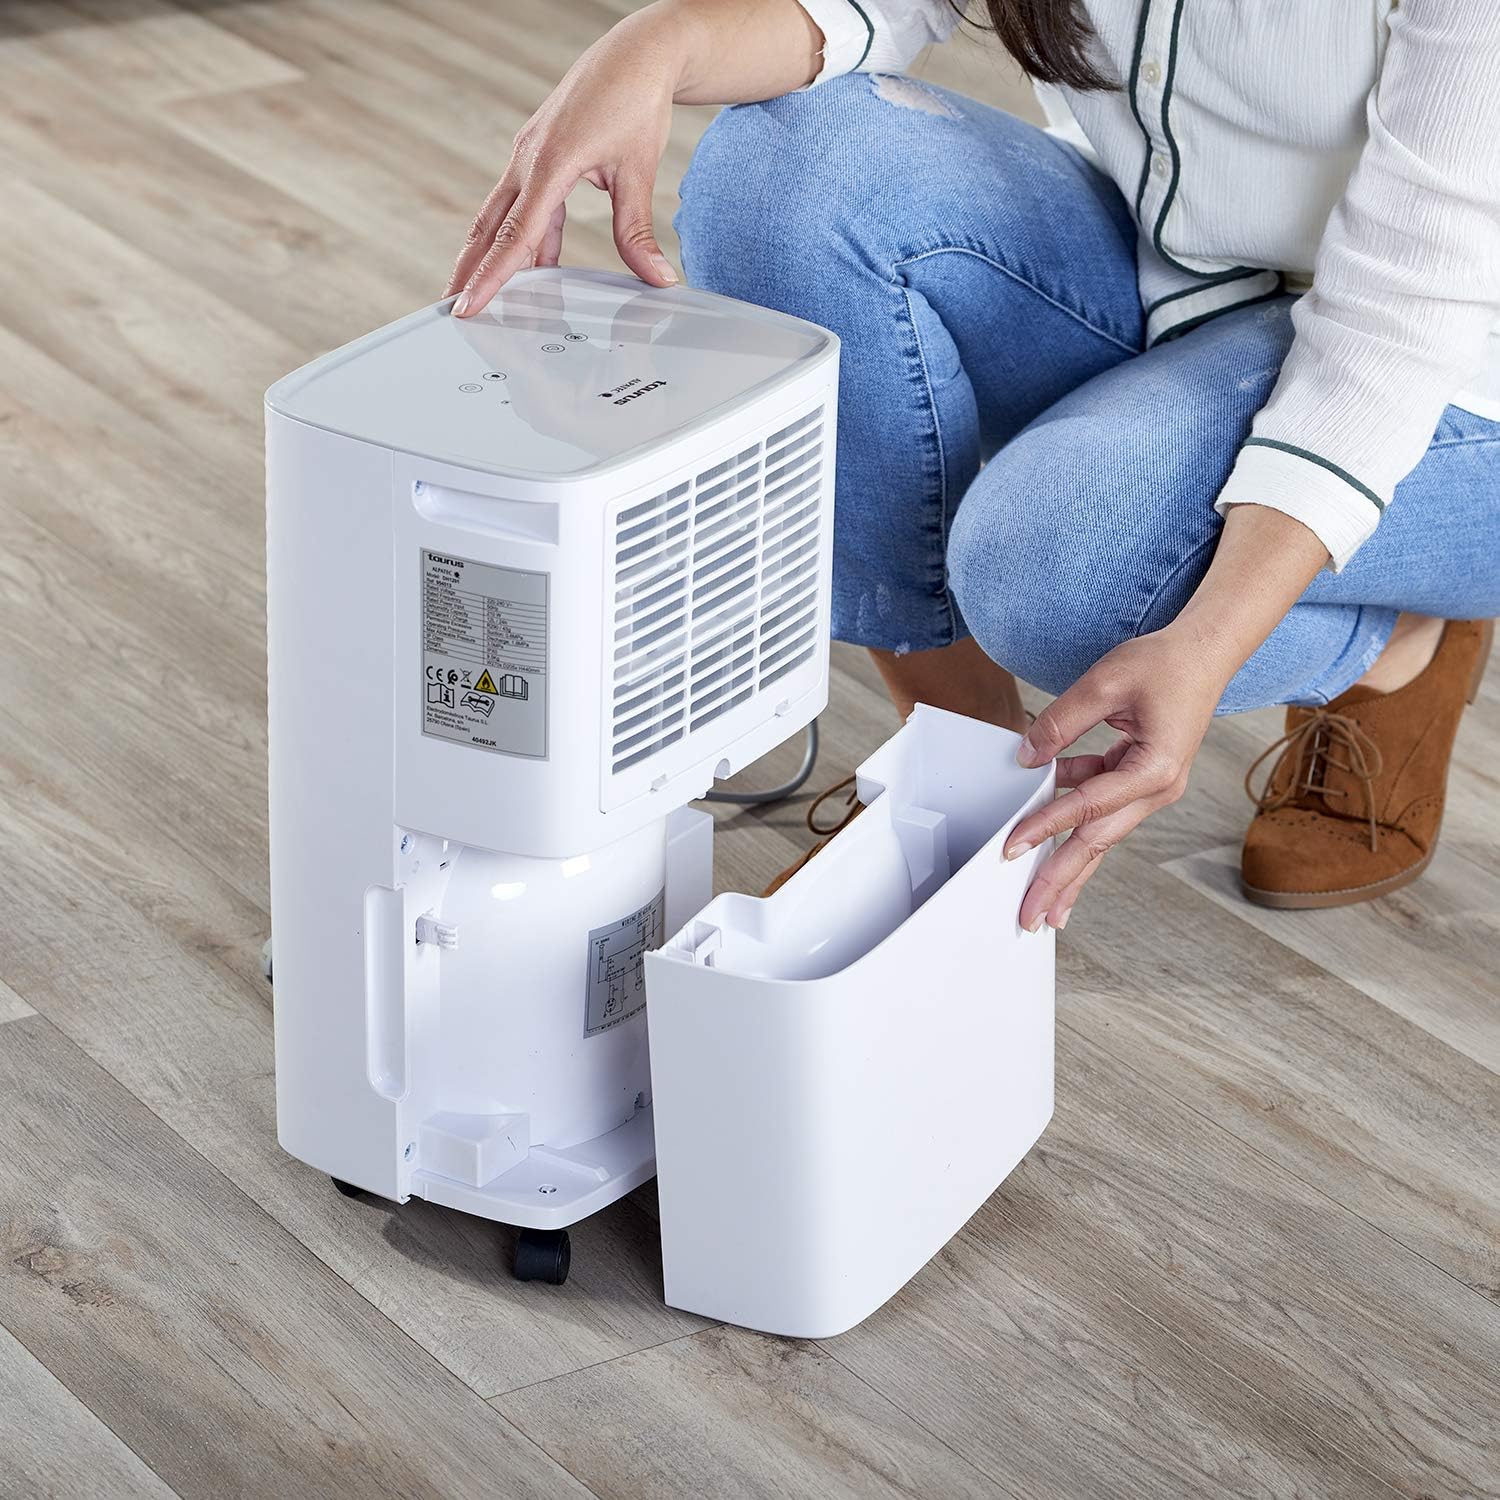
Image: Removing the water collection tank.
- Indicador Cheio de Água: The dehumidifier has a 2.5-liter water tank. When the tank is full, the Water Full Indicator light will illuminate, and the unit will automatically shut off to prevent overflow.
- Esvaziando o tanque: Carefully pull out the water tank from the front of the unit. Dispose of the collected water. Reinsert the empty tank firmly until it clicks into place. The unit will resume operation.
- Drenagem Contínua: For continuous operation without needing to empty the tank, connect a drainage hose (not included) to the continuous drainage outlet (usually located at the back or side of the unit). Ensure the hose is sloped downwards to allow gravity drainage into a suitable receptacle.
5. Manutenção
5.1 Limpando o Filtro de Ar

Image: Removing the air filter for cleaning.
Regular cleaning of the air filter is essential for efficient operation.
- Desligue o desumidificador e desconecte-o da tomada.
- Locate the air filter cover (typically on the side or rear of the unit) and remove it.
- Carefully pull out the air filter.
- Lave o filtro com água morna e sabão ou aspire-o para remover poeira e detritos.
- Enxágue bem e deixe o filtro secar completamente ao ar antes de reinseri-lo.
- Place the dry filter back into its slot and secure the cover.
5.2 Limpeza da parte externa da unidade
Limpe o exterior do desumidificador com um pano macio, damp pano. Não utilize produtos de limpeza abrasivos, solventes ou produtos químicos agressivos, pois estes podem danificar a superfície.
5.3 Automatic Defrost Control
The dehumidifier is equipped with an automatic defrost function. If frost builds up on the evaporator coils, the unit will temporarily stop dehumidifying and run the fan to melt the frost. This is a normal operation and ensures efficient performance in cooler environments.
6. Solução De Problemas
Antes de entrar em contato com o atendimento ao cliente, consulteview Os seguintes problemas comuns e suas soluções:
| Problema | Possível causa | Solução |
|---|---|---|
| A unidade não liga | No power supply; Power cord not plugged in; Water tank full or not correctly inserted. | Verifique a ligação elétrica; Esvazie e recoloque o reservatório de água corretamente. |
| Sem desumidificação ou baixa eficiência | Air filter clogged; Room temperature too low; Air inlet/outlet blocked; Desired humidity level already reached. | Clean the air filter; Ensure room temperature is above 5°C; Clear obstructions; Lower the desired humidity setting. |
| Water Full Indicator is on, but tank is not full | Water tank not correctly positioned; Float switch malfunction. | Remove and reinsert the water tank firmly; If problem persists, contact support. |
| Ruído incomum durante a operação | A unidade não está em uma superfície nivelada; Problema em um componente interno. | Ensure unit is on a flat, stable surface; If noise is excessive or persistent, discontinue use and contact support. |
7. Especificações
7.1 Dados Técnicos
| Recurso | Detalhe |
|---|---|
| Marca | Touro |
| Número do modelo | 954513000 (PLEASANT) |
| Cor | Branco |
| Dimensões (C x L x A) | 34.5 x 20 x 10 cm |
| Peso | 9.5 quilos |
| Capacidade do tanque de água | 2.5 litros |
| Capacidade de desumidificação | Up to 12 liters/24 hours |
| Poder | 210 Watts |
| Volumetage | 240V |
| Material | Plástico |
| Classe de energia | A a G |
| Área de piso recomendada | Até 25 metros quadrados |
| Características especiais | Humidity level detector, 24h timer, R290 refrigerant gas, Easy maintenance, Washable filters, Automatic defrost |
8. Garantia e Suporte
This product is covered by a manufacturer's warranty. Please refer to the warranty card included with your purchase or contact your retailer for specific warranty terms and conditions. For technical support, spare parts, or service inquiries, please contact the Taurus customer service department or your local distributor. Information regarding spare parts availability is not provided in this manual.


