Introdução
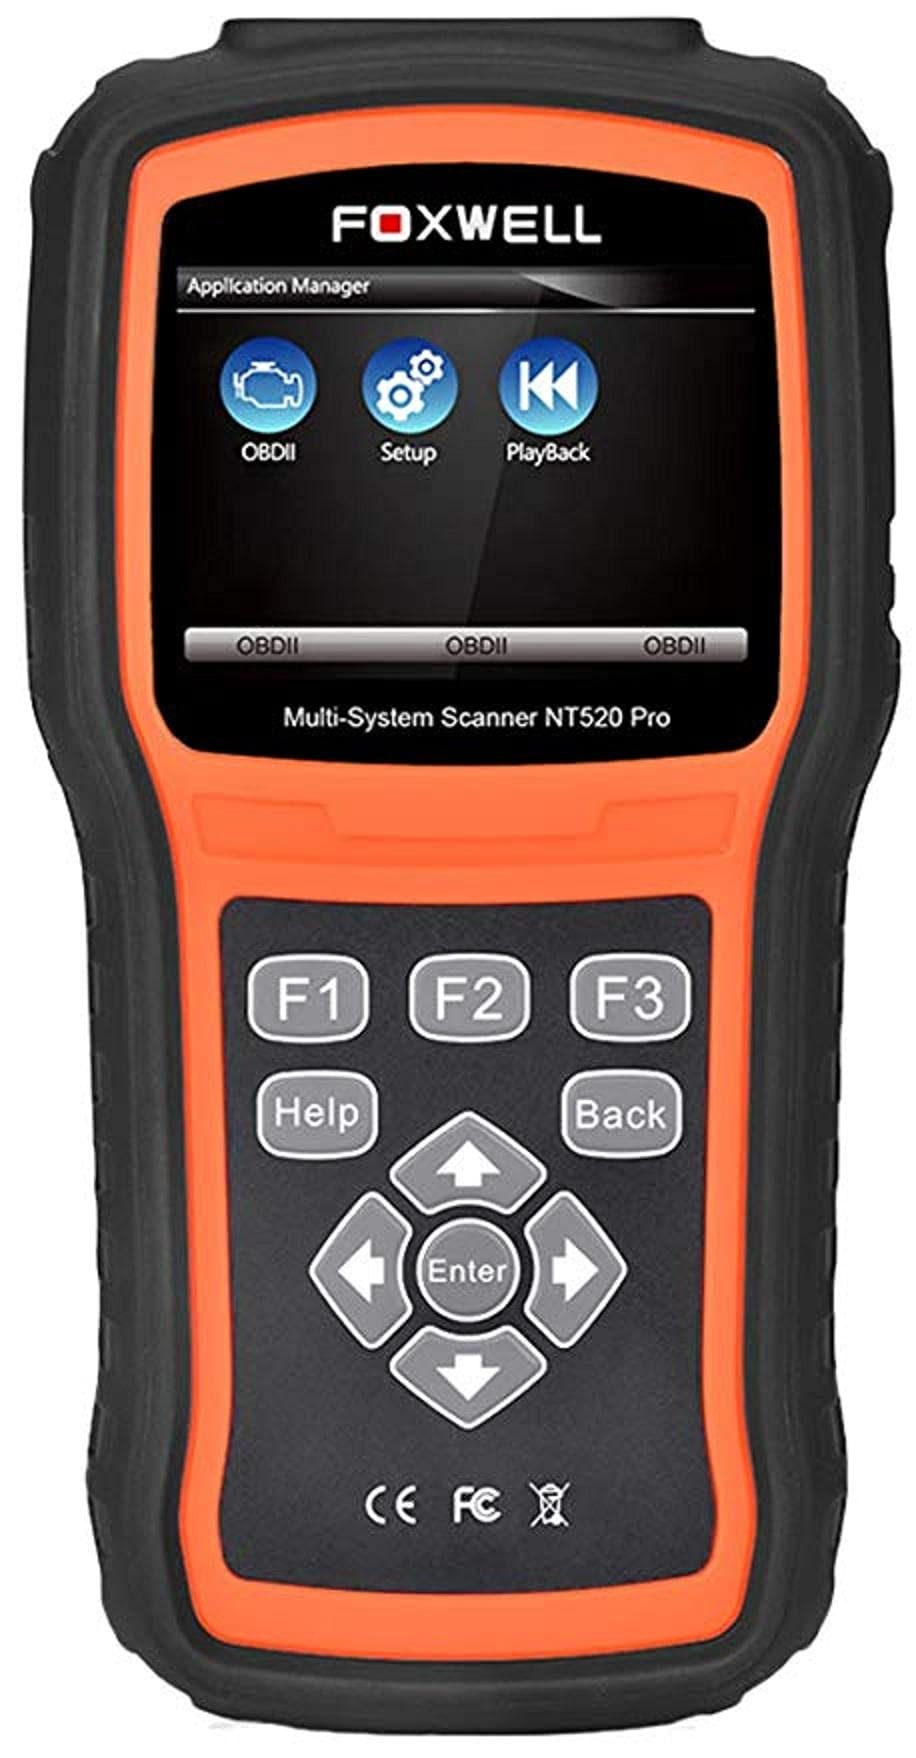
The Foxwell NT520 PRO is a professional-grade car fault diagnostic tool designed to help users identify and resolve issues in various vehicle systems. This device offers comprehensive diagnostic functions, including reading and clearing fault codes, viewing live data streams, and performing specialized tests and coding functions. It supports a wide range of car makes and models equipped with an OBD II - 16 pin connector.
1. Configuração
1.1 Conteúdo da embalagem
- Foxwell NT520 PRO Diagnostic Tool
- Cabo de diagnóstico OBD II
- USB Cable (for updates and data transfer)
- Manual do usuário (este documento)
1.2 Inicialização do dispositivo
- Connect the OBD II diagnostic cable to the NT520 PRO device.
- Locate the vehicle's OBD II port, typically found under the dashboard on the driver's side.
- Plug the diagnostic cable into the vehicle's OBD II port. The device should power on automatically. If not, ensure the vehicle's ignition is in the ON position.
1.3 Atualizações de Software
The NT520 PRO offers free updates for one selected car brand. Additional brands (up to five) can be added via internet for a fee. Regular software updates ensure compatibility with newer vehicle models and provide access to the latest diagnostic features.
- Conecte o dispositivo a um computador usando o cabo USB fornecido.
- Install the Foxwell update client software on your computer (refer to the official Foxwell website for download).
- Follow the on-screen instructions in the update client to register your device and perform software updates.
2. Instruções de operação
The NT520 PRO features a color screen for easy navigation and data display.
2.1 Navegação básica
- Use the arrow keys to navigate through menus.
- Pressione o botão 'Enter' ou 'OK' para selecionar uma opção.
- Press the 'Back' or 'Exit' button to return to the previous screen.
2.2 Funções de diagnóstico
The device supports diagnostics for most available control units in a vehicle, including:
- Módulo de controle do motor (ECM)
- Módulo de controle de transmissão (TCM)
- Sistema de travagem antibloqueio (ABS)
- Sistema de airbag
- Módulo de controle corporal (BCM)
2.2.1 Reading and Clearing Fault Codes
- From the main menu, select 'Diagnostics' or 'Scan'.
- Selecione a marca e o modelo do veículo.
- Select the desired control unit (e.g., Engine, ABS).
- Selecione 'Ler códigos' para view current and stored Diagnostic Trouble Codes (DTCs).
- Select 'Clear Codes' to erase the detected fault codes. This will also turn off the Malfunction Indicator Lamp (MIL) if the fault is no longer present.
2.2.2 Fluxo de Dados ao Vivo
View real-time data from various sensors and components.
- After selecting the control unit, choose 'Live Data'.
- Selecione os parâmetros que deseja monitorar.
- Os dados serão exibidos em formato numérico ou gráfico.
2.2.3 Informações da ECU
Access information about the Electronic Control Unit.
- After selecting the control unit, choose 'ECU Information'.
- View details such as VIN, calibration ID, and software version.
2.2.4 Component Testing and Coding
The device can perform tests on various car parts and supports programming and coding for different components.
- Component Tests: Select 'Active Test' or 'Component Test' from the menu to activate specific components and check their functionality.
- Programming and Coding: This function allows for programming and coding of various parts. Use with caution and only if you are familiar with the specific vehicle's requirements.
- Key Coding: For certain models, the device supports key coding functionality. Refer to your vehicle's service manual for specific procedures.
3. Manutenção
3.1 Cuidados com o dispositivo
- Mantenha o dispositivo limpo e livre de poeira e umidade.
- Guarde o dispositivo em local fresco e seco quando não estiver em uso.
- Evite deixar cair o dispositivo ou submetê-lo a impactos fortes.
- Do not use harsh chemicals for cleaning; a soft, damp pano é suficiente.
3.2 Manutenção de Software
Regularly check for and install software updates to ensure optimal performance and compatibility with the latest vehicle models. Refer to section 1.3 for update instructions.
4. Solução De Problemas
4.1 O dispositivo não liga
- Ensure the OBD II cable is securely connected to both the device and the vehicle's OBD II port.
- Verifique se a ignição do veículo está na posição LIGADO.
- Check the vehicle's fuse for the OBD II port (consult your vehicle's owner's manual).
4.2 Erro de comunicação
- Confirm the vehicle supports the OBD II protocol (most vehicles manufactured after 1996 do).
- Ensure the diagnostic cable is not damaged.
- Tente conectar-se a um veículo diferente para descartar um problema específico deste veículo.
- Atualize o software do dispositivo para a versão mais recente.
4.3 Indicador de mau funcionamento Lamp (MIL) Remains On
After clearing fault codes, if the MIL (Check Engine Light) remains illuminated, it indicates that the underlying fault has not been resolved or a new fault has occurred. Address the root cause of the fault before attempting to clear codes again.
5. Especificações
| Recurso | Detalhe |
|---|---|
| Fabricante | Foxwell |
| Marca | Foxwell |
| Número do modelo | 111111111111 |
| Número da peça do fabricante | 111111111111 |
| Fonte de energia | Elétrico com fio |
| Peso do item | 818 g |
| Dimensões de envio | 21.2 x 17.8 x 8.2 cm |
| ASIN | B092326PXZ |
| Primeira data disponível | 8 de abril de 2021 |
6. Garantia e Suporte
6.1 Garantia do Produto
Please refer to the warranty card included with your product or visit the official Foxwell website for detailed warranty information. Warranty terms typically cover manufacturing defects for a specified period from the date of purchase.
6.2 Suporte Técnico
For technical assistance, software updates, or troubleshooting not covered in this manual, please contact Foxwell customer support through their official website or authorized service centers. Have your product model and serial number ready when contacting support.