1. Produto acabadoview
The Browning Spec Ops Elite HP4 is an advanced trail camera designed for capturing high-quality images and videos of wildlife, particularly in low-light conditions. It features an invisible infrared flash for discreet nighttime recording and a high-resolution sensor for detailed captures. This manual provides essential information for setting up, operating, and maintaining your trail camera.
This bundle includes two Browning BTC-8E-HP4 Spec Ops Elite HP4 Trail Cameras, Blucoil 32GB SDHC Memory Cards, Blucoil AA Batteries, a Blucoil 6.5-FT Combination Cable Lock, and a VidPro USB 2.0 Card Reader.
2. O que está na caixa
- 2 x Browning BTC-8E-HP4 Spec Ops Elite HP4 Trail Cameras
- 2 x 6-FT Tree Mount Straps
- 1 x Blucoil 6.5-Foot Multi-Functional Combination Cable Lock with 4-Digit Password Code
- 6 x Blucoil AA Batteries
- 2 x Blucoil 32GB Class 10 SDHC SD Cards
- 1 x VidPro USB 2.0 Card Reader
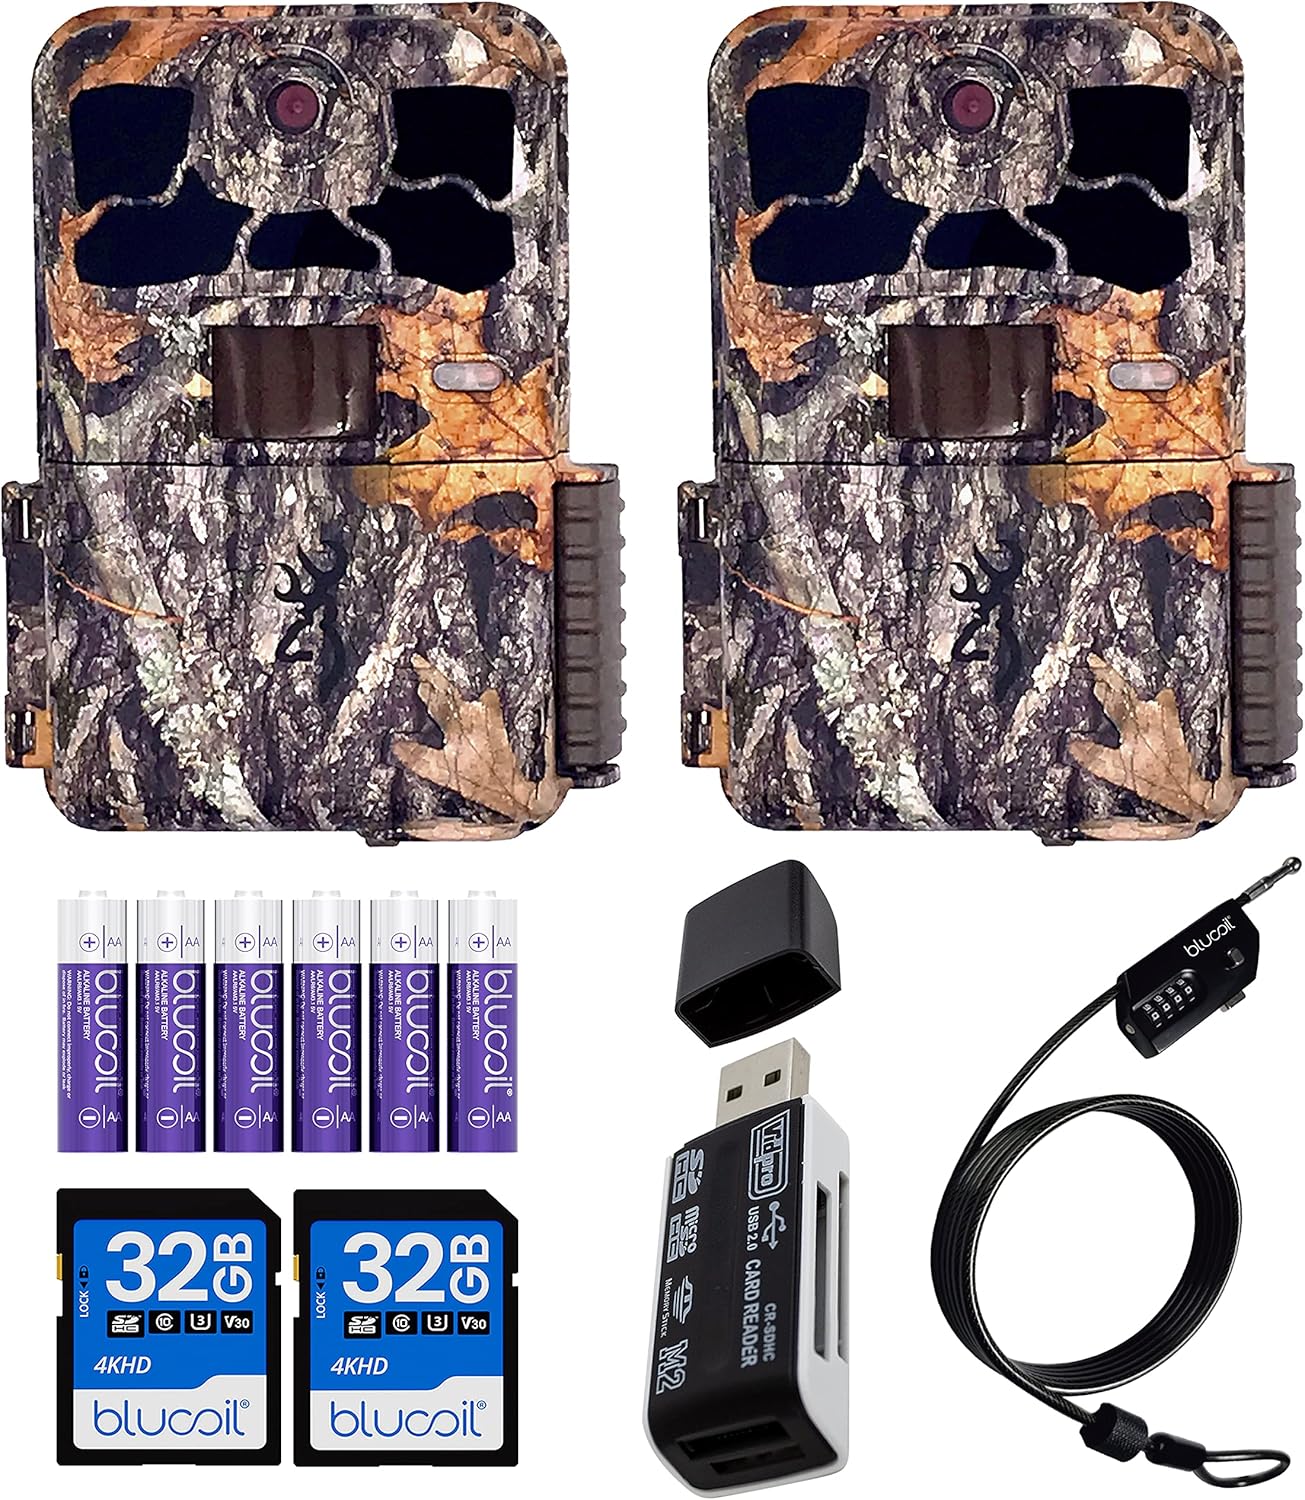
Image: Contents of the Browning Spec Ops Elite HP4 Trail Camera bundle.
3. Guia de configuração
3.1. Instalação da bateria
The Spec Ops Elite HP4 camera requires 8 AA batteries for operation. Ensure you use fresh, high-quality alkaline or lithium batteries for optimal performance and battery life.
- Open the camera's housing latch.
- Localize o compartimento da bateria.
- Insert 8 AA batteries, paying close attention to the polarity indicators (+/-) inside the compartment.
- Feche o compartimento da bateria com segurança.

Image: Proper battery installation in the trail camera.

Image: Blucoil AA Alkaline Batteries included in the bundle.
3.2. Inserção do cartão SD
The camera supports SDXC cards up to 512GB. For best results, use Class 10 or higher SDHC/SDXC cards.
- With the camera housing open, locate the SD card slot.
- Insert the Blucoil 32GB SDHC card into the slot until it clicks into place. Ensure the card is inserted in the correct orientation.
- Para remover o cartão, empurre-o suavemente até que ele se solte.

Image: SD card slot visible on the camera's internal panel.
3.3. Montando a Câmera
Use the provided tree mount strap to secure the camera to a tree or post. Position the camera at an appropriate height and angle to capture the desired area.
- Thread the strap through the mounting slots on the back of the camera.
- Wrap the strap around the tree and secure it tightly.
- Ajuste o ângulo da câmera conforme necessário.

Imagem: Lado view of the camera showing the mounting strap attachment point.
3.4. Securing with Cable Lock
The Blucoil 6.5-FT Multi-Functional Combination Cable Lock can be used to deter theft. The preset password is 0000, and it can be reset using the included Key Pin.
- Locate the security cable slot on the camera.
- Thread the cable lock through the slot and around the mounting surface (e.g., tree).
- Set your desired 4-digit combination.
- Secure the lock.

Image: Trail camera secured with the Blucoil combination cable lock.
4. Instruções de operação
4.1. Ligar / desligar
To power on the camera, slide the ON/OFF switch to the "ON" position. To power off, slide it to "OFF".
4.2. Navegando no Menu
The camera features a 2-inch colored LCD screen for menu navigation and previewing footage. Use the directional buttons and "E" (Enter) button to navigate through settings.
Image: Camera's internal LCD screen and control layout.
4.3. Modos de gravação
The Spec Ops Elite HP4 offers various recording modes:
- Modo de foto: Captures still images up to 22MP resolution.
- Modo de vídeo: Records Full HD (1920 x 1080p) videos at 30 or 60 frames per second.
- Timelapse Plus Mode: Captures images at set intervals, allowing you to create timelapse videos. These can be viewed on your computer using the Buck Watch Timelapse Viewer (downloadable from Browning's weblocal). Note: The Timelapse Viewer is not compatible with Mac. You may need to change the file extension from TLS to AVI for compatibility.
4.4. Capture Timer
The built-in Capture Timer allows you to control when the camera is active. You can set it to record only during specific hours, such as daytime or nighttime, to conserve battery life and focus on relevant activity.
4.5. ViewFootage
Você pode préview captured photos and videos directly on the camera's 2-inch color LCD screen. The screen displays information such as time, date, temperature, barometric pressure, and moon phase.
Para detalhes viewing and management, remove the SD card and insert it into the VidPro USB 2.0 Card Reader. Connect the card reader to your computer to access the files.

Image: VidPro USB 2.0 Card Reader for accessing footage em um computador.
5. Manutenção
- Limpeza: Regularly wipe the camera lens and IR flash window with a soft, lint-free cloth to ensure clear images. Keep the housing free of dirt and debris.
- Cuidados com a bateria: Replace batteries when the low battery indicator appears. Remove batteries if the camera will not be used for an extended period to prevent leakage.
- Gerenciamento de cartão SD: Format your SD card periodically to maintain optimal performance and prevent data corruption. Back up important footage antes da formatação.
- Armazenar: Quando não estiver em uso, guarde a câmera em local fresco e seco, longe da luz solar direta e de temperaturas extremas.
6. Solução De Problemas
| Problema | Possível causa/solução |
|---|---|
| Câmera não liga |
|
| Poor image/video quality at night |
|
| Camera not detecting motion |
|
| SD card error / Cannot save files |
|
| Timelapse videos not playing on Mac |
|
7. Especificações
| Recurso | Detalhe |
|---|---|
| Modelo | BTC-8E-HP4 |
| Resolução da imagem | Até 22MP |
| Resolução de vídeo | 1920 x 1080p FHD at 30/60FPS |
| Faixa de detecção | 80 pés |
| Alcance do Flash IR | 90-FT (Invisible "Night Vision") |
| Velocidade do Gatilho | 0.1s-0.7s |
| Tempo de recuperação | 0.5s |
| Tela LCD | 2" Colored |
| Fonte de energia | 8 pilhas AA |
| Suporte para cartão SD | Up to 512GB SDXC card (Class 10 or higher recommended) |
| SO compatível | Windows (Buck Watch Timelapse Viewer not compatible with Mac) |
| Material | Zinco |
| Dimensões | 1 x 1 x 1 polegadas |
| Peso | 1 libra |
| Resistência à água | Impermeável (IP54) |
8. Garantia e Suporte
For detailed warranty information and technical support, please refer to the official Browning Trail Cameras webou entre em contato diretamente com o serviço de atendimento ao cliente. Guarde o comprovante de compra como prova para eventuais solicitações de garantia.
Você pode visitar o Browning Store on Amazon para obter mais informações sobre o produto.


