1. Produto acabadoview
Thank you for choosing the Arlux Lighting Onyx R2 Round Recessed LED Spot Light. This product is designed for indoor use, providing efficient and modern illumination. This manual provides essential information for the safe installation, operation, and maintenance of your new LED spot light.
Informações de segurança
- Leia todas as instruções cuidadosamente antes da instalação e uso.
- A instalação deve ser realizada por um eletricista qualificado, de acordo com as normas e regulamentos elétricos locais.
- Ensure the power supply is disconnected at the main circuit breaker before installation, maintenance, or cleaning.
- Não modifique o produto de forma alguma. Modificações não autorizadas podem anular a garantia e representar riscos à segurança.
- Este produto foi projetado apenas para uso interno. Não o exponha à umidade ou a temperaturas extremas.
- Não olhe diretamente para a fonte de luz LED quando ela estiver acesa, pois isso pode causar cansaço visual ou danos aos olhos.
- Mantenha os materiais de embalagem fora do alcance das crianças.
2. Conteúdo da embalagem
Verifique se todos os componentes estão presentes e sem danos antes de prosseguir com a instalação.
- 1 x Arlux Lighting Onyx R2 Round Recessed LED Spot Light
- 1 x LED Driver (Power Supply)
- Hardware de montagem

Image 2.1: The Arlux Lighting Onyx R2 Recessed LED Spot Light shown with its separate LED driver (power supply) and connecting cable.
3. Especificações
| Marca | Iluminação Arlux |
| Modelo | Onyx R2 |
| Tipo | Recessed LED Spot Light |
| Forma | Redondo |
| Consumo de energia | 18 Watts |
| Fluxo Luminoso | 1550 Lúmens |
| Temperatura de cor | 4000 Kelvin (Branco Neutro) |
| Material | Alumínio |
| Cor | Branco |
| Peso do item | 390 gramas |
| Tipo de instalação | Montagem no teto (embutido) |
| Fonte de energia | Elétrico com fio |
| Usos específicos | Ceiling illumination for indoor spaces |
4. Configuração e instalação
4.1 Lista de verificação de pré-instalação
- Ferramentas necessárias: Drill, hole saw (appropriate diameter for recess), wire strippers, screwdriver, voltage testador.
- Fonte de energia: Ensure the electrical circuit is compatible with the spot light's power requirements (18W).
- Ceiling Space: Verify sufficient clearance above the ceiling for the fixture and driver.
- Segurança em primeiro lugar: Always turn off the main power supply at the circuit breaker before starting any electrical work.
4.2 Etapas de instalação
- Prepare o teto: Using an appropriate hole saw, cut a circular opening in the ceiling at the desired installation location. Refer to the product specifications for the exact cutout diameter (typically around Ø200-210mm for a Ø225mm fixture).
- Connect the Driver: Connect the AC input wires from your household electrical supply to the input terminals of the LED driver. Ensure correct polarity (Live, Neutral, Earth) as indicated on the driver. Secure connections firmly.
- Connect the Spot Light: Plug the DC output cable from the LED driver into the corresponding input port on the back of the Onyx R2 spot light. This connection is typically a simple plug-and-play connector.
- Insert the Spot Light: Gently push the spring clips on the sides of the spot light upwards and insert the fixture into the prepared ceiling opening. The spring clips will hold the light securely in place.
- Verificação final: Ensure the spot light is flush with the ceiling surface and securely mounted.
- Restaurar energia: Ligue novamente a alimentação principal no disjuntor.
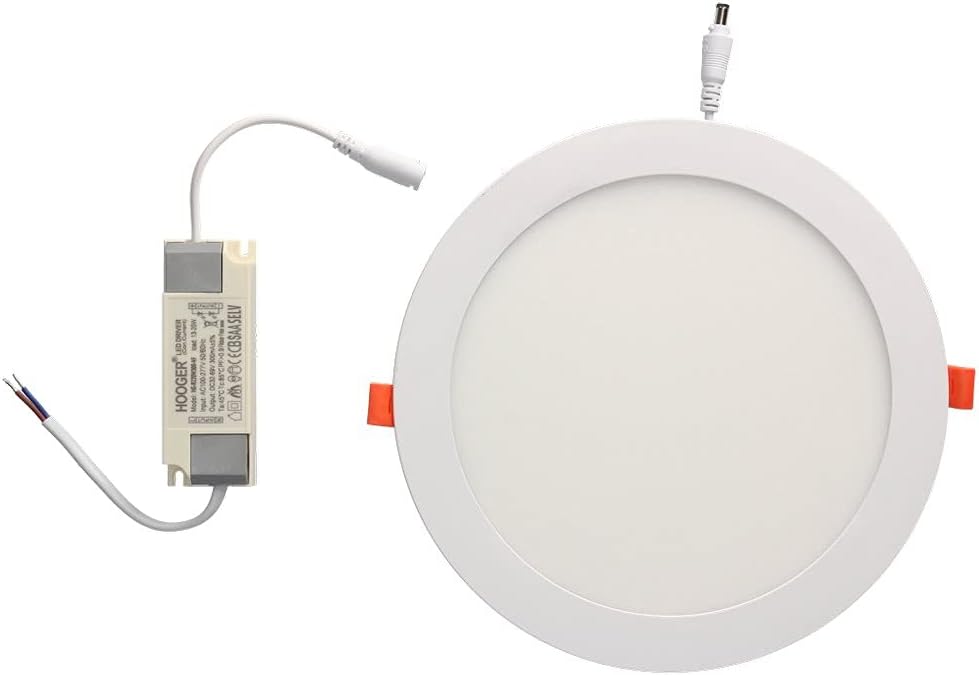
Image 4.1: The Arlux Lighting Onyx R2 Recessed LED Spot Light shown installed flush within a ceiling, providing ambient lighting.
5. Instruções de operação
The Arlux Lighting Onyx R2 Recessed LED Spot Light operates immediately upon receiving power. It is typically controlled by a standard wall switch connected to the electrical circuit.
- Ligar/Desligar: Use the wall switch connected to the light fixture to turn the light on or off.
- Escurecimento: This model is not specified as dimmable. Attempting to use it with a non-compatible dimmer switch may cause damage or malfunction.
6. Manutenção
The Arlux Lighting Onyx R2 LED Spot Light requires minimal maintenance.
- Limpeza: Ensure the power is off before cleaning. Wipe the surface of the light with a soft, dry, or slightly damp pano. Não utilize produtos de limpeza abrasivos, solventes ou produtos químicos agressivos, pois estes podem danificar o acabamento ou os componentes elétricos.
- Longevidade do LED: LED lights have a long lifespan and do not require bulb replacement. If the light stops functioning, refer to the troubleshooting section.
7. Solução De Problemas
If you encounter issues with your Arlux Lighting Onyx R2 LED Spot Light, please consult the following table before contacting support.
| Problema | Possível causa | Solução |
|---|---|---|
| A luz não acende | Sem fonte de alimentação Conexão de fiação solta Driver de LED com defeito Faulty light fixture | Verifique o disjuntor e o interruptor de parede. Verify all wiring connections are secure (power off first). Test the driver if possible, or replace it. If driver is functional, the fixture may be faulty; contact support. |
| A luz pisca | Fonte de alimentação instável Fiação solta Incompatible dimmer switch (if used) | Ensure stable power. Check for loose connections. Remove dimmer switch if not compatible, or replace with a compatible LED dimmer. |
| A luz está fraca | Fonte de alimentação incorreta Volumetage queda | Ensure the correct LED driver is used. Consult an electrician to check for voltage issues in your electrical system. |
8. Garantia e Suporte
Information regarding specific warranty terms for the Arlux Lighting Onyx R2 Round Recessed LED Spot Light is not available in the provided product details. For warranty inquiries or technical support, please contact your retailer or the manufacturer directly.
Spare parts availability information is also not available. Please contact your point of purchase for assistance with replacement components.


