Introdução
The OWC Mercury Elite Pro Quad is a versatile 4-bay storage enclosure designed to provide flexible storage solutions for both Mac and Windows PC users. It supports both 2.5-inch and 3.5-inch drives, offering substantial capacity for various workflows. This enclosure is RAID-ready, allowing users to implement their preferred RAID software for enhanced performance or data redundancy.
Key features include a powerful USB-C interface with 10Gb/s USB 3.2 Gen 2 bandwidth, backward compatibility with legacy USB ports via an included USB-C to USB-A cable, and a robust aluminum enclosure with a whisper-quiet fan for optimal heat dissipation.

Image: The OWC Mercury Elite Pro Quad 4-Bay Storage Enclosure, showcasing its sleek silver design and front panel.
Conteúdo da embalagem
- OWC Mercury Elite Pro Quad 4-Bay Storage Enclosure
- Cabo USB-C para USB-C
- Cabo USB-C para USB-A
- Adaptador de energia
- Keys for front panel lock
- Documentação
Configurar
- Unpack the Enclosure: Remova cuidadosamente todos os componentes da embalagem.
- Instalar unidades:
- Unlock and open the front panel of the enclosure.
- Deslize para fora as bandejas de unidade vazias.
- Attach your 2.5-inch or 3.5-inch SATA hard drives or SSDs to the drive trays using the provided screws. Ensure the connectors align correctly.
- Deslize as bandejas de unidades já instaladas de volta para o gabinete até que elas se encaixem no lugar.
- Feche e trave o painel frontal.
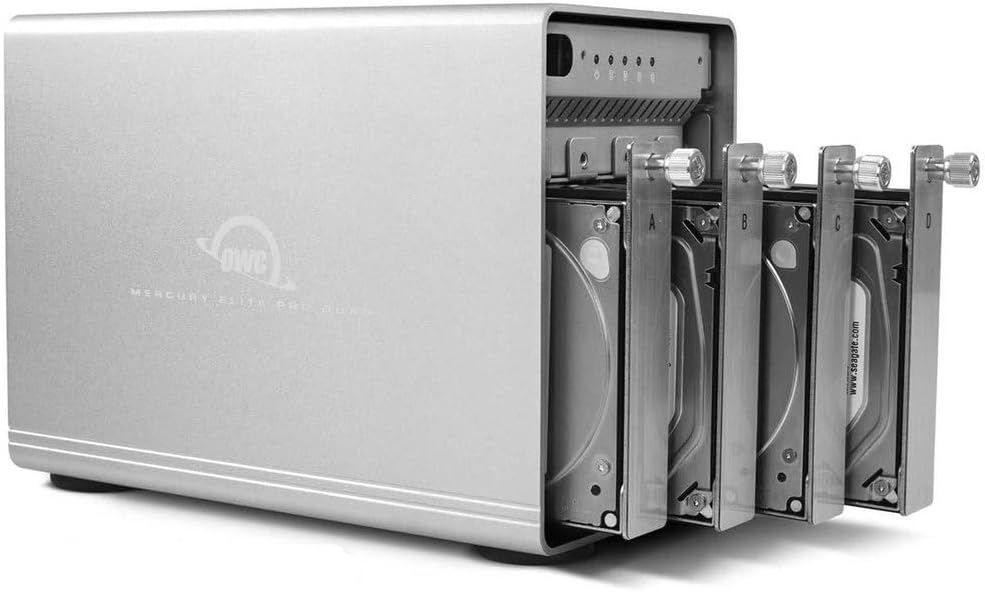
Image: The OWC Mercury Elite Pro Quad with four drive trays partially extended, showing how drives are accessed.

Image: A 2.5-inch SSD securely mounted onto a drive tray, ready for insertion into the enclosure.
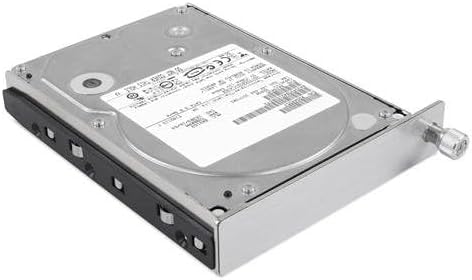
Image: A 3.5-inch HDD securely mounted onto a drive tray, illustrating the larger drive compatibility.
- Conectar ao computador:
- Connect one end of the included USB-C cable to the USB-C port on the rear of the Mercury Elite Pro Quad.
- Connect the other end of the USB-C cable to an available USB-C or Thunderbolt 3 port on your Mac or Windows PC. If your computer uses a traditional USB-A port, use the included USB-C to USB-A cable.
- Conecte a energia: Plug the power adapter into the enclosure's AC IN port and then into a wall outlet.
- Ligar: Flip the power switch on the rear of the enclosure to the 'ON' position. The power indicator LED on the front will illuminate.
- Format Drives: Once connected and powered on, your operating system will detect the new drives. You may need to initialize and format the drives using your computer's disk utility software (e.g., Disk Utility on macOS, Disk Management on Windows) before they can be used.

Image: The rear panel of the OWC Mercury Elite Pro Quad, showing the USB 3.1 Gen 2 port, power input, and power switch.
Operating the Enclosure
The OWC Mercury Elite Pro Quad is designed as a JBOD (Just a Bunch Of Disks) enclosure, meaning each installed drive is recognized as an independent volume by your computer. This provides maximum flexibility for managing your storage.
- Transferência de dados: Once formatted, the drives will appear as separate volumes on your computer. You can drag and drop files, use backup software, or access them like any other connected storage device. The USB 3.2 (10Gb/s) interface ensures high-speed data transfer, up to 947MB/s depending on your drives and system.
- Configuração RAID: While this model is RAID-ready, it does not include SoftRAID software. Users wishing to configure RAID arrays (e.g., RAID 0, RAID 1, RAID 5, RAID 10) will need to acquire and install compatible RAID software separately. This allows for customized performance and data redundancy based on your specific needs.
- Drive Activity LEDs: The front panel features individual LEDs for each drive bay, indicating drive activity (read/write operations).
Manutenção
- Limpeza: Regularly wipe the exterior of the enclosure with a soft, dry cloth. Avoid using harsh chemicals or abrasive materials. Ensure the ventilation grilles are free from dust buildup to maintain proper airflow.
- Ventilação: Position the enclosure in a well-ventilated area. Do not block the fan or air vents. The aluminum casing and quiet fan are designed to dissipate heat efficiently, but proper airflow is crucial for drive longevity.
- Drive Handling: When replacing or installing drives, handle them carefully to avoid static discharge or physical damage. Always power off and disconnect the enclosure before opening it to access the drive bays.
Solução de problemas
- Gabinete não liga:
- Ensure the power adapter is securely connected to both the enclosure and a working power outlet.
- Verify the power switch on the rear of the enclosure is in the 'ON' position.
- Experimente uma tomada diferente.
- Drives Not Recognized by Computer:
- Check all cable connections (USB and power) to ensure they are secure.
- Tente conectar a uma porta USB diferente no seu computador.
- Ensure the drives are properly seated in their trays and the trays are fully inserted into the enclosure.
- Verify that the drives are initialized and formatted for your operating system using Disk Utility (macOS) or Disk Management (Windows).
- Test the enclosure with different drives if possible to rule out drive issues.
- Desempenho lento:
- Ensure you are using a USB 3.0/3.1/3.2 compatible port on your computer for optimal speeds.
- Check the health of your installed drives.
- Verify that your computer's drivers for USB or Thunderbolt are up to date.
- Ruído incomum:
- Some hard drives can produce operational noise. If the noise is excessive or unusual, it may indicate a drive issue.
- Ensure the enclosure is placed on a stable, flat surface to minimize vibrations.
- While the fan is designed to be quiet, check for any obstructions or debris that might be causing fan noise.
Especificações
| Recurso | Especificação |
|---|---|
| Marca | OWC |
| Número do modelo | 8648289 |
| Material | Metal |
| Peso do item | 10.45 libras (4.75 kg) |
| Capacidade de armazenamento de memória | Up to 48 TB (with compatible drives) |
| Dispositivos compatíveis | Desktop (Mac, Windows PC) |
| Fator de forma do disco rígido | 2.5 polegadas, 3.5 polegadas |
| Número máximo de dispositivos compatíveis | 4 |
| Taxa de transferência de dados | Up to 10 Gigabits Per Second (USB 3.2 Gen 2) |
| Dimensões do produto | 11 x 7 x 8 polegadas (aproximadamente 9.4"C x 5.3"L x 7.3"A) |
| interface de hardware | USB (USB-C, USB-A compatible) |
Garantia e Suporte
The OWC Mercury Elite Pro Quad RAID Ready (JBOD) 4-Bay Storage Enclosure comes with a 1 ano de garantia limitada OWC.
For technical assistance, troubleshooting, or any product-related inquiries, OWC provides Suporte ao cliente 24 horas por dia, 7 dias por semana. Please refer to the official OWC webSite com informações de contato e recursos adicionais.
Para mais informações e suporte, visite o OWC Official Website.


