1. Introdução
The Xetron LMG-10X Digital Manifold Gauge is an advanced tool designed for HVAC and refrigeration systems. It provides precise measurements for pressure, temperature, vacuum, and automatically calculates superheat and subcooling. This manual will guide you through the setup, operation, and maintenance of your device.

Figure 1: Xetron LMG-10X Digital Manifold Gauge with included accessories.
2. Informações de segurança
Always read and understand all safety warnings and instructions before using the device. Failure to follow these instructions may result in electric shock, fire, or serious injury.
- Certifique-se de que todas as conexões estejam seguras antes de operar.
- Não exponha o dispositivo a temperaturas extremas ou à luz solar direta por períodos prolongados.
- Use only specified accessories and probes.
- Mantenha o dispositivo longe de água e outros líquidos.
- Entregue a manutenção somente a pessoal qualificado.
3. Conteúdo da embalagem
Verifique se todos os itens listados abaixo estão presentes em sua embalagem:
- 1 x Xetron Digital Manifold Gauge (LMG-10X)
- 2xClamp Sondas de temperatura
- 1 x Estojo de transporte
- 1 x Manual do Usuário (este documento)

Figure 2: What's in the box - Xetron Digital Manifold and Clamp Temperature Probes.
4. Configuração
4.1. Ligação inicial
- Insert batteries into the compartment on the back of the unit (if not pre-installed).
- Pressione e segure o botão liga/desliga (⏻) para ligar o dispositivo.
- The LCD screen will illuminate and display the initial measurement interface.
4.2. Connecting Probes and Hoses
Conecte o clamp temperature probes to the designated ports on the manifold. Ensure a secure connection. Refrigerant hoses (not included) can be connected to the 1/4" SAE threaded connectors at the bottom of the unit.
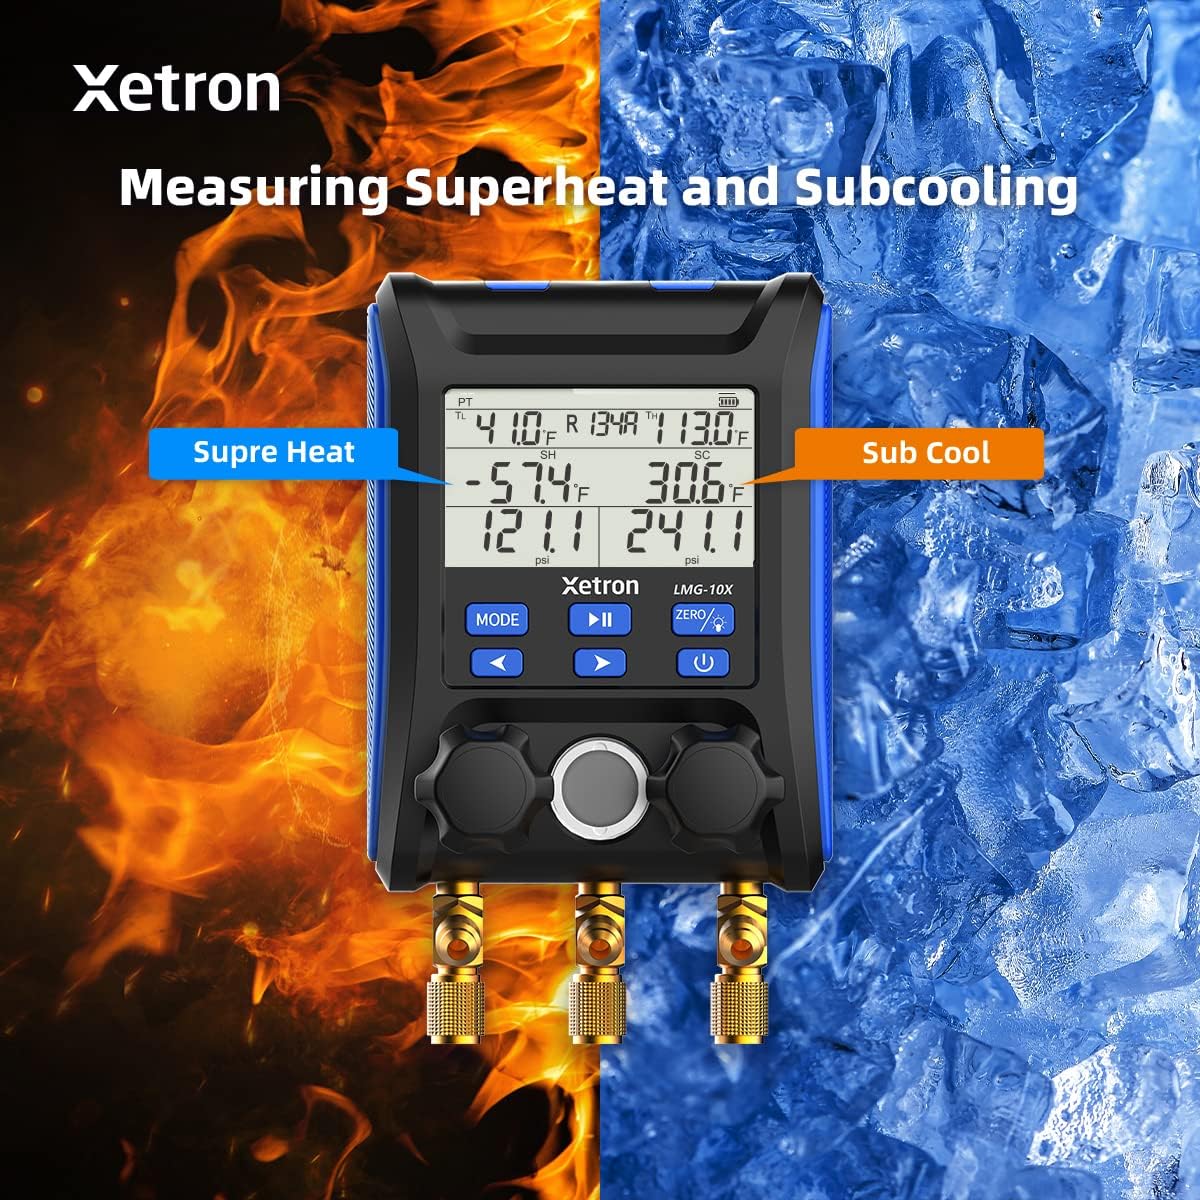
Figure 3: Connecting the Xetron LMG-10X to an HVAC system.
5. Instruções de operação
5.1. Pressure and Temperature Measurement Mode
This mode displays real-time pressure and temperature readings, along with calculated saturation temperatures (VSAT, LSAT).

Figure 4: Interface for Pressure and Temperature Measurement Mode.
5.2. Superheat and Subcooling Measurement
The device automatically calculates superheat (SH) and subcooling (SC) values based on the selected refrigerant and measured parameters.

Figure 5: Display showing Superheat and Subcooling measurements.
5.3. Pressure Hold Test Mode
To enter Pressure Hold Test mode, briefly press the MODO botão seguido pelo REPRODUZIR/PAUSAR button from VAC mode. This mode allows you to monitor pressure changes over time.

Figure 6: Interface for Pressure Hold Test Mode.
5.4. Unit Settings and Auto Shutdown
The device allows for conversion of various measurement units and configuration of automatic shutdown settings.

Figure 7: Temperature Unit Setting.
Figure 8: Pressure Unit Setting.
Figure 9: Auto Shutdown OFF.
Figure 10: Auto Shutdown ON.
6. Built-in Refrigerant Database
The Xetron LMG-10X comes with a comprehensive database of 88 types of refrigerants, allowing for accurate calculations and measurements across various systems.

Figure 11: Partial list of supported refrigerants.
7. Manutenção
7.1. Limpeza
Limpe o dispositivo com um pano macio, damp pano. Não utilize produtos de limpeza abrasivos ou solventes. Certifique-se de que o dispositivo esteja seco antes de guardá-lo.
7.2. Armazenamento
Store the device in its carrying case in a cool, dry place when not in use. Remove batteries if storing for extended periods to prevent leakage.
8. Solução De Problemas
| Problema | Possível causa | Solução |
|---|---|---|
| O dispositivo não liga. | Pilhas fracas ou descarregadas; pilhas inseridas incorretamente. | Substitua as pilhas; verifique a polaridade correta. |
| Leituras imprecisas. | Probes not properly connected; incorrect refrigerant selected. | Check probe connections; verify selected refrigerant matches system. |
| A tela está escura ou piscando. | Bateria fraca. | Substitua as pilhas. |
9. Especificações
- Modelo: XT-LMG-10X-EU
- Dimensões (C x L x A): 37 x 30 x 10 cm (14.57 x 11.81 x 3.94 polegadas)
- Peso do item: 1.2 kg (2.65 libras)
- Material: Acrilonitrila Butadieno Estireno (ABS)
- Refrigerant Database: 88 tipos
- Funções: Pressure & Temperature Measurement, Vacuum Measurement, Pressure Hold Test, Automatic Shutdown, Temperature Compensation
10. Garantia e Suporte
Xetron offers a one-year warranty for the LMG-10X Digital Manifold Gauge. For any questions or support needs, please contact Xetron customer service. We are committed to providing lifetime customer service.
For further assistance, please visit the official Xetron webou entre em contato com os canais de suporte.