1. Introdução
Obrigado pela compra.asing the DOOMAY Digital Alarm Clock. This compact and versatile alarm clock is designed for convenience and readability, featuring an adjustable LCD display, snooze function, weekend mode, and temperature display. This manual will guide you through the setup, operation, and maintenance of your new alarm clock to ensure optimal performance.
2. Informações de segurança
- Mantenha o dispositivo longe da água e de ambientes com alta umidade.
- Avoid exposing the clock to direct sunlight or extreme temperatures.
- Não tente desmontar ou reparar o dispositivo por conta própria. Consulte um profissional qualificado para obter assistência técnica.
- Use only the specified battery type (2 x AAA batteries).
- Remova as pilhas se o dispositivo não for usado por um longo período para evitar vazamentos.
- Mantenha as pilhas fora do alcance das crianças.
3. Conteúdo da embalagem
- DOOMAY Digital Alarm Clock (1 unit)
- Pilhas AAA (2 unidades)
- Manual do usuário (este documento)
4. Produto acabadoview
Familiarize yourself with the components and controls of your DOOMAY Digital Alarm Clock.
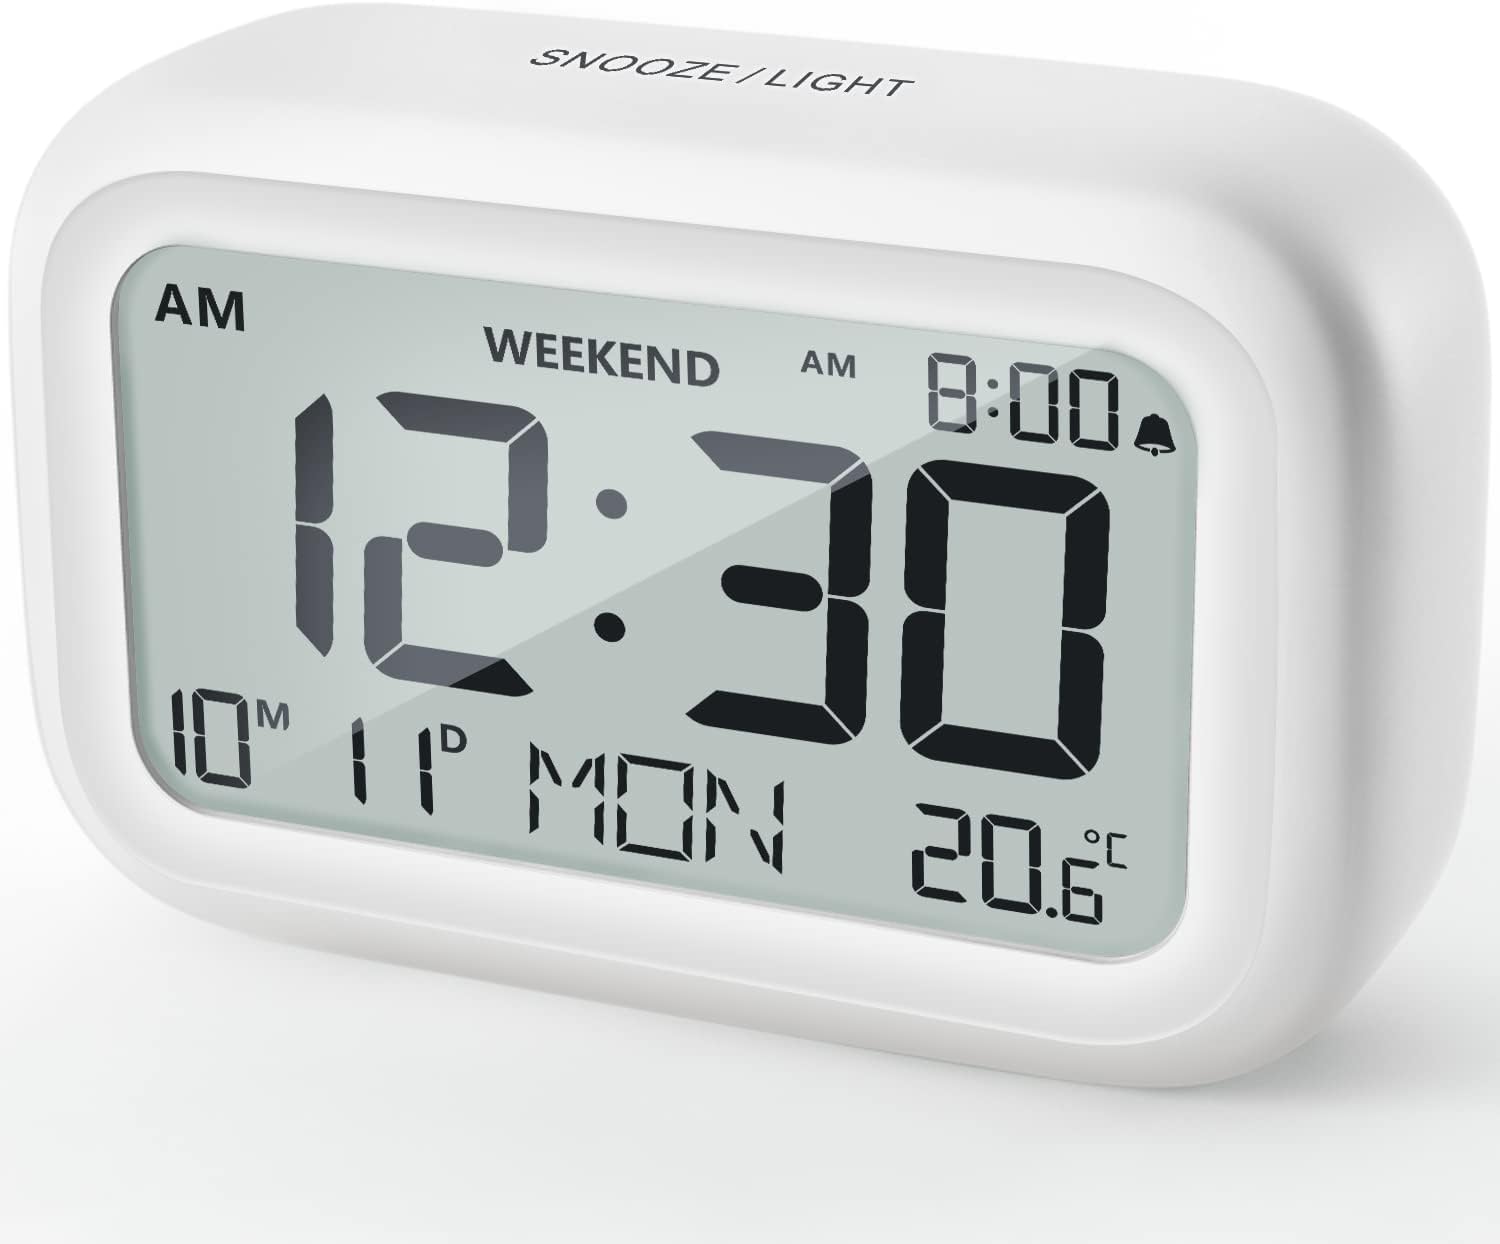
Figura 4.1: Frente View of the Alarm Clock
This image displays the front of the DOOMAY Digital Alarm Clock, highlighting its large, clear LCD screen. The screen shows the current time (12:30), AM indicator, day of the week (MON), date (10th month, 11th day), and indoor temperature (20.6°C). The top of the clock has a "SNOOZE/LIGHT" button.

Figura 4.2: Principais característicasview
This diagram illustrates the main functionalities of the alarm clock: 12/24H time display, calendar, alarm setting, adjustable volume, snooze function, backlight, weekend mode, and temperature display. The clock itself is shown on a wooden table, displaying 7:00 AM, Friday, and 28.8 degrees.

Figure 4.3: Back Panel Controls
This image shows the rear of the alarm clock, detailing the various control buttons and the battery compartment. Buttons are clearly labeled for: 12/24H time format, Alarm setting, Weekend mode, Date setting, Minus (-) for decreasing values, Plus (+) for increasing values, and °C/°F for temperature unit selection. The battery compartment is visible, designed for two AAA batteries.
Controles e exibição:
- Tela LCD: Shows time, date, day of week, AM/PM indicator, alarm status, and temperature.
- SNOOZE/LIGHT Button (Top): Activates snooze function during alarm; illuminates backlight for 5 seconds.
- 12/24H Button (Back): Alterna entre os formatos de hora de 12 e 24 horas.
- ALARM Button (Back): Entra no modo de configuração do alarme.
- WEEKEND Button (Back): Activates/deactivates weekend mode.
- DATE Button (Back): Entra no modo de configuração de data.
- MINUS (-) Button (Back): Decreases values during setting; adjusts alarm volume.
- PLUS (+) Button (Back): Increases values during setting; adjusts alarm volume.
- °C/°F Button (Back): Alterna entre as unidades de temperatura Celsius e Fahrenheit.
5. Configuração
5.1 Instalação da bateria
- Abra a tampa do compartimento da bateria localizada na parte traseira do relógio.
- Insert two (2) AAA batteries, ensuring correct polarity (+ and -).
- Feche bem a tampa do compartimento da bateria.
- The display will light up, and the clock will be ready for initial setup. A low battery symbol will appear when batteries need replacement. If the display shows "8888" flashing, it's also an indication to change batteries.
5.2 Configuração inicial de data e hora
- Definir hora:
- Pressione o 12/24H button to switch between 12-hour (with AM/PM) and 24-hour formats.
- Pressione e segure o 12/24H Pressione o botão por 3 segundos para entrar no modo de ajuste de hora. Os dígitos da hora piscarão.
- Use o + or - botões para ajustar a hora.
- Pressione o 12/24H Pressione o botão novamente para confirmar a hora e passar para a configuração dos minutos. Os dígitos dos minutos piscarão.
- Use o + or - botões para ajustar os minutos.
- Pressione o 12/24H button one more time to exit time setting.
- Definir data:
- Pressione e segure o DATA button for 3 seconds to enter date setting mode. The year digits will flash.
- Use o + or - botões para ajustar o ano.
- Pressione o DATA button again to confirm the year and move to month setting.
- Adjust the month using + or -.
- Imprensa DATA again to move to day setting.
- Adjust the day using + or -.
- Imprensa DATA one more time to exit date setting. The day of the week will automatically adjust.
6. Instruções de operação
6.1 Configurando o Alarme
- Pressione e segure o ALARME button for 3 seconds. The alarm hour digits will flash.
- Use o + or - botões para definir a hora do alarme desejada.
- Pressione o ALARME Pressione novamente o botão para confirmar a hora e passar para a configuração dos minutos. Os dígitos dos minutos do alarme piscarão.
- Use o + or - botões para definir o minuto do alarme desejado.
- Pressione o ALARME button one more time to exit alarm setting. The alarm icon (bell symbol) will appear on the display, indicating the alarm is active.
- To turn the alarm ON/OFF, simply press the ALARME button once. The bell icon will appear/disappear.
6.2 Função de soneca
When the alarm sounds, gently tap the large SNOOZE / LIGHT button on the top of the clock. The alarm will pause for 9 minutes and then sound again. This can be repeated multiple times.

Figure 6.1: Activating Snooze
This image demonstrates how to activate the snooze function by touching the top of the alarm clock. The text highlights that this action provides an additional 9 minutes of sleep after the alarm sounds.
To completely turn off the alarm after it sounds (without snoozing), press any button on the back of the clock.
6.3 Modo Fim de Semana
The weekend mode allows the alarm to sound only from Monday to Friday, preventing it from ringing on Saturday and Sunday.

Figure 6.2: Weekend Mode Activated
This image shows the alarm clock display with the "WEEKEND" indicator prominently displayed, signifying that the weekend mode is active. The accompanying text clarifies that in this mode, the alarm will only sound from Monday to Friday, ensuring undisturbed weekends.
- To activate Weekend Mode, press the FIM DE SEMANA button once. The "WEEKEND" indicator will appear on the display.
- To deactivate Weekend Mode, press the FIM DE SEMANA button again. The "WEEKEND" indicator will disappear.
6.4 Adjustable Alarm Volume
The alarm clock offers two volume levels: Low (70 dB) and High (85 dB).

Figure 6.3: Alarm Volume Levels
This image visually represents the two available alarm volume settings: L01 (85 dB) for a louder alarm and L02 (70 dB) for a softer alarm. The alarm clock is shown in a bedroom setting, emphasizing its use as a bedside device.
- No modo de exibição de hora normal, pressione o + or - buttons to cycle between the two alarm volume levels. The current volume level will be briefly displayed.
6.5 Função de retroiluminação
To illuminate the display in low light conditions, simply tap the SNOOZE / LIGHT button on the top of the clock. The backlight will activate for approximately 5 seconds, providing clear visibility of the time and other information.
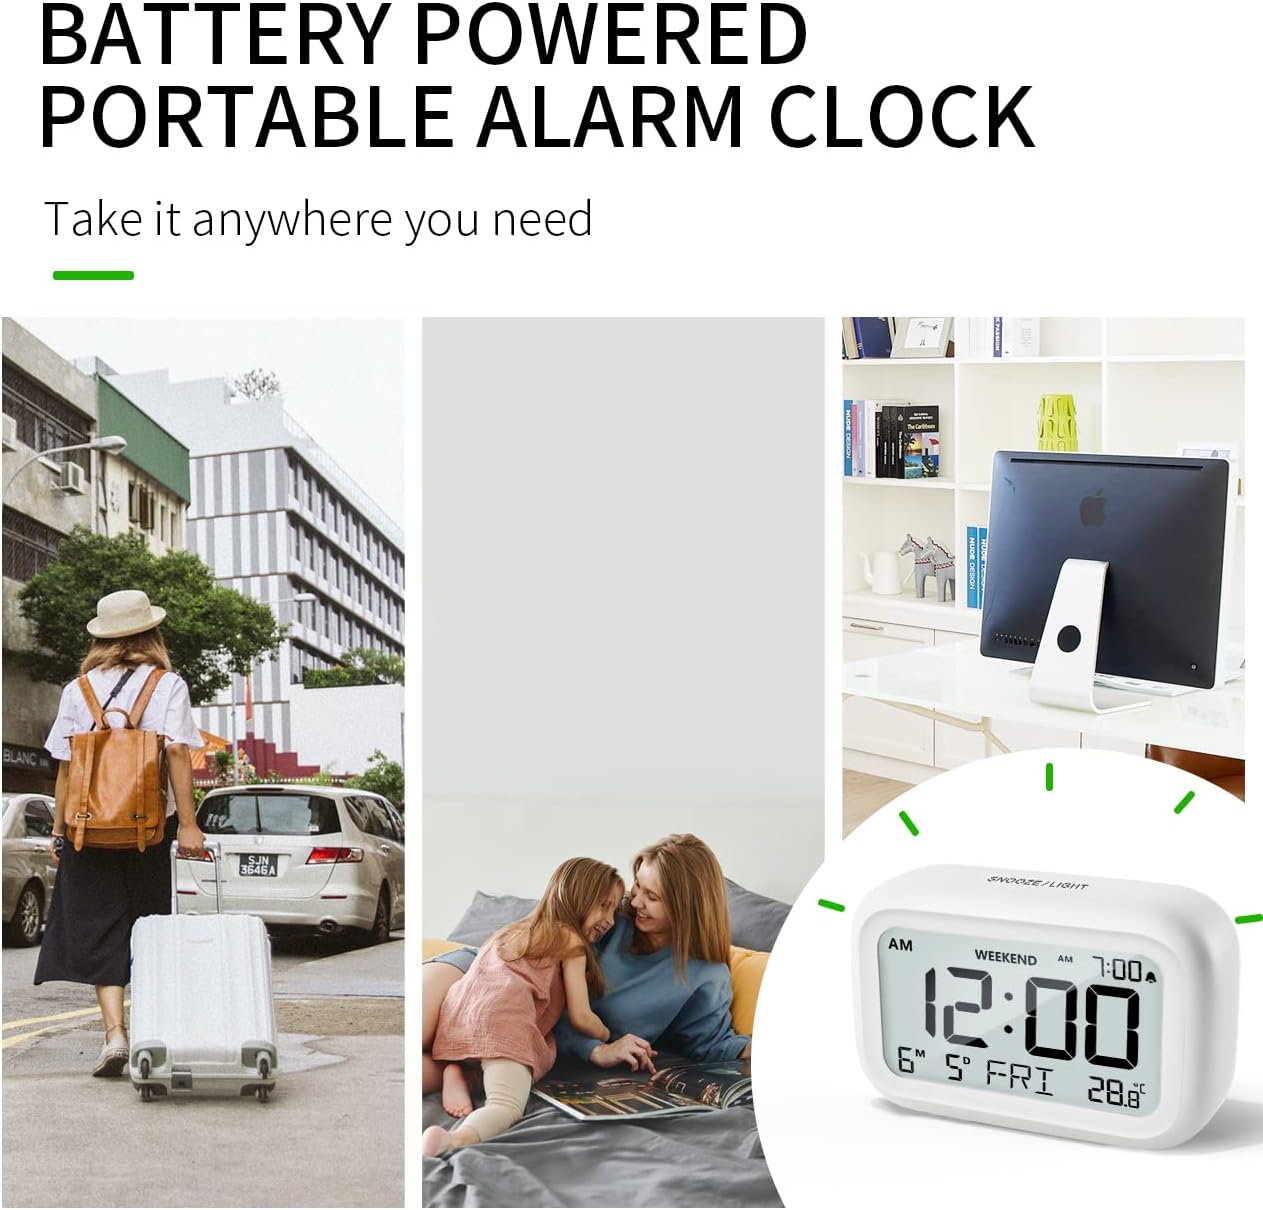
Figure 6.4: Backlight in Action
This image provides a side-by-side comparison of the alarm clock's display. On the left, the clock is shown in a well-lit environment. On the right, the same clock is shown in a dark setting with its 5-second backlight activated, demonstrating how the display becomes clearly visible at night.
6.6 Exibição de temperatura
The clock displays the indoor temperature. You can switch between Celsius (°C) and Fahrenheit (°F) units.
- To change the temperature unit, press the ° C / ° F botão na parte de trás do relógio.
7. Manutenção
7.1 Limpeza
Limpe o relógio com um pano macio e seco. Não utilize produtos de limpeza abrasivos ou solventes, pois podem danificar a superfície.
7.2 Substituição da bateria
When the low battery indicator appears on the display, or if the display shows "8888" flashing, it is time to replace the batteries. Follow the steps in Section 5.1 Battery Installation to replace the two AAA batteries.
8. Solução De Problemas
| Problema | Possível causa | Solução |
|---|---|---|
| A tela está em branco ou com brilho reduzido. | As pilhas estão descarregadas ou instaladas incorretamente. | Substitua as pilhas por pilhas AAA novas, certificando-se da polaridade correta. |
| O alarme não dispara. | Alarm is not activated, or Weekend Mode is ON. | Ensure the alarm icon is displayed. Check if Weekend Mode is active and deactivate if necessary. |
| Snooze function not working. | Not tapping the SNOOZE/LIGHT button correctly. | Ensure a firm, brief tap on the top SNOOZE/LIGHT button when the alarm is sounding. |
| A data e a hora estão incorretas. | Not set correctly or batteries were removed. | Refer to Section 5.2 Initial Time and Date Setting to re-set. |
9. Especificações
| Recurso | Detalhe |
|---|---|
| Número do modelo | 5293Reino Unido |
| Marca | DOOMAY |
| Dimensões (C x L x A) | 10.9 x 3.81 x 6.9 cm (4.29 x 1.5 x 2.72 polegadas) |
| Peso | 127.01 gramas (0.28 libras) |
| Material | Acrilonitrila Butadieno Estireno (ABS) |
| Fonte de energia | 2 pilhas AAA (incluídas) |
| Tipo de exibição | LCD digital |
| Níveis de volume do alarme | Low (70 dB), High (85 dB) |
| Duração da soneca | 9 minutos |
| Duração da luz de fundo | 5 segundos |
| Unidades de temperatura | Celsius (°C) / Fahrenheit (°F) |
10. Garantia e Suporte
DOOMAY products are designed for reliability and performance. For any questions, technical support, or warranty claims, please contact your retailer or visit the official DOOMAY website for assistance. Please retain your proof of purchase for warranty purposes.
For further information, you may visit the brand's Amazon store page: DOOMAY Store on Amazon


