Introdução
This manual provides detailed instructions for the setup, operation, and maintenance of your BISOFICE H5 Handheld POS Terminal. Please read this manual thoroughly before using the device to ensure proper functionality and to prevent damage. Keep this manual for future reference.
Produto acimaview
The BISOFICE H5 is a versatile handheld POS terminal designed for various business applications, integrating a barcode scanner, thermal printer, and robust communication capabilities within an Android 8.1 operating system.
Principais características:
- Android 8.1 OS for smooth and stable operation.
- Compact and wireless design with a 2550mAh rechargeable battery.
- Built-in 58mm thermal receipt printer with a printing speed of over 75mm/s.
- Intelligent payment terminal with 3G, WiFi, BT4.0, and WCDMA network support.
- 2MP focus camera for 1D/2D barcode scanning.
- 5.0-inch IPS touchscreen display (1280x720 resolution).
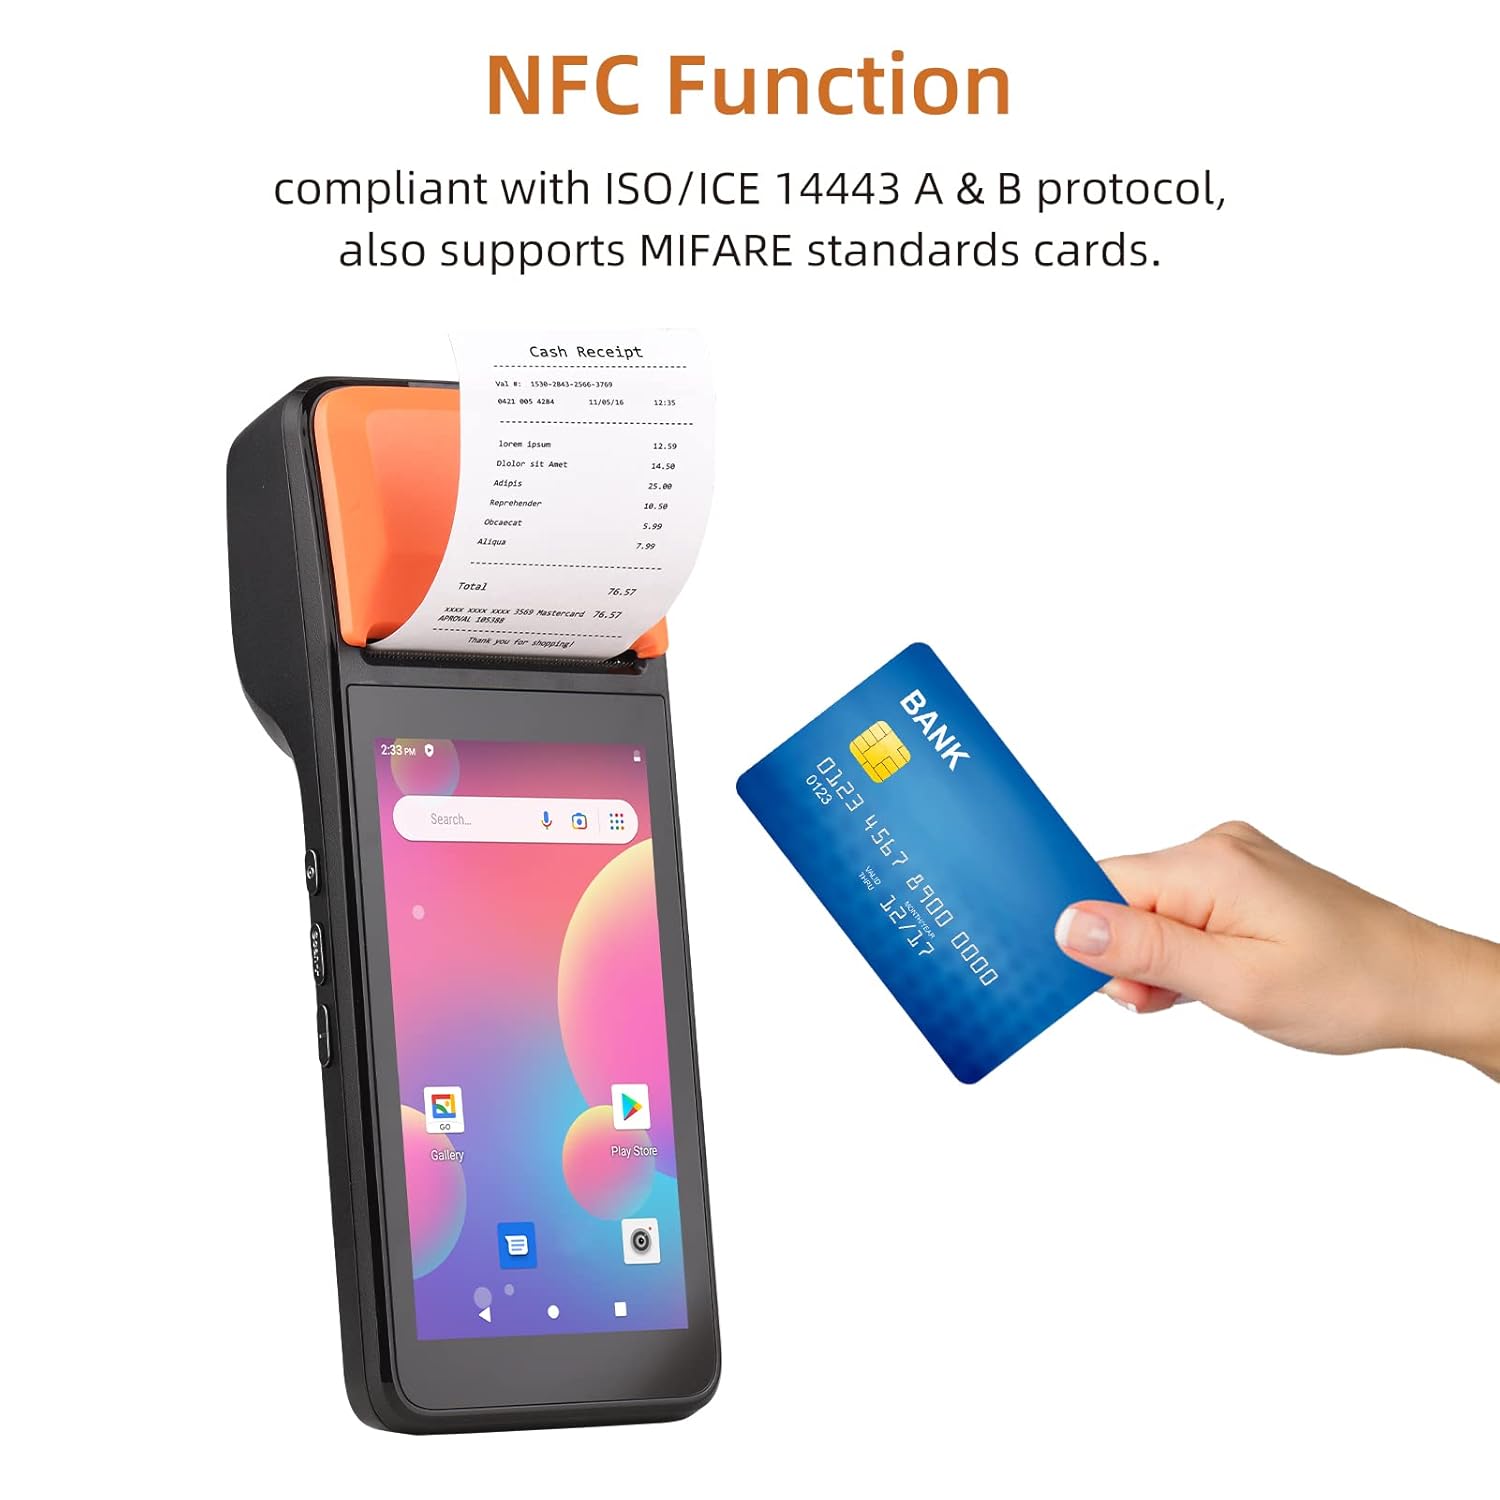
- NFC function compliant with ISO/ICE 14443 A & B protocol, supporting MIFARE standard cards.
Em geral View:

Dimensões do dispositivo:

Operação portátil:

Funcionalidade NFC:
Thermal Printer Details:

Camera and Barcode Reader:

Especificações
The following table details the technical specifications of the BISOFICE H5 Handheld POS Terminal:
| Recurso | Detalhe |
|---|---|
| Modelo | H5 |
| CPU | MTK Dual CPU, 4-core 1.3GHz |
| Sistema operacional | Androide 8.1 |
| Memória | 8GB ROM + 1GB RAM |
| Mostrar | 5.0" HD IPS (1280x720), G+FF features, Touch Screen |
| Impressora | High-speed 58mm thermal printer, >75mm/s print speed, 58x40mm paper roll |
| Câmera Traseira | 2 million focus camera (2MP), supports 1D/2D barcode recognition |
| Bateria | 8.8V, 2550mAh Lithium ion polymer Battery |
| Tempo de carregamento | 2 horas |
| Tempo de descarga | 30 horas |
| Tempo de espera | 85 horas |
| Comunicação sem fio | GSM: B2/B3/B5/B8; WCDMA: B1/B2/B5/B8 |
| Wi-fi | 2.4G, support IEEE 802.11 a/b/g/n |
| Bluetooth | BT2.1/3.0/4.0 BLE |
| NFC | Yes, compliant with ISO/ICE 14443 A & B protocol |
| Slot para cartão SIM | Standard SIM card holder |
| Interface de comunicação | Type-C (supports OTG) |
| Charger Input/Output | Input: AC 100-240V, Output: 5V, 2A |
| Dimensões (CxLxA) | 20.83 x 7.62 x 8.89 cm |
| Peso do item | 499 g |
| Componentes incluídos | PDA Machine, Type-C Cable, Thermal Paper Roll |

Guia de configuração
1. Carregando o dispositivo
Before first use, fully charge the device. Connect the provided Type-C cable to the device's charging port and the other end to the AC adapter. Plug the adapter into a power outlet. The charging indicator will illuminate. A full charge takes approximately 2 hours.
2. Installing the SIM Card (Optional)
If you require 3G network connectivity, install a standard SIM card:
- Locate the SIM card slot, usually under the battery cover or on the side.
- Insert the standard SIM card into the slot with the metal contacts facing down, ensuring it clicks into place.
- Feche a tampa com segurança.
3. Loading Thermal Paper Roll
The device uses 58mm wide thermal paper rolls with a maximum diameter of 40mm.
- Open the printer cover by gently pushing the latch or button.
- Insert the thermal paper roll with the printing surface facing the print head. Ensure the paper feeds smoothly.
- Puxe uma pequena quantidade de papel para além da borda de corte.
- Feche a tampa da impressora firmemente até ouvir um clique.
4. Ligar / desligar
- Para ligar: Press and hold the power button (typically on the side) until the screen illuminates.
- Para desligar: Mantenha pressionado o botão liga/desliga até que o menu de desligamento apareça. Selecione "Desligar" e confirme.
Instruções de operação
1. Navegação básica no Android
The BISOFICE H5 operates on Android 8.1. Navigate using the 5.0-inch touchscreen:
- Tocar: Para selecionar um item ou abrir um aplicativo.
- Deslize: To scroll through lists or screens.
- Pitada: To zoom in or out (if supported by the application).
- Botão Home: Retorna à tela inicial.
- Botão Voltar: Retorna à tela anterior.
- Botão de aplicativos recentes: Exibe os aplicativos usados recentemente.
2. Conectando-se a redes
- Wi-fi: Vá para Configurações > Rede e Internet > Wi-FiLigue o Wi-Fi, selecione a rede desejada e digite a senha, se solicitado.
- 3G/Dados Móveis: If a SIM card is installed, go to Configurações > Rede e Internet > Rede móvel e certifique-se de que os dados móveis estejam ativados.
- Bluetooth: Vá para Configurações > Dispositivos conectados > Bluetooth. Turn Bluetooth on to pair with other devices.
3. Using the Barcode Scanner
The device features a 2MP camera and CCD 1D reader for scanning barcodes.
- Open an application that supports barcode scanning (e.g., a POS application or a dedicated scanner app).
- Point the camera/scanner lens at the barcode, ensuring it is within the focus area.
- The device will typically emit a sound or vibrate upon successful scan.
4. Printing Receipts/Labels
The integrated thermal printer allows for quick printing of receipts or labels.
- Ensure thermal paper is correctly loaded.
- Within your POS or printing application, select the print option.
- Confirm print settings if prompted (e.g., number of copies).
- The device will automatically print the document. Tear off the receipt using the serrated edge.
5. Using NFC Function
The NFC function enables contactless transactions and data exchange.
- Certifique-se de que o NFC esteja ativado em Configurações > Dispositivos conectados > NFC.
- Open an application that supports NFC (e.g., a payment app).
- Hold the NFC-enabled card or device near the NFC reader area (typically near the printer section) until the transaction is confirmed.
Manutenção
1. Limpeza do dispositivo
- Use um pano macio, seco e sem fiapos para limpar a parte externa do dispositivo.
- For the touchscreen, use a screen cleaner specifically designed for electronic displays. Do not spray cleaner directly onto the screen.
- Evite usar produtos químicos agressivos, solventes ou materiais abrasivos.
2. Printer Head Maintenance
Regularly clean the thermal print head to ensure clear print quality.
- Desligue o dispositivo antes de limpá-lo.
- Abra a tampa da impressora.
- Gently wipe the print head with an alcohol swab or a soft cloth dampenriquecido com álcool isopropílico.
- Allow the print head to dry completely before closing the cover and powering on the device.
3. Cuidados com a bateria
- Evite expor o dispositivo a temperaturas extremas.
- Do not fully discharge the battery frequently. Charge it before it drops too low.
- If storing the device for an extended period, charge the battery to about 50% and store it in a cool, dry place.
Solução de problemas
| Problema | Possível causa | Solução |
|---|---|---|
| O dispositivo não liga. | Bateria fraca; dispositivo travou. | Charge the device for at least 30 minutes. If still unresponsive, perform a forced restart (refer to device documentation for specific key combination, usually holding power button for 10-15 seconds). |
| Não é possível imprimir. | No paper; paper jammed; printer cover not closed; print head dirty; application error. | Check and load paper. Clear any paper jams. Ensure printer cover is securely closed. Clean the print head. Restart the printing application or the device. |
| Qualidade de impressão ruim. | Dirty print head; low quality thermal paper; paper loaded incorrectly. | Clean the print head. Use high-quality thermal paper. Ensure paper is loaded correctly with the thermal side facing the print head. |
| O leitor de código de barras não está funcionando. | Poor lighting; barcode damaged; scanner lens dirty; application not active. | Ensure adequate lighting. Check barcode for damage. Clean the scanner lens. Ensure the scanning application is open and active. |
| No network connection (Wi-Fi/3G). | Wi-Fi/Mobile data off; incorrect password; out of range; SIM card issue. | Check Wi-Fi/Mobile data settings. Re-enter Wi-Fi password. Move closer to the Wi-Fi router. Reinsert SIM card or check its activation status. |
Garantia e Suporte
For warranty information and technical support, please refer to the warranty card included with your product or contact BISOFICE customer service through their official website or the retailer where the product was purchased. Please have your product model (H5) and serial number ready when contacting support.


