1. Produto acabadoview
The LoraTap WiFi Switch Module Pro is a smart device designed to integrate with your existing electrical system, offering remote control, energy monitoring, and voice control capabilities. It allows you to manage your lights or other appliances via the Smart Life application and is compatible with traditional wall switches.
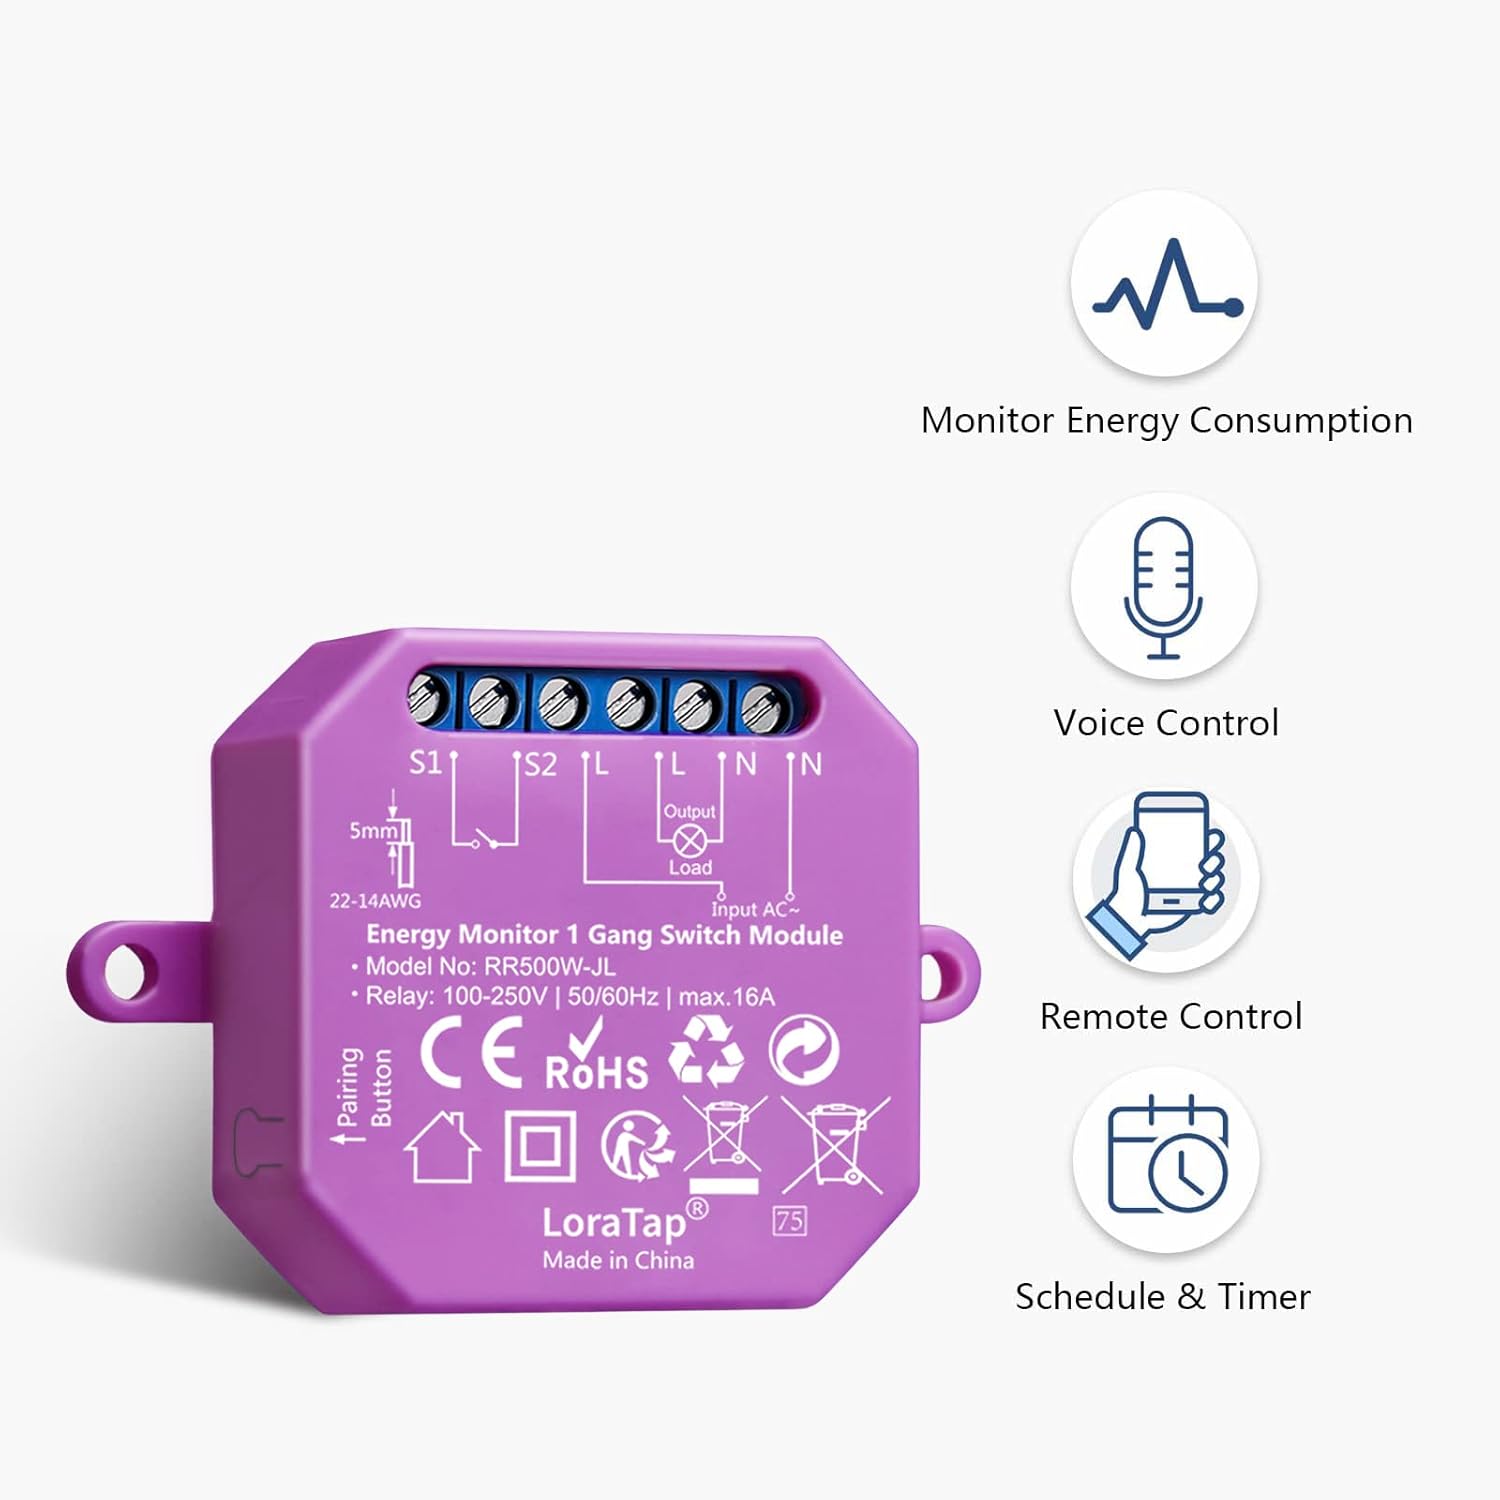
Figure 1: LoraTap WiFi Switch Module Pro. This image displays the compact module with its wiring terminals and a pairing button, alongside icons representing its key features: energy consumption monitoring, voice control, remote control, and scheduling/timer functions.
2. Informações de segurança
- Risco elétrico: Installation should only be performed by a qualified electrician or a person with a thorough understanding of electrical systems. Ensure power is disconnected at the circuit breaker before installation.
- Volumetage e atual: Do not exceed the maximum load ratings of 250V, 5A, or 1150W for this module. Overloading can cause damage or fire.
- Somente para uso interno: Este dispositivo foi projetado para uso interno em ambientes secos. Não o exponha à umidade ou a temperaturas extremas.
- Fiação: Follow all local electrical codes and wiring diagrams provided in this manual. Incorrect wiring can lead to electric shock or fire.
- Crianças: Mantenha o dispositivo e seus componentes fora do alcance de crianças.
3. Conteúdo da embalagem
Verifique se todos os itens estão presentes no seu pacote:
- LoraTap WiFi Switch Module Pro (RR502W-JL-V2-SLT)
- Manual do usuário
4. Especificações
| Recurso | Especificação |
|---|---|
| Número do modelo | RR502W-JL-V2-SLT |
| Marca | Lora Tap |
| Vol operacionaltage | 100-250V AC |
| Max atual | 5A |
| Potência Máxima | 1150W (2300W for 250V, 5A) |
| Protocolo sem fio | Wi-Fi 2.4 GHz (IEEE 802.11 b/g/n) |
| Material | Acrilonitrila Butadieno Estireno (ABS) |
| Dimensões | 13.9 x 7.4 x 2.7 cm |
| Peso | 120 gramas |
| Certificações | CE, FCC |
5. Instalação e configuração
5.1 Instruções de Fiação
AVISO: Ensure the main power supply is turned off at the circuit breaker before attempting any wiring. Incorrect wiring can cause electric shock or damage to the device.
- Desligue a energia no disjuntor principal.
- Open the junction box or switch box where the module will be installed.
- Connect the wires according to the appropriate wiring diagram below. The module supports various configurations, including single-pole switches and 3-way (two-way) switches.
- Certifique-se de que todas as conexões dos fios estejam seguras.
- Carefully place the module and wiring back into the junction box.
- Restaure a energia no disjuntor.

Figure 2: Detailed Wiring Diagrams. This image illustrates three common wiring scenarios: connecting the module without an existing wall switch, with a single-pole wall switch, and with a 3-way (two-way) switch setup. Pay close attention to the Input L, Input N, Output L, Output N, S1, and S2 terminals.
5.2 App Pairing (Smart Life)
- Baixe o aplicativo "Smart Life" na App Store (iOS) ou na Google Play Store (Android).
- Cadastre-se ou faça login na sua conta Smart Life.
- Ensure your smartphone is connected to a 2.4GHz Wi-Fi network. The module does not support 5GHz Wi-Fi directly. If you have a dual-band router, ensure you select the 2.4GHz network.
- Open the Smart Life app, tap the "+" icon in the top right corner to add a device.
- Select "Electrical" then "Switch (Wi-Fi)" or "Socket (Wi-Fi)" depending on the app's latest interface.
- Press and hold the "Pairing Button" on the LoraTap module for approximately 5 seconds until the indicator light flashes rapidly.
- In the app, confirm that the indicator light is flashing rapidly and follow the on-screen instructions to connect to your Wi-Fi network.
- Após a conexão, você pode renomear o dispositivo e atribuí-lo a um cômodo.

Figure 3: Module Integration and App Interface. This image shows the LoraTap module discreetly installed behind a traditional wall switch, alongside a smartphone screen demonstrating the Smart Life app's energy monitoring and scheduling capabilities.
6. Instruções de operação
6.1 Monitoramento de Energia
The LoraTap module features an integrated high-precision energy meter. You can view real-time and historical energy consumption data directly within the Smart Life application.
- Open the Smart Life app and select your LoraTap switch module.
- Navigate to the "Energy" or "Statistics" section within the device interface.
- Aqui você pode view current power (W), voltage (V), current (mA), and total energy consumption (kWh) for the day, month, or year.

Figure 4: Energy Monitoring Interface. This image displays the Smart Life app's energy statistics screen, showing real-time power usage and historical consumption data presented in graphs and lists for daily and monthly periods.
6.2 Controle de voz
The module is compatible with Amazon Alexa and Google Assistant for convenient voice control.
- Ensure your LoraTap module is successfully paired with the Smart Life app.
- Abra o aplicativo Amazon Alexa ou Google Home.
- Enable the "Smart Life" skill/service and link your Smart Life account.
- Discover devices. Your LoraTap module should appear.
- Agora você pode usar comandos de voz como:
- "Alexa, ligue [Nome do Dispositivo]"
- "Ok Google, desligue [Nome do dispositivo]"

Figure 5: Voice Control Functionality. This image illustrates the use of voice commands to control connected devices, featuring compatibility with Amazon Alexa and Google Assistant.
6.3 Remote Control and Scheduling
Control your devices from anywhere and automate their operation using the Smart Life app.
- Remoto ON/OFF: Tap the device icon in the Smart Life app to turn it on or off remotely.
- Agendamento: Set specific times for the device to turn on or off automatically.
- Select your device in the app.
- Tap "Schedule" or "Timer".
- Add new schedules with desired times and actions (ON/OFF).
- Funções do temporizador: The module supports various timer functions including Countdown, Schedule, Random, Inching, and Circulate.
- Contagem regressiva: Turn off after a set duration.
- Agendar: Set daily or weekly on/off times.
- Aleatório: Turn on/off randomly within a time frame (e.g., for security when away).
- Avançando: Turn on for a brief period, then off automatically.
- Circular: Repeat on/off cycles.
- Controle de Grupo: Control multiple LoraTap modules simultaneously by creating groups in the Smart Life app.
- Compartilhamento de dispositivos: Share control of your devices with family members through the app.

Figure 6: Advanced Timer Functions. This image highlights the five distinct timer functions available in the Smart Life app for the LoraTap module, offering greater automation flexibility compared to basic scheduling.

Figure 7: Remote Control via Smart Life App. This image depicts a user interacting with the Smart Life application on a smartphone to manage various smart devices in different rooms.

Figure 8: Device Sharing Feature. This graphic illustrates how control of the smart module can be shared among multiple family members through the Smart Life app.
6.4 Traditional Switch Compatibility
The LoraTap module is designed to work in parallel with your existing traditional wall switches, allowing both manual and smart control of your connected device.
- After installation, you can still use your physical wall switch to turn the light or appliance on/off.
- The module will synchronize its status with the physical switch, ensuring consistent control regardless of the method used.

Figure 9: Parallel Operation with Wall Switch. This image demonstrates how the LoraTap WiFi switch module functions seamlessly alongside a traditional wall switch, allowing both manual and smart control of a connected light fixture.
7. Manutenção
- Limpeza: Ensure the device is powered off before cleaning. Use a soft, dry cloth to wipe the surface. Do not use liquid cleaners or sprays.
- Atualizações de firmware: The Smart Life app may prompt you for firmware updates. It is recommended to keep the device's firmware updated for optimal performance and security. Follow the in-app instructions for updates.
- Verificações regulares: Verifique periodicamente as conexões da fiação para garantir que permaneçam seguras.
8. Solução De Problemas
| Problema | Possível causa | Solução |
|---|---|---|
| O dispositivo não liga. | No power supply; incorrect wiring; circuit breaker tripped. | Check circuit breaker. Verify wiring according to diagrams. Ensure power is restored. |
| Cannot pair with Smart Life app. | Incorrect Wi-Fi band (5GHz); weak Wi-Fi signal; device not in pairing mode. | Ensure phone is on 2.4GHz Wi-Fi. Move device closer to router. Press and hold pairing button until indicator flashes rapidly. Try resetting the module. |
| O controle remoto não funciona. | No internet connection; module offline; app issue. | Check home internet connection. Verify module's Wi-Fi status in app. Restart app or phone. |
| O controle de voz não responde. | Smart Life skill not linked; device name not recognized; internet issue. | Ensure Smart Life skill is enabled and linked in Alexa/Google Home app. Use the exact device name. Check internet connection. |
| Os dados de monitoramento de energia estão incorretos ou ausentes. | Incorrect wiring; device malfunction. | Verify wiring, especially load connections. Contact support if issue persists. |
Reinicializando o Módulo
To reset the module to factory settings and enter pairing mode, press and hold the pairing button for approximately 5-10 seconds until the indicator light flashes rapidly.
9. Garantia e Suporte
Garantia: This LoraTap product comes with a 2-year warranty from the date of purchase, covering manufacturing defects. Please retain your proof of purchase for warranty claims.
Suporte ao cliente: For technical assistance, troubleshooting, or warranty inquiries, please contact LoraTap customer support through their official website or the retailer where the product was purchased. Provide your model number (RR502W-JL-V2-SLT) and a detailed description of the issue.
Recursos on-line: For additional information, FAQs, and updated guides, visit the official LoraTap support page: www.loratap.com/support (Example link, replace if actual link is known).


