1. Introdução
This manual provides detailed instructions for the setup, operation, and maintenance of your ORIA Digital Alarm Clock (Model OUS-HY-WA109B). Please read this manual thoroughly before using the product to ensure proper function and safety.
1.1 Conteúdo da embalagem
- ORIA Digital Alarm Clock (Model OUS-HY-WA109B)
- Cabo de alimentação USB
- Manual do usuário

Figure 1: Package contents including the ORIA Digital Alarm Clock, USB cable, and user manual.
2. Informações de segurança
- Não exponha o dispositivo a temperaturas extremas, luz solar direta ou alta umidade.
- Mantenha o dispositivo longe de água ou outros líquidos.
- Use only the provided USB cable or a certified equivalent for power.
- Não tente desmontar ou reparar o dispositivo sozinho. Entre em contato com o suporte ao cliente para obter assistência.
- Descarte as baterias de acordo com os regulamentos locais.
3. Configuração
3.1 Ligando o dispositivo
The ORIA Digital Alarm Clock offers dual power options:
- DC Cable Power (Recommended): Connect the provided USB power cable to the DC 5V port on the back of the clock and plug the other end into a USB power adapter (not included) or a USB port. The display will remain continuously on.
- Battery Power (Backup/Power Saving Mode): Insert 3 AAA batteries (not included) into the battery compartment on the back of the clock. In battery mode, the screen will automatically turn off after 8 seconds to conserve power. Touch the top button to wake up the screen for 8 seconds.
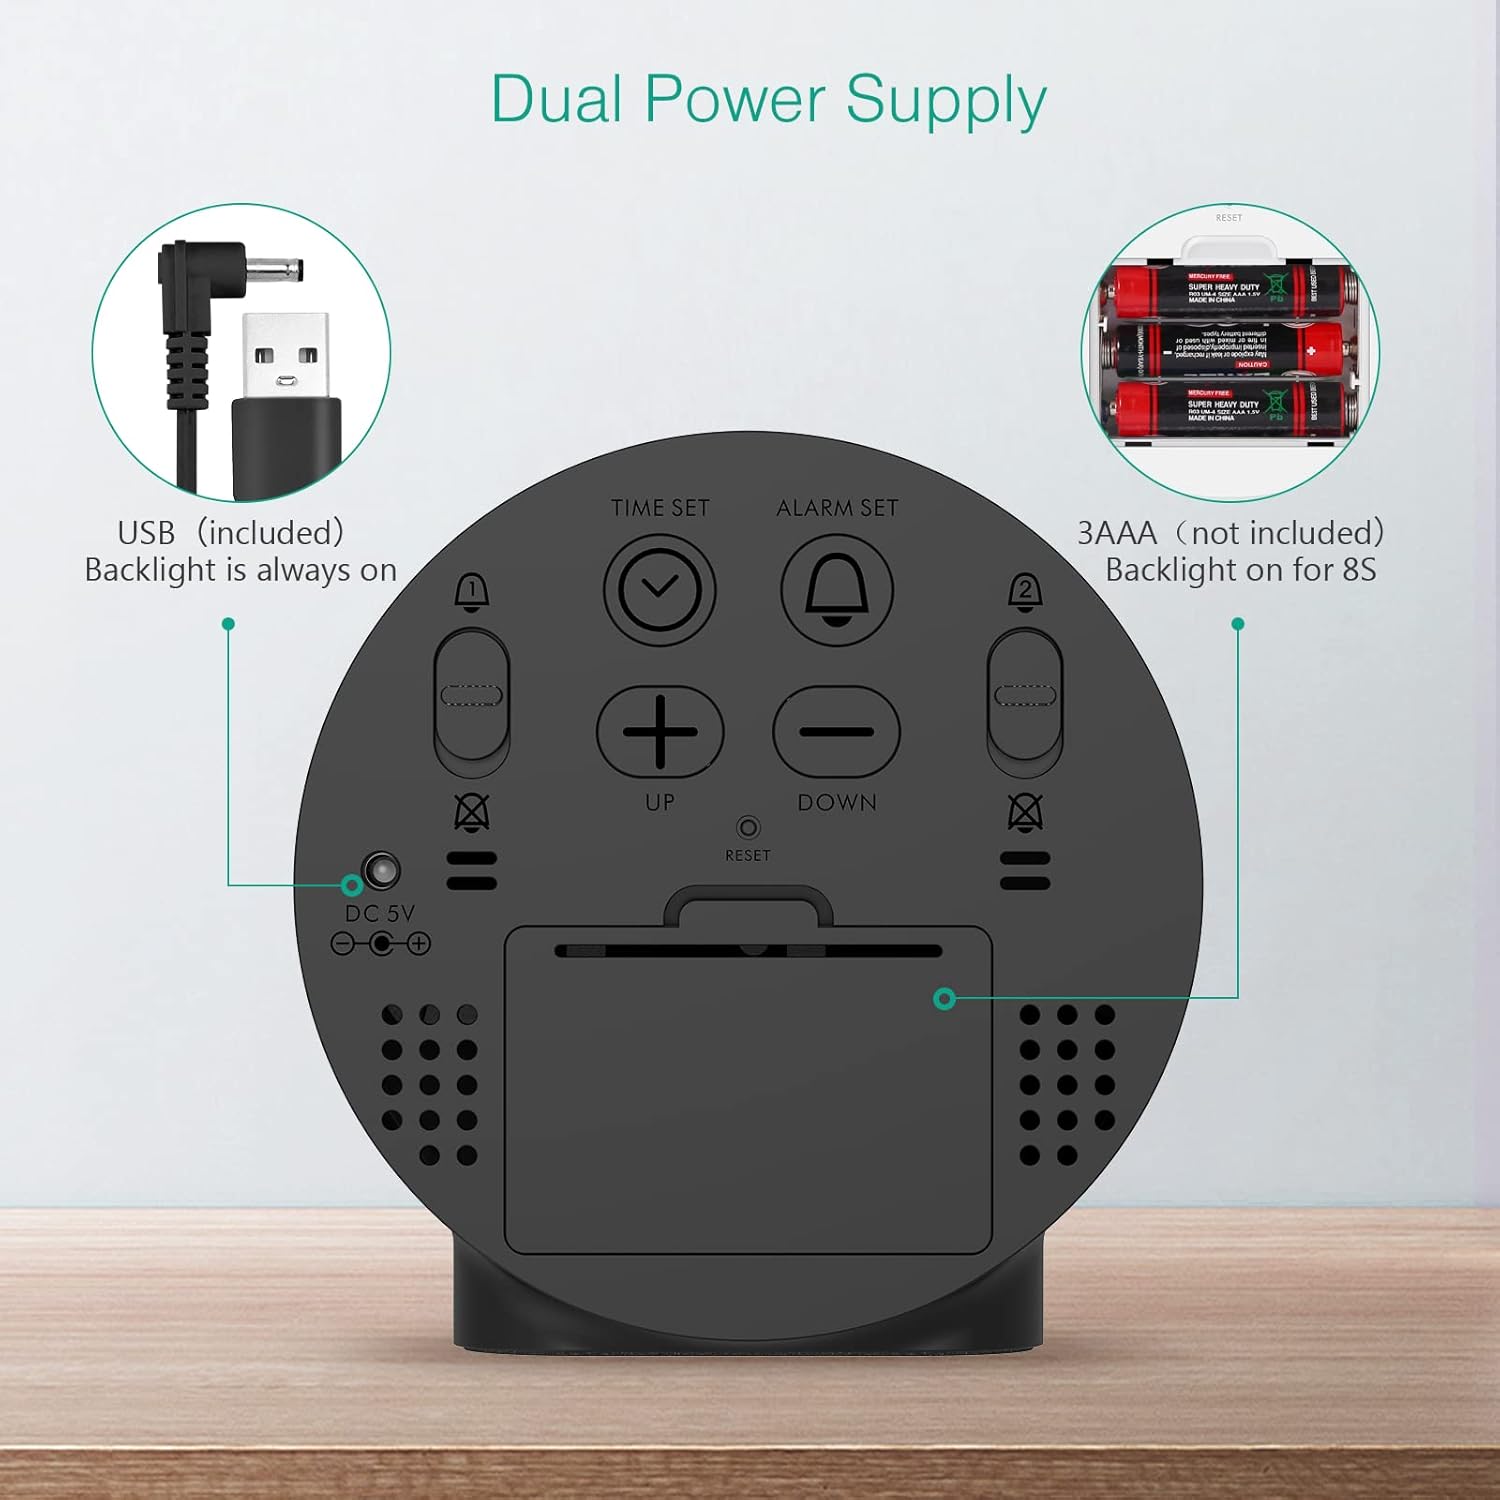
Figure 2: Back panel illustrating the USB power input and battery compartment for dual power supply.
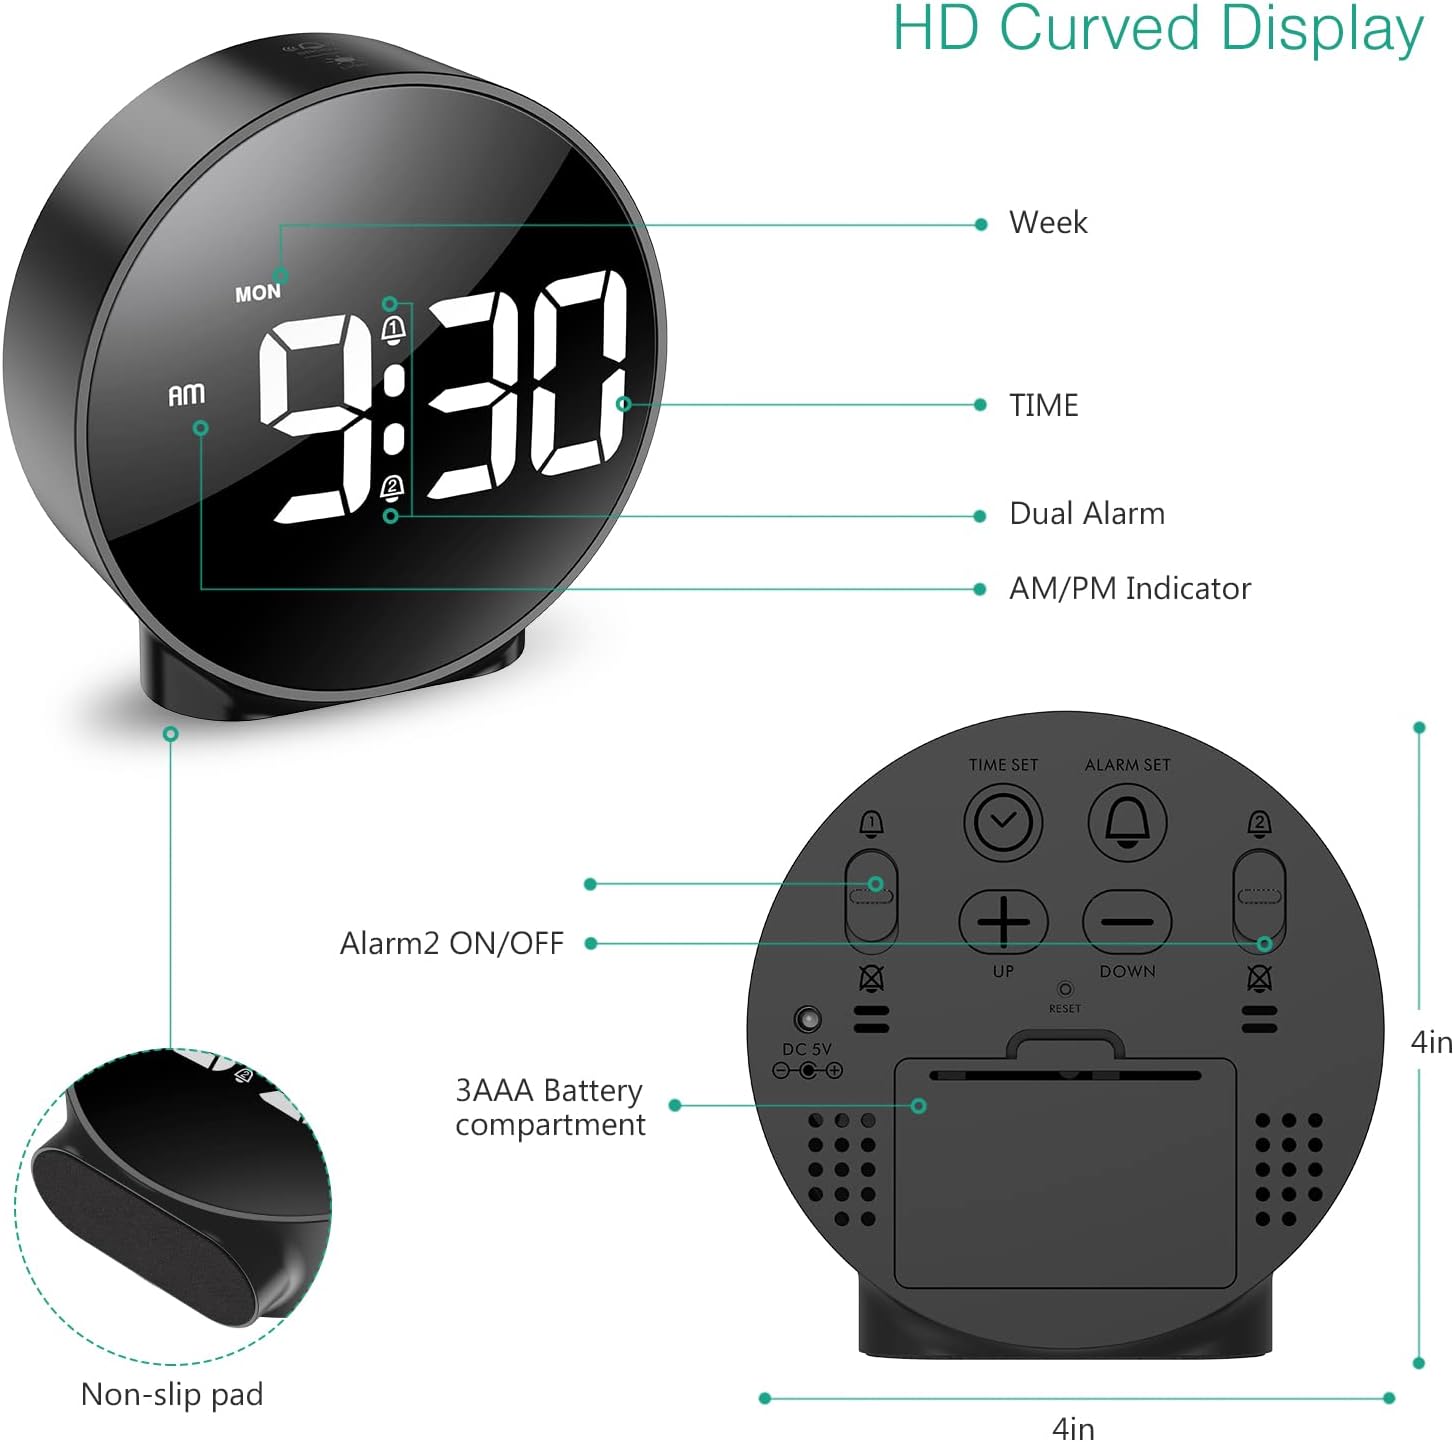
Figura 3: Detalhado view of the clock's back panel, highlighting the DC 5V input, battery compartment, and control buttons.
4. Instruções de operação
4.1 Setting the Time (12/24Hr Format)
- Pressione e segure o HORÁRIO DEFINIDO button on the back of the clock for 3 seconds to enter time setting mode. The hour digits will start flashing.
- Use o UP or ABAIXO botões para ajustar a hora.
- Imprensa HORÁRIO DEFINIDO Para confirmar a hora e passar para a configuração dos minutos, os dígitos dos minutos piscarão.
- Use o UP or ABAIXO botões para ajustar os minutos.
- Imprensa HORÁRIO DEFINIDO again to confirm the minute and exit time setting mode.
- Para alternar entre o formato de 12 horas e o de 24 horas, pressione o 12/24H botão.
4.2 Configurar alarmes (alarmes duplos)
The clock supports two independent alarms (Alarm 1 and Alarm 2) with 5 alarm modes.
- Pressione e segure o ALARME DEFINIDO botão (para Alarme 1) ou ALARME 2 LIGADO/DESLIGADO button (for Alarm 2) for 3 seconds to enter alarm setting mode. The hour digits will flash.
- Use o UP or ABAIXO botões para ajustar a hora do alarme.
- Pressione o respectivo ALARME DEFINIDO or ALARME 2 LIGADO/DESLIGADO Pressione o botão novamente para confirmar a hora e passar para a configuração dos minutos. Os dígitos dos minutos piscarão.
- Use o UP or ABAIXO botões para ajustar o minuto do alarme.
- Pressione o respectivo ALARME DEFINIDO or ALARME 2 LIGADO/DESLIGADO button again to confirm the minute and select the alarm mode. The display will show the current mode (e.g., "1-1" for one day).
- Use o UP or ABAIXO buttons to cycle through the 5 alarm modes:
- 1-1: Alarm sounds once.
- 1-5: O alarme toca de segunda a sexta-feira.
- 1-6: O alarme toca de segunda a sábado.
- 1-7: Alarm sounds Monday to Sunday.
- 6-7: Alarm sounds Saturday to Sunday.
- Pressione o respectivo ALARME DEFINIDO or ALARME 2 LIGADO/DESLIGADO button one last time to confirm the alarm mode and exit alarm setting.
- To turn an alarm ON or OFF, short press the respective ALARME DEFINIDO or ALARME 2 LIGADO/DESLIGADO botão. Um ícone de alarme aparecerá no visor quando ativado.
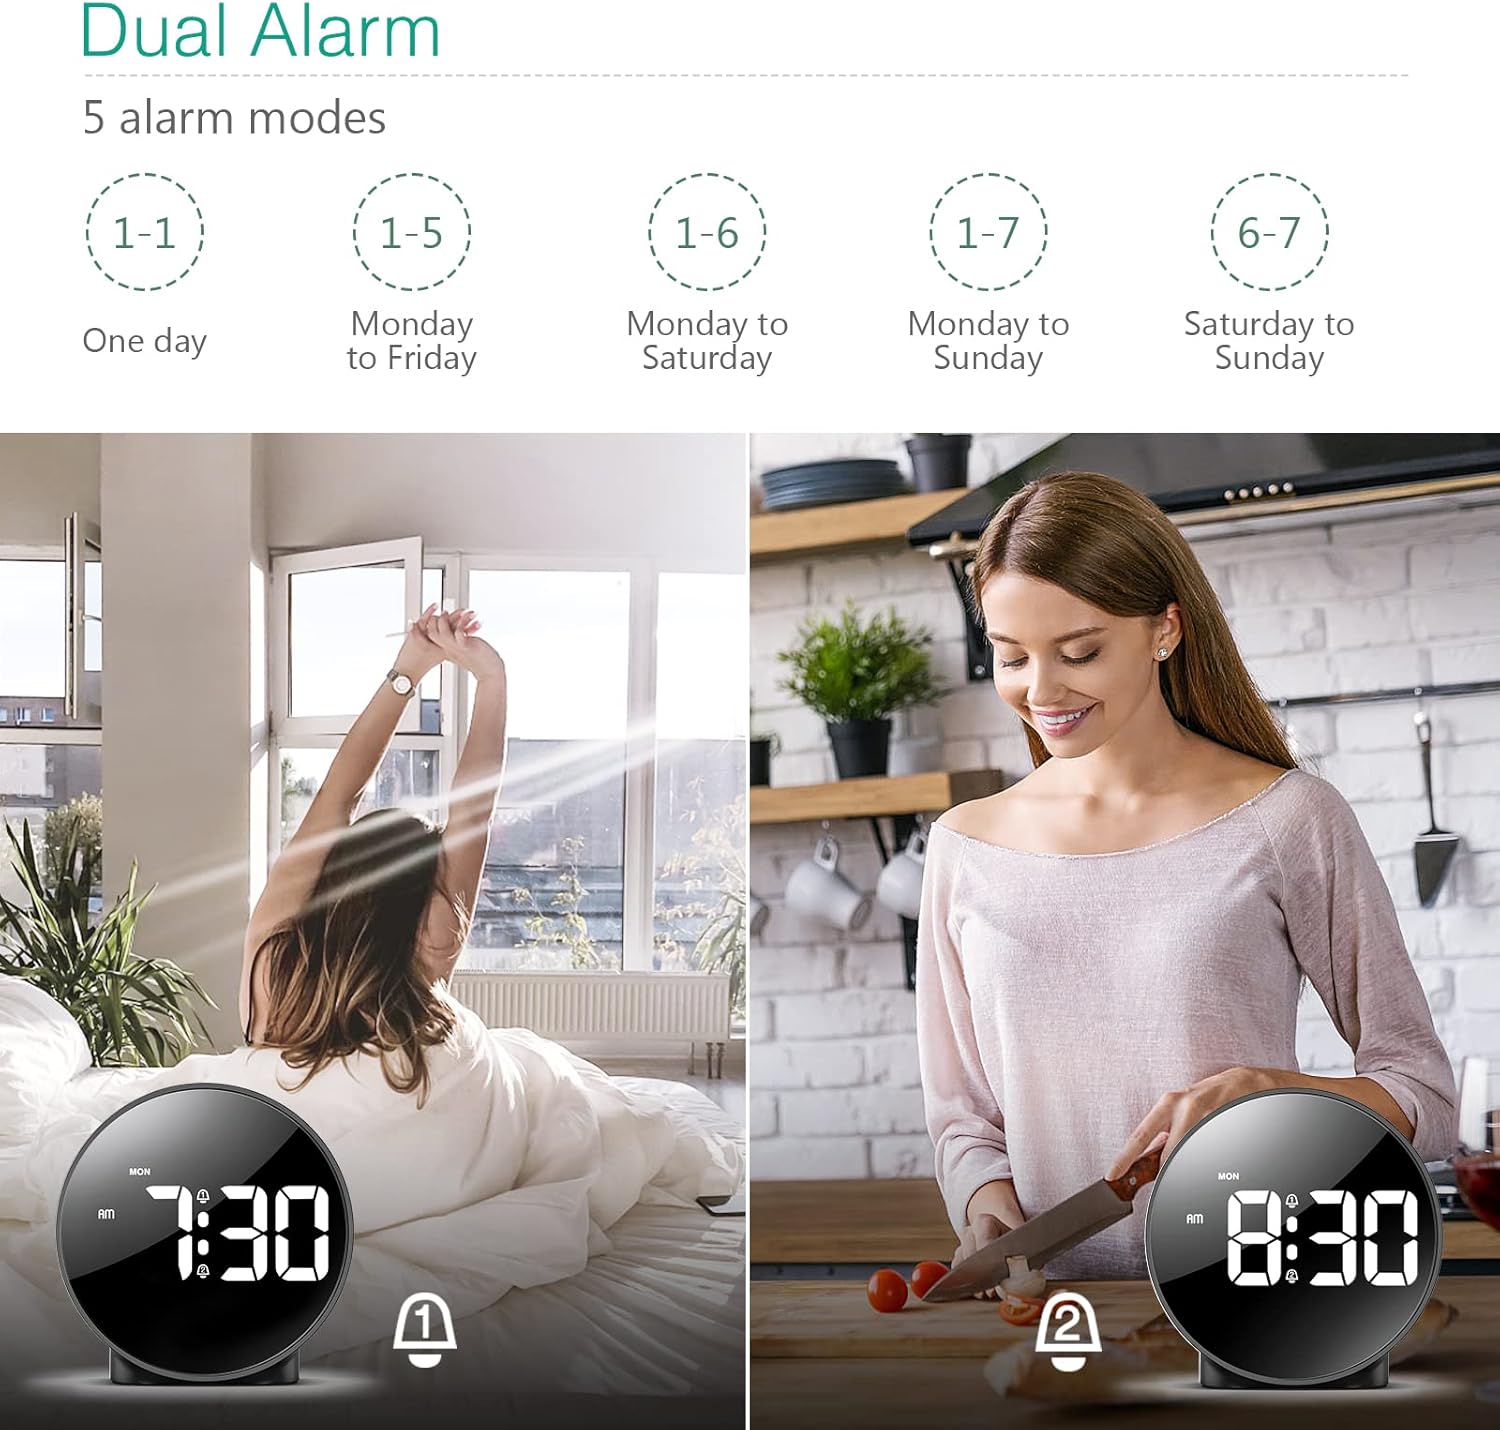
Figure 4: Illustration of the dual alarm functionality with various scheduling modes.
4.3 Função de soneca
Quando o alarme tocar, pressione o botão grande. SNOOZE / LIGHT button on the top of the clock to activate the snooze function. The alarm will pause for 5 minutes and then sound again. You can repeat this process multiple times.

Figure 5: Activating the snooze function by touching the top of the clock.
4.4 Ajustando o brilho
The clock features 4 levels of adjustable brightness. Short press the SNOOZE / LIGHT button on the top of the clock to cycle through the brightness levels (100%, 80%, 60%, and 0% (off)).

Figure 6: Visual representation of the four adjustable brightness levels of the clock display.
4.5 Horário de Verão (DST)
The clock supports Daylight Saving Time adjustment. Refer to the included mini-manual for specific instructions on how to activate or deactivate DST.
5. Características
- HD LED Display: Large, high-definition curved display for clear time reading.
- Dual Alarms with 5 Modes: Set two independent alarms with flexible scheduling options (one-day, weekdays, weekends, or every day).
- Brilho ajustável: Four levels of display brightness, including an off mode, to suit various environments and preferences.
- Função soneca: Provides an additional 5 minutes of sleep with a simple touch.
- Formato 12/24 horas: Alterne facilmente entre os formatos de exibição de hora padrão e militar.
- Fonte de alimentação dupla: Operates via USB cable for continuous display or AAA batteries for power-saving mode (display turns off after 8 seconds).
- Design compacto: Suitable for various locations such as bedrooms, living rooms, offices, or for travel.
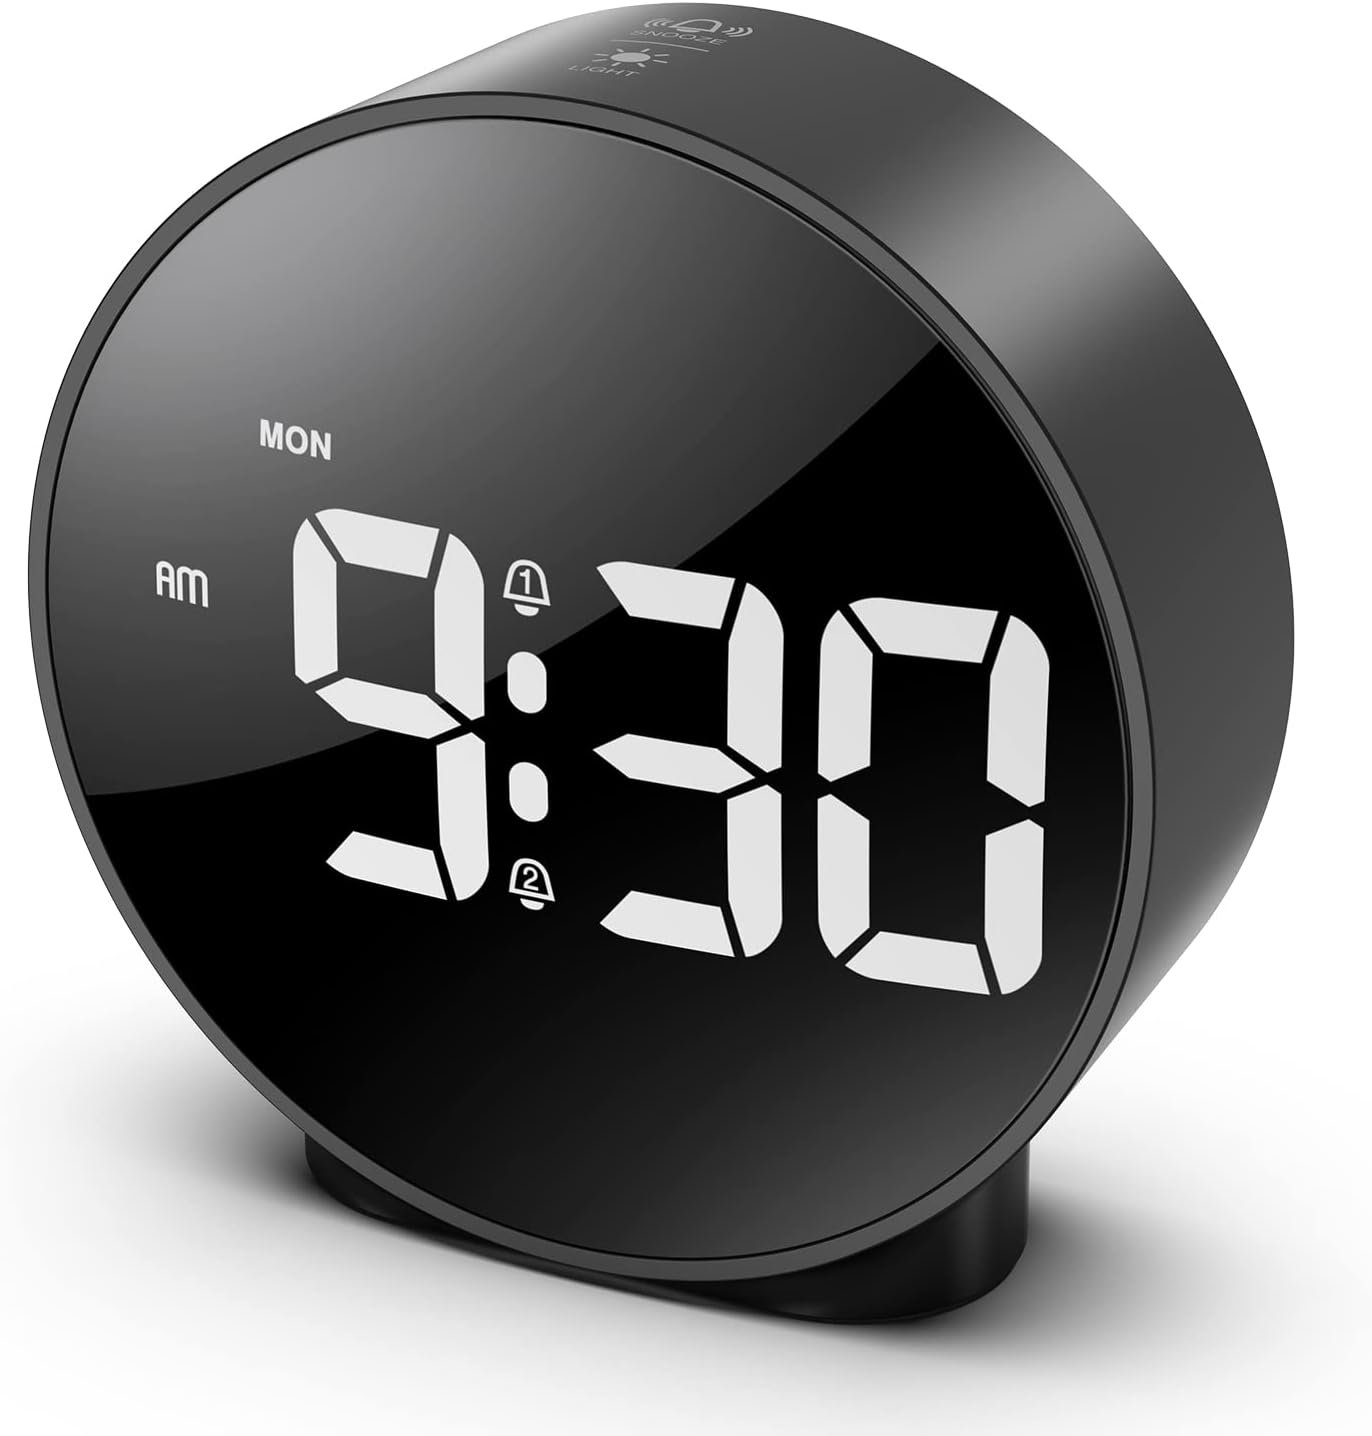
Figure 7: The ORIA Digital Alarm Clock showcasing its clear HD LED display.
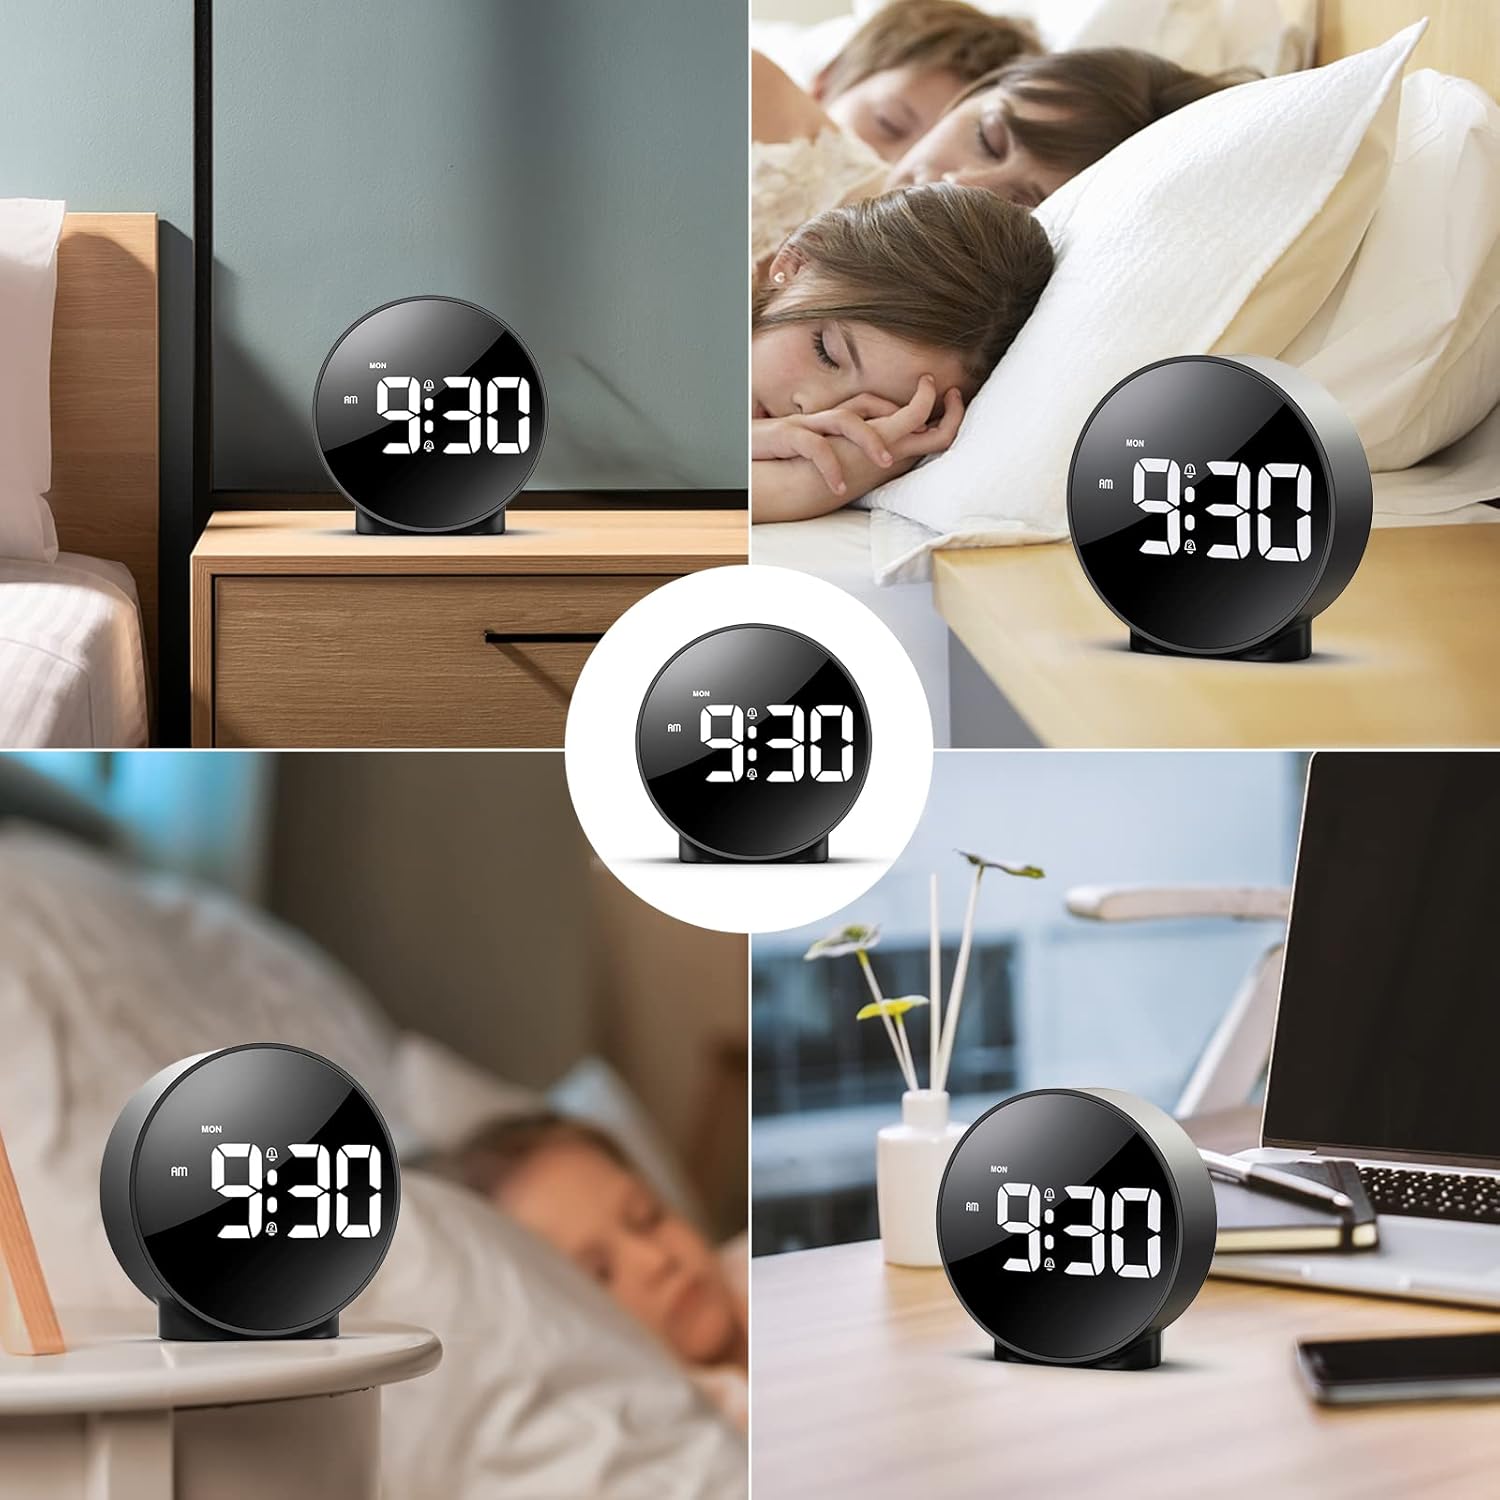
Figure 8: The versatile ORIA Digital Alarm Clock integrated into different environments like a bedroom, office, and living room.
6. Manutenção
- Limpe o relógio com um pano macio e seco. Não utilize produtos de limpeza abrasivos ou solventes.
- Se não for utilizar o produto por um período prolongado, remova as pilhas para evitar vazamentos.
7. Solução De Problemas
- Display is off in battery mode: This is normal for power saving. Touch the top button to activate the display for 8 seconds. For continuous display, use the USB power cable.
- Botões não respondem: Try resetting the clock by pressing the small REINICIAR button located on the back panel using a thin object (e.g., a paperclip).
- Alarme não soa: Ensure the alarm is activated (alarm icon visible on display) and the volume is not set to zero.
- Data/hora incorreta: Re-enter time setting mode and adjust the time and date as per Section 4.1.
8. Especificações
| Marca | ORIA |
| Número do modelo | OUS-HY-WA109B |
| Cor | Black Case & White Digit |
| Tipo de exibição | LED digital |
| Dimensões do produto | 4.29"L x 4.8"A |
| Peso do item | 5.9 onças (0.17 quilogramas) |
| Fonte de energia | Corded Electric & Battery Powered (3x AAA, not included) |
| Material | Plástico |
| Características especiais | Alarm, LED Display, Adjustable Brightness, Dual Alarms, Snooze |
9. Garantia e Suporte
- Garantia de 1 anos: O produto é coberto por uma garantia limitada de 1 anos.
- 90-Day Free Replacements: Enjoy free replacements for eligible issues within 90 days of purchase.
- Devoluções gratuitas em 30 dias: Returns are accepted within 30 days of purchase.
- Suporte ao cliente 24 horas por dia, 7 dias por semana: For any inquiries or assistance, please contact ORIA customer support.
- Suporte técnico vitalício: Beneficie de suporte técnico vitalício para o seu produto.
Para obter mais assistência, visite o ORIA Store on Amazon.


