1. Introdução
Obrigado pela compra.asing the Shanrya Digital Mirror Alarm Clock. This manual provides essential information for the proper setup, operation, and maintenance of your device. Please read these instructions carefully before use and retain them for future reference.

Figura 1: Frente view of the Shanrya Digital Mirror Alarm Clock displaying 4:30 in red LED digits.
2. Configuração
2.1 Conteúdo da embalagem
- Shanrya Digital Mirror Alarm Clock
- Cabo de alimentação USB
- Manual do usuário (este documento)
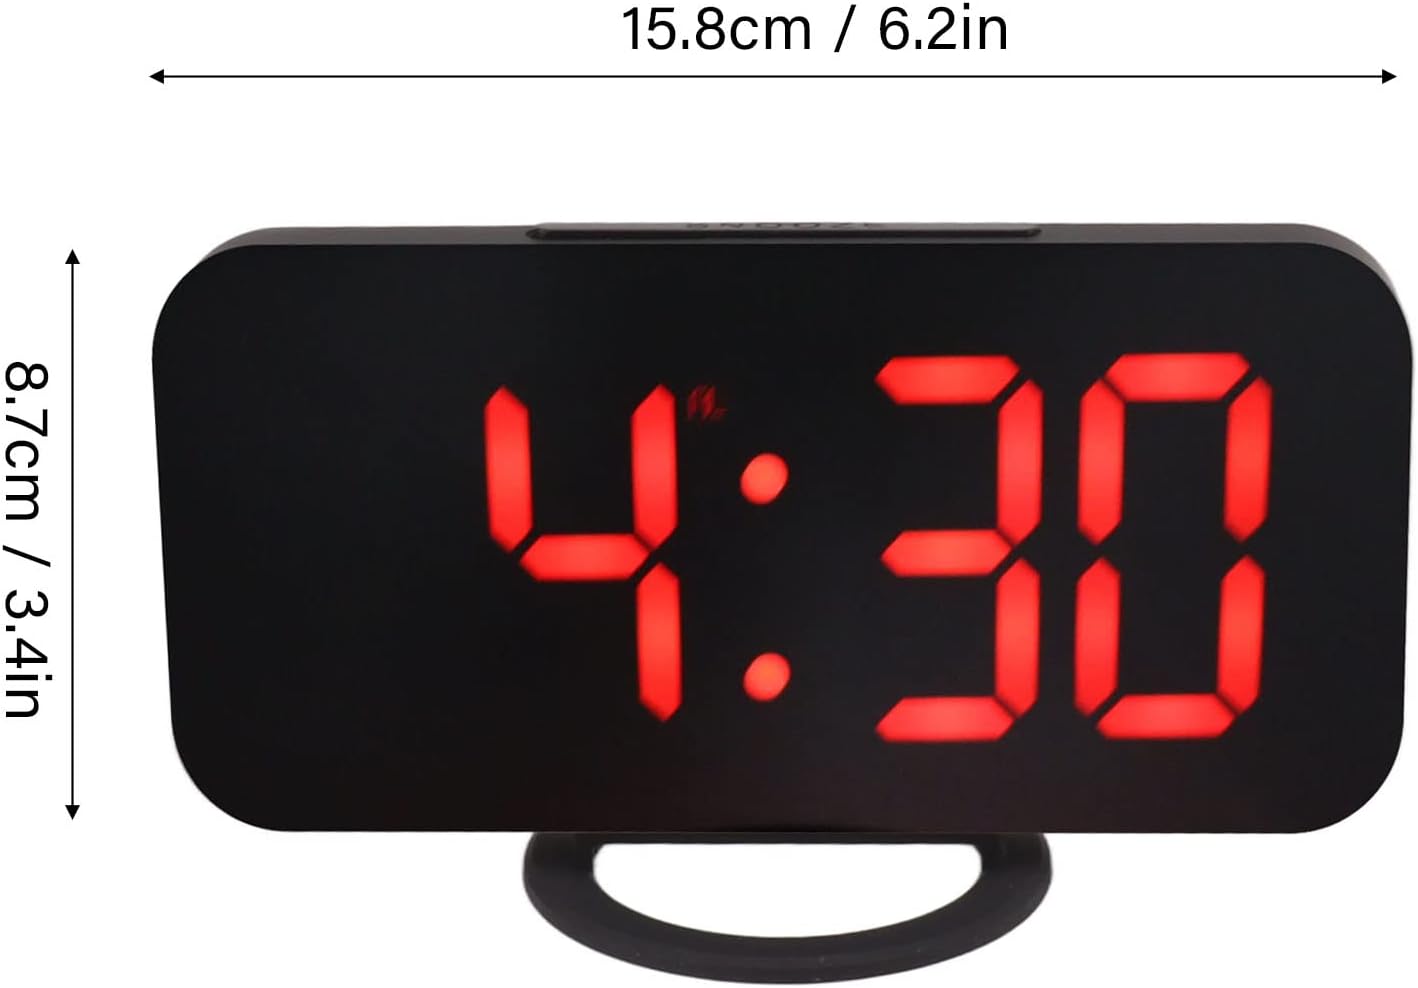
Figure 2: The alarm clock shown with its USB power cable, ready for connection.
2.2 Conexão de Energia
- Connect the small end of the provided USB power cable to the DC 5V input port on the back of the alarm clock.
- Conecte a extremidade USB padrão do cabo a um adaptador de energia USB (não incluído) ou a uma porta USB energizada.
- O visor acenderá, indicando que o relógio está ligado.
Observação: This clock requires continuous power via USB. It does not operate on batteries for primary function, but may have a small internal battery for time memory during power outages (not user-replaceable).
3. Instruções de operação
3.1 Funções dos botões
The clock features several buttons, typically located on the top or side. Refer to Figure 3 for button identification.

Figura 3: Detalhado view of the clock's control buttons and examples of different display brightness levels.
- Botão MODE: Used to switch between time display, alarm setting, and other modes.
- Botões PARA CIMA/PARA BAIXO: Used to adjust values (time, alarm) or brightness levels.
- Botão SONECA: Activates the snooze function when the alarm sounds.
3.2 Definição da hora
- Pressione o MODO Pressione o botão até que o visor do tempo pisque.
- Use o UP e ABAIXO botões para ajustar a hora.
- Imprensa MODO Novamente, para alternar para o ajuste de minutos.
- Use o UP e ABAIXO botões para ajustar os minutos.
- Imprensa MODO Para confirmar e sair do modo de configuração de hora.
3.3 Configurando o Alarme
- Pressione o MODO button repeatedly until the alarm icon (e.g., a bell) appears and the alarm time flashes.
- Use o UP e ABAIXO botões para definir a hora do alarme desejada.
- Imprensa MODO Novamente, para alternar para o ajuste de minutos.
- Use o UP e ABAIXO botões para definir os minutos desejados do alarme.
- Imprensa MODO to confirm and activate the alarm. The alarm icon will remain displayed.
- To deactivate the alarm, repeat the steps and press MODO até que o ícone de alarme desapareça.
3.4 Função de soneca
Quando o alarme tocar, pressione o SONECA button (usually located on top of the clock) to temporarily silence the alarm. The alarm will sound again after a preset interval (e.g., 5-10 minutes). To turn off the alarm completely, press any other button or let it ring for its full duration.
3.5 Ajuste de brilho
The clock offers multiple brightness levels for its LED display, including manual adjustment, automatic adjustment, and a night mode. This allows for optimal visibility in various lighting conditions.
- Ajuste manual: In time display mode, press the UP or ABAIXO buttons to cycle through different brightness levels (e.g., Dark, Mid Gear, Bright).
- Ajuste automático: Some models may feature an ambient light sensor that automatically adjusts display brightness based on room lighting. Refer to Figure 3 for visual representation of brightness levels.
- Modo noturno: A specific setting that dims the display significantly during predefined night hours to prevent disturbance. Consult the specific button sequence for your model to activate/deactivate night mode.
4. Manutenção
4.1 Limpeza
To clean the clock, gently wipe the surface with a soft, dry, or slightly damp cloth. Do not use abrasive cleaners, solvents, or chemical sprays, as these can damage the mirror finish and electronic components.
4.2 Armazenamento
If storing the clock for an extended period, disconnect it from the power source and store it in a cool, dry place away from direct sunlight and extreme temperatures.
5. Solução De Problemas
| Problema | Possível causa | Solução |
|---|---|---|
| A tela está em branco ou não acende. | Sem energia ou conexão solta. | Ensure the USB cable is securely connected to both the clock and a powered USB port/adapter. Try a different USB port or adapter. |
| O alarme não dispara. | Alarm not set or deactivated. Volume too low (if applicable). | Verify the alarm is set and the alarm icon is displayed. Check if there's a volume setting (though most digital clocks have fixed alarm volume). |
| O horário está incorreto. | Hora incorreta ou interrupção de energia. | Reset the time according to section 3.2. If power was interrupted, the clock may need to be reset. |
| A tela está muito brilhante ou muito escura. | É necessário ajustar o nível de brilho. | Adjust the brightness manually using the UP/DOWN buttons as described in section 3.5. |
6. Especificações
- Número do modelo: Shanrya1am475rqfe-12
- ASIN: B0BVC2VWF3
- Marca: Shanrya
- Tipo de exibição: LED digital (vermelho)
- Características: Alarm, Snooze, Dimmable Display (Manual, Auto, Night Mode)
- Fonte de energia: DC 5V via USB cable
- Dimensões: Approximately 15.8 cm (6.2 in) x 8.7 cm (3.4 in) (Width x Height)
- Primeira data disponível: 25 de março de 2023

Figure 4: Diagram illustrating the approximate dimensions of the alarm clock.
7. Garantia e Suporte
Este produto está coberto pela garantia padrão do fabricante. Para obter informações específicas sobre os termos e condições da garantia, consulte a documentação fornecida no momento da compra ou entre em contato com o seu revendedor.
For technical support or inquiries, please contact the seller or manufacturer through the platform where the product was purchased. Please have your model number (Shanrya1am475rqfe-12) and ASIN (B0BVC2VWF3) ready when contacting support.


