1. Informações importantes de segurança
Please read and understand all instructions before beginning installation. Failure to do so may result in electric shock, fire, or other injuries that could be fatal or cause property damage.
- AVISO: To avoid electric shock, ensure power is turned off at the circuit breaker or fuse box before installation.
- Todas as ligações elétricas devem estar em conformidade com os códigos e regulamentos locais ou com o Código Elétrico Nacional (NEC).
- Consulte um eletricista qualificado se não tiver certeza sobre o processo de instalação.
- This fixture is designed for indoor use in damp localizações.
- Não tente alterar a luminária ou seus componentes.
2. Conteúdo da embalagem
Verify that all parts are included before proceeding with installation.
- LED Chips (Integrated)
- Installation Kits (Mounting hardware)
- Manual de instruções (este documento)
3. Especificações do produto
| Recurso | Especificação |
|---|---|
| Marca | Hamilyeah |
| Modelo | CL |
| Dimensões | 12"C x 12"L x 3.3"A |
| Material | Anti-rust Metal, LED |
| O quetage | 18 Watts |
| Volumetage | 120 Volts (CA) |
| Tipo de fonte de luz | LED (Integrado) |
| Temperatura de cor | 3000 Kelvin |
| Brilho | 2200 Lúmens |
| Regulável | Sim (compatível com a maioria dos dimmers) |
| Tipo de instalação | Montagem embutida |
| Uso interno/externo | Interior (Damp Classificação de localização) |
| Certificações | ETL Listed (for electrical components) |
4. Instruções de Instalação (Configuração)
Antes de começar: Ensure the power is OFF at the circuit breaker. Use a voltage tester to confirm the power is off before touching any wires.
- Prepare the Mounting Plate:
The fixture includes a mounting plate. Attach this plate to your junction box using the provided screws. Ensure it is securely fastened.
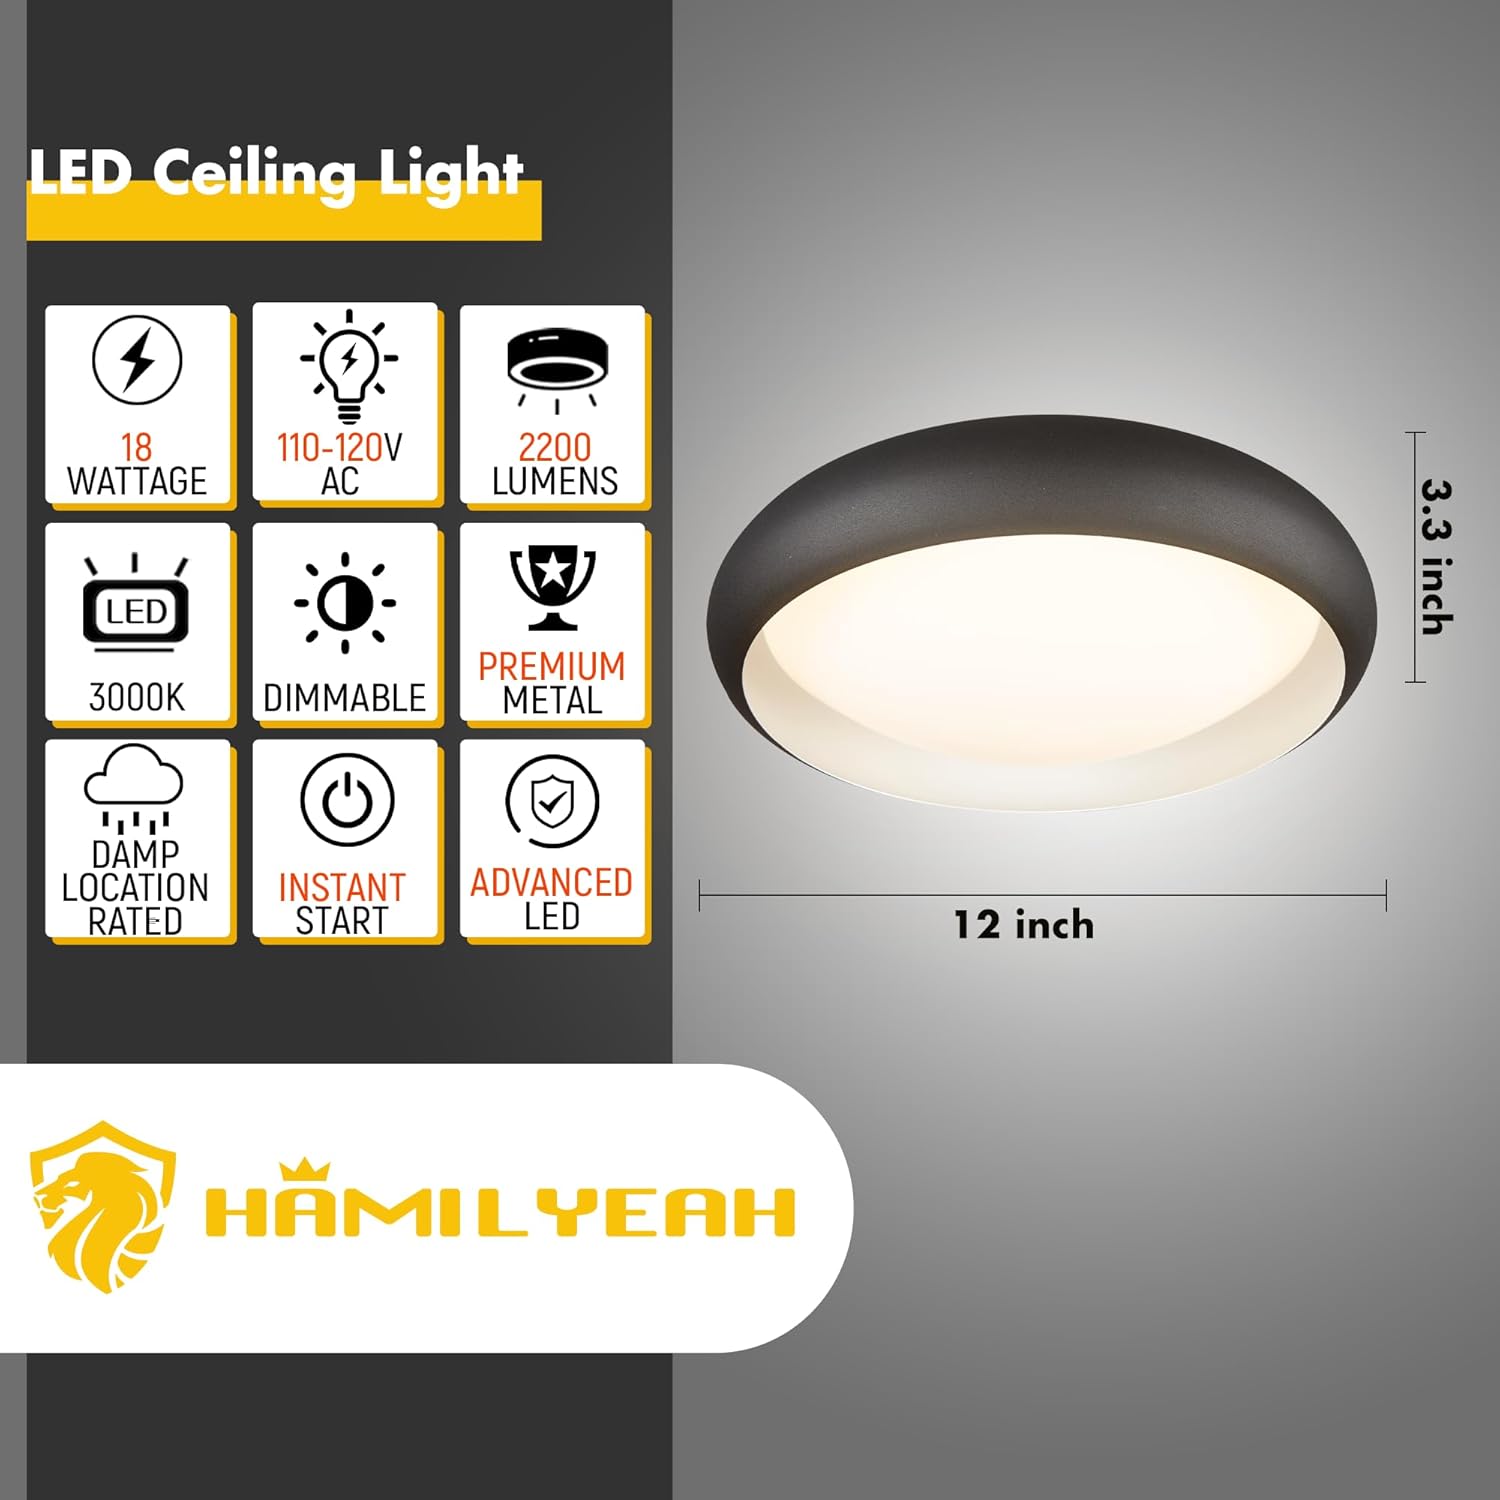
Image 1: Product dimensions and key specifications. This image illustrates the physical size and electrical characteristics of the light fixture.
- Conexões elétricas:
Connect the fixture's wires to the corresponding wires from your junction box. Typically, this involves:
- Conecte o fio preto da luminária ao fio preto (fase) da caixa de junção.
- Conecte o fio branco da luminária ao fio branco (neutro) da caixa de junção.
- Connect the green or bare copper (ground) wire from the fixture to the ground wire from the junction box.
Secure connections with wire nuts. Ensure all wires are tucked neatly into the junction box.
- Monte o dispositivo:
Align the fixture with the mounting plate and secure it firmly. This usually involves tightening screws that pass through the fixture into the mounting plate.

Image 2: The Hamilyeah flush mount LED ceiling light installed and illuminated. This shows the light's appearance when operational.
- Restaurar energia:
Once the fixture is securely installed and all connections are made, restore power at the circuit breaker. Test the light fixture.
Note on older junction boxes: Some older homes may have smaller junction boxes where the LED plate might obstruct mounting holes. In such cases, it may be necessary to carefully disassemble the LED plate from the mounting bracket to access the holes, then reassemble after securing the bracket. If you encounter difficulties, consult a professional electrician.
5. Instruções de operação
This Hamilyeah LED ceiling light is designed for simple operation.
- Ligar/desligar: Control the light using a standard wall switch connected to the fixture.
- Função de escurecimento: This fixture is dimmable. If connected to a compatible dimmer switch (sold separately), you can adjust the light intensity to your preference.
Video 1: Hamilyeah Flush Mount LED Ceiling Light Modern. This video demonstrates the light fixture in various room settings, showcasing its aesthetic and functionality.
6. Manutenção
To maintain the appearance and performance of your Hamilyeah LED ceiling light, follow these simple guidelines:
- Limpeza: Certifique-se de que a energia esteja desligada antes de limpar. Limpe a luminária com um pano macio, seco ou levemente úmido.amp pano. Não utilize produtos de limpeza abrasivos ou solventes, pois estes podem danificar o acabamento ou os componentes elétricos.
- Longevidade do LED: The integrated LED chips are designed for long life and do not require replacement.
7. Solução De Problemas
Se você tiver problemas com sua luminária, consulte os problemas e soluções comuns a seguir:
| Problema | Possível causa | Solução |
|---|---|---|
| A luz não acende. | Sem energia para o dispositivo elétrico. Conexão de fio solta. Interruptor de parede com defeito. | Verifique o disjuntor/fusível. Certifique-se de que a energia esteja ligada. Verifique se todas as conexões dos fios estão seguras (com a energia desligada). Test the wall switch with another device or replace it. |
| A luz pisca ou escurece inesperadamente. | Interruptor dimmer incompatível. Conexão de fio solta. | Ensure dimmer switch is LED-compatible. Replace if necessary. Verifique as conexões dos fios (com a energia desligada). |
| A luz não é tão forte quanto o esperado. | A intensidade da luz do dimmer está muito baixa. Instalação incorreta. | Adjust dimmer to maximum brightness. Review installation steps to ensure proper wiring. |
8. Garantia e Suporte
Garantia: Hamilyeah provides a 1-year hassle-free warranty for this product. This warranty covers defects in materials and workmanship under normal use.
Suporte ao cliente: If you have any questions, require assistance, or need to claim warranty service, please contact Hamilyeah customer support. You can typically reach us through your purchase platform by navigating to "Your Orders," finding your order in the list, selecting "Problem with Order," and choosing the relevant topic.
For more information, visit the official Hamilyeah store: Hamilyeah Store


