Introdução
Thank you for choosing the PUSEE W2 Electric Mug and Candle Warmer. This device is designed to keep your beverages warm and to melt scented candles safely. Please read this manual thoroughly before use to ensure proper operation and to maximize the product's lifespan.
Informações de segurança
- Always place the warmer on a flat, stable, and heat-resistant surface.
- Não mergulhe o aquecedor em água ou qualquer outro líquido.
- Mantenha fora do alcance de crianças e animais de estimação.
- Do not touch the heating plate when the device is on or immediately after use, as it will be hot.
- Desligue o aquecedor quando não estiver em uso ou antes de limpá-lo.
- Verifique se o cabo de alimentação não está danificado ou preso.
- Use only with compatible cups and containers as specified in this manual.
- Do not use the warmer for cooking or heating food directly.
Produto acimaview
The PUSEE W2 Electric Mug and Candle Warmer features a sleek design with intuitive controls for ease of use. It includes a heating plate, a digital display, and touch-sensitive buttons for temperature and timer adjustments.

Figura 1: Control Panel and Digital Display. This image highlights the intuitive design of the warmer, showing the digital display for temperature and time, along with the touch-sensitive buttons for various settings.
O painel de controle inclui:
- Tela digital: Shows current temperature and timer settings.
- Cup Choice Button: Selects material-specific temperature ranges (Glass, Ceramic, Metal).
- Botões de ajuste de temperatura (+/-): Increases or decreases the heating temperature.
- Botão do temporizador: Sets the automatic shut-off time.
- Gravity Sensor ON/OFF Button: Toggles the automatic detection feature for cup placement.
Configurar
- Descompacte: Carefully remove the warmer from its packaging. Ensure all components, including the power cord, are present and undamaged.
- Colocação: Place the warmer on a dry, flat, and stable surface away from flammable materials. Ensure there is adequate space around the device for ventilation.
- Conecte a energia: Plug the power cord into a standard 110V electrical outlet. The warmer will enter standby mode.

Figura 2: PUSEE W2 Warmer in a typical setup. This image shows the warmer placed on a desk, illustrating its compact size and readiness for operation.
Instruções de operação
Ligar/Desligar
Press the power button to turn the warmer on or off. The digital display will illuminate when the device is active.
Configurações de temperatura
The warmer offers 9 temperature settings, optimized for different cup materials. Press the 'Cup Choice' button to cycle through the material types (Glass, Ceramic, Metal). Once a material is selected, use the '+' and '-' buttons to adjust the temperature within the following ranges:
- Vidro: 140°F - 160°F - 180°F
- Cerâmica: 130°F - 150°F - 176°F
- Metal: 145°F - 165°F - 185°F

Figura 3: Temperature settings for various materials. This image illustrates the different temperature options available for glass, ceramic, and metal cups, ensuring optimal warmth for your beverage.
Configurações do temporizador
The warmer has a default auto shut-off after 4 hours. To customize the shut-off time, press the 'Timer' button and use the '+' and '-' buttons to set a duration from 1 to 9 hours. The device will automatically turn off after the selected time.

Figura 4: Auto Shut-Off Feature. This image demonstrates the warmer's automatic shut-off function, providing peace of mind for users.
Gravity Sensor (Auto On/Off)
The warmer is equipped with a gravity sensor. When a cup is placed on the heating plate, the device will automatically begin heating. When the cup is removed, it will stop heating. You can toggle this feature on or off using the dedicated 'Gravity Sensor ON/OFF' button on the control panel.
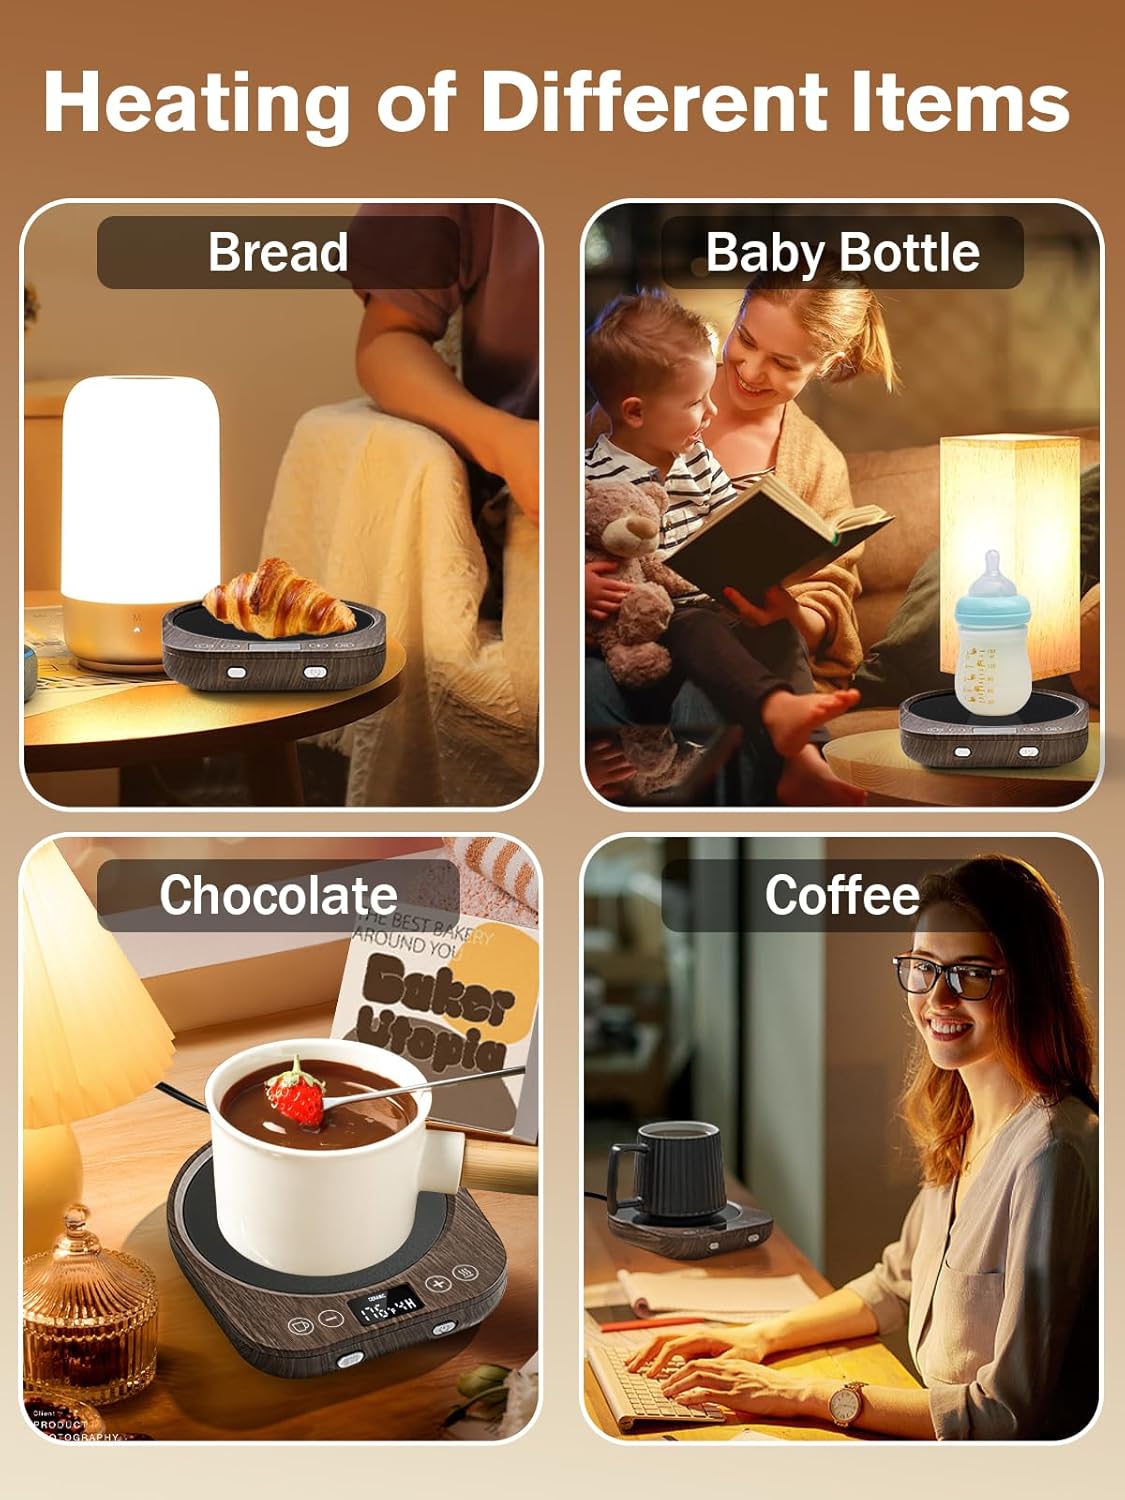
Figura 5: Gravity Induction Switch in action. This image shows how the warmer automatically activates when a cup is placed on it, thanks to the gravity sensor.
Suitable Cup Types and Uses
The PUSEE W2 warmer is compatible with most flat-bottomed cups made of glass, ceramic, or metal. It can be used to warm coffee, tea, milk, hot chocolate, and also functions as a flameless candle warmer.
- Recomendado: Flat-bottomed stainless steel mugs, ceramic mugs, glass cups, teapots, baby bottles.
- Não recomendado: Insulated tumblers, plastic cups, paper cups, cups with uneven or thick bottoms.
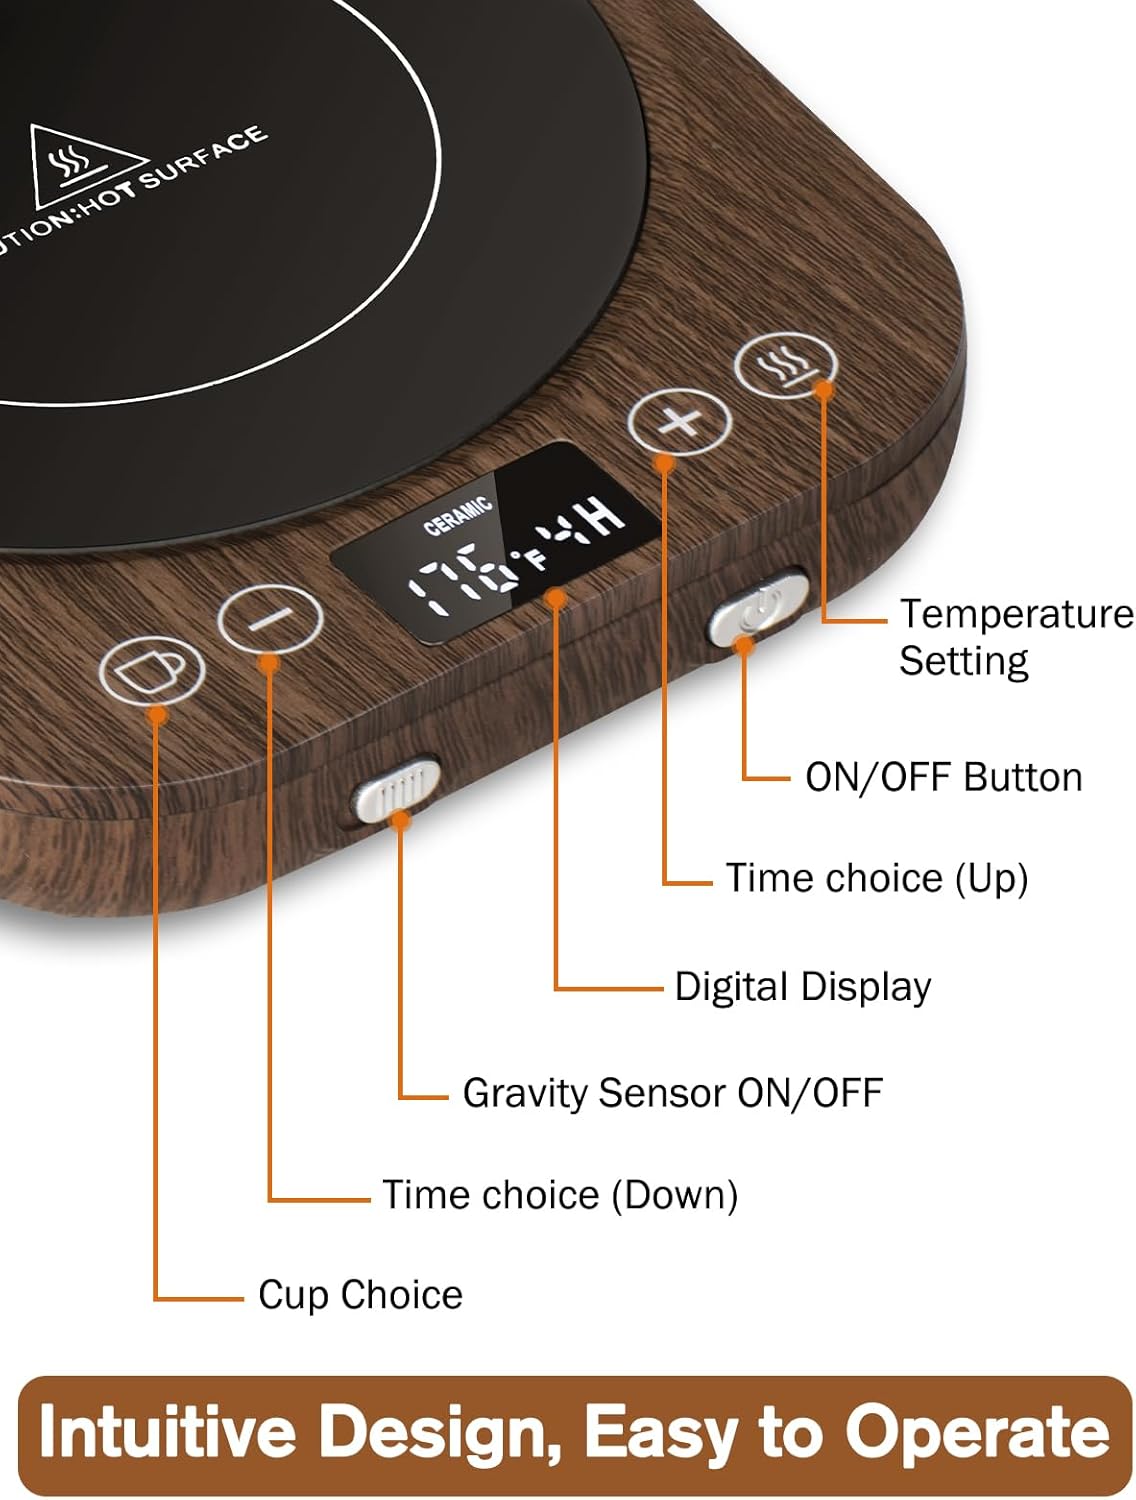
Figura 6: Compatible Cup Types. This image visually demonstrates the range of cups and containers that can be safely and effectively used with the warmer.
Vídeo de demonstração do produto
1 vídeo: Official PUSEE Coffee Mug Warmer Demonstration. This video provides a visual guide on how to operate the PUSEE W2 warmer, including setting temperatures and using its features.
Manutenção
The PUSEE W2 warmer features a high-hardness microcrystal panel that is high-temperature resistant, waterproof, and easy to clean.
- Limpeza: Before cleaning, ensure the warmer is unplugged and completely cooled down. Wipe the heating plate and body with a soft, damp pano. Não use produtos de limpeza abrasivos ou esfregões.
- Derramamentos: In case of spills, immediately unplug the device. Once cooled, wipe away the liquid with a dry cloth.
- Armazenar: Guarde o aquecedor em local seco quando não estiver em uso.

Figura 7: Waterproof Surface for Easy Cleaning. This image highlights the warmer's waterproof surface, making it simple to clean accidental spills.
Solução de problemas
| Problema | Possível causa | Solução |
|---|---|---|
| O aquecedor não liga. | Not plugged in; Power outlet issue; Device malfunction. | Check power connection; Try a different outlet; Contact customer support if issue persists. |
| A bebida não está suficientemente quente. | Incorrect temperature setting; Incompatible cup type; Gravity sensor off. | Increase temperature; Ensure cup is flat-bottomed and compatible; Check gravity sensor setting. |
| Warmer turns off unexpectedly. | Auto shut-off timer activated; Cup removed from plate (if gravity sensor is on). | Adjust timer settings; Ensure cup remains on the plate or disable gravity sensor if continuous heating is desired. |
| O visor digital não está funcionando. | Problema de energia; Mau funcionamento do dispositivo. | Verifique a ligação elétrica; entre em contato com o suporte ao cliente. |
Especificações
- Modelo: W2
- Volumetage: 110 Volts
- O quetage: 300 watts
- Temperatura máxima: 185 graus Fahrenheit
- Material: Stainless Steel (heating plate), Wood grain finish (body)
- Fonte de energia: Elétrico com fio
- Dimensões da embalagem: 8.39 x 6.3 x 1.65 polegadas
- Peso do item: 1.06 libras
Garantia e Suporte
For warranty information or technical support, please refer to the contact details provided with your purchase or visit the official PUSEE webGuarde o comprovante de compra como prova de aquisição.


