1. Produto acabadoview
The Otovoda B-T50 Dash Cam is a comprehensive front and rear camera system designed to enhance driving safety and provide reliable evidence in case of incidents. It features high-resolution recording, Wi-Fi connectivity for easy access, advanced night vision, and a 24-hour parking monitor.

Figure 1: Otovoda B-T50 Dash Cam components and features.

Figure 2: Key features of the Otovoda B-T50 Dash Cam.
2. Conteúdo da embalagem
Verifique se todos os itens estão presentes no seu pacote:
- Otovoda B-T50 Dash Cam (Main Unit)
- Câmera Traseira
- Ventosa
- Car Charger (Type-C)
- Cabo da câmera traseira
- Cabo USB
- Cartão SD de 64 GB
- Manual do usuário
- Cable Clips / 3M Tape
- SIM Ejector Tool (for SD card removal)

Figura 3: Acessórios e componentes incluídos.
3. Configuração e instalação
3.1 Inserindo o cartão SD
The dash cam supports Micro SD cards up to 256GB (a 64GB card is included). Ensure the card is Class 10, U3 or higher for optimal performance.
- Locate the SD card slot on the side of the main dash cam unit.
- Insira o cartão Micro SD com os contatos dourados voltados para a parte traseira da câmera até ouvir um clique.
- Para remover, empurre o cartão delicadamente até que ele se solte.

Figure 4: SD card insertion.
3.2 Montagem da câmera veicular
Mount the main unit on your car's windshield using the provided suction cup mount. Choose a location that does not obstruct your view da estrada.
- Clean the windshield surface where you intend to mount the camera.
- Attach the suction cup mount to the dash cam unit.
- Pressione firmemente a ventosa contra o para-brisa e acione a alavanca para fixá-la.
- Ajuste o ângulo da câmera para garantir uma imagem nítida. view da estrada à frente.

Figure 5: Dash cam mounted on windshield.

Figure 6: Suction cup mounting steps.
3.3 Conectando a câmera traseira
The rear camera provides a 1080P recording of the rear view. It can be mounted inside the rear window or externally near the license plate.
- Connect the rear camera cable to the rear camera unit.
- Route the cable neatly along the vehicle's interior trim to the main dash cam unit.
- Plug the other end of the rear camera cable into the designated port on the main dash cam.
- Secure the rear camera in your desired location using the provided 3M tape or screws.

Figure 7: Dual channel recording setup.

Figure 8: Rear camera design.
3.4 Conexão de Energia
Connect the dash cam to your vehicle's power supply using the provided car charger.
- Plug the Type-C end of the car charger into the dash cam's power port.
- Conecte a outra extremidade do carregador veicular na tomada do isqueiro do seu veículo.
- A câmera veicular ligará automaticamente e começará a gravar quando a ignição do veículo for ligada.

Figure 9: Type-C power port.
4. Instruções de operação
4.1 Gravação Básica
Once powered on, the dash cam will automatically start recording. The 3-inch screen will display the live view das câmeras frontal e traseira.

Figure 10: Dash cam 3-inch display.
4.2 Wi-Fi e controle por aplicativo
The built-in Wi-Fi allows you to connect your smartphone to the dash cam via the free Viidure APP (available for Android and iOS). This enables real-time viewing, video playback, downloading, and sharing.
- Download and install the "Viidure" app from your device's app store.
- Turn on Wi-Fi on your dash cam (refer to the camera's menu settings).
- On your smartphone, connect to the dash cam's Wi-Fi network (SSID and password usually displayed on the dash cam screen).
- Open the Viidure app to access live view, recorded videos, and settings.
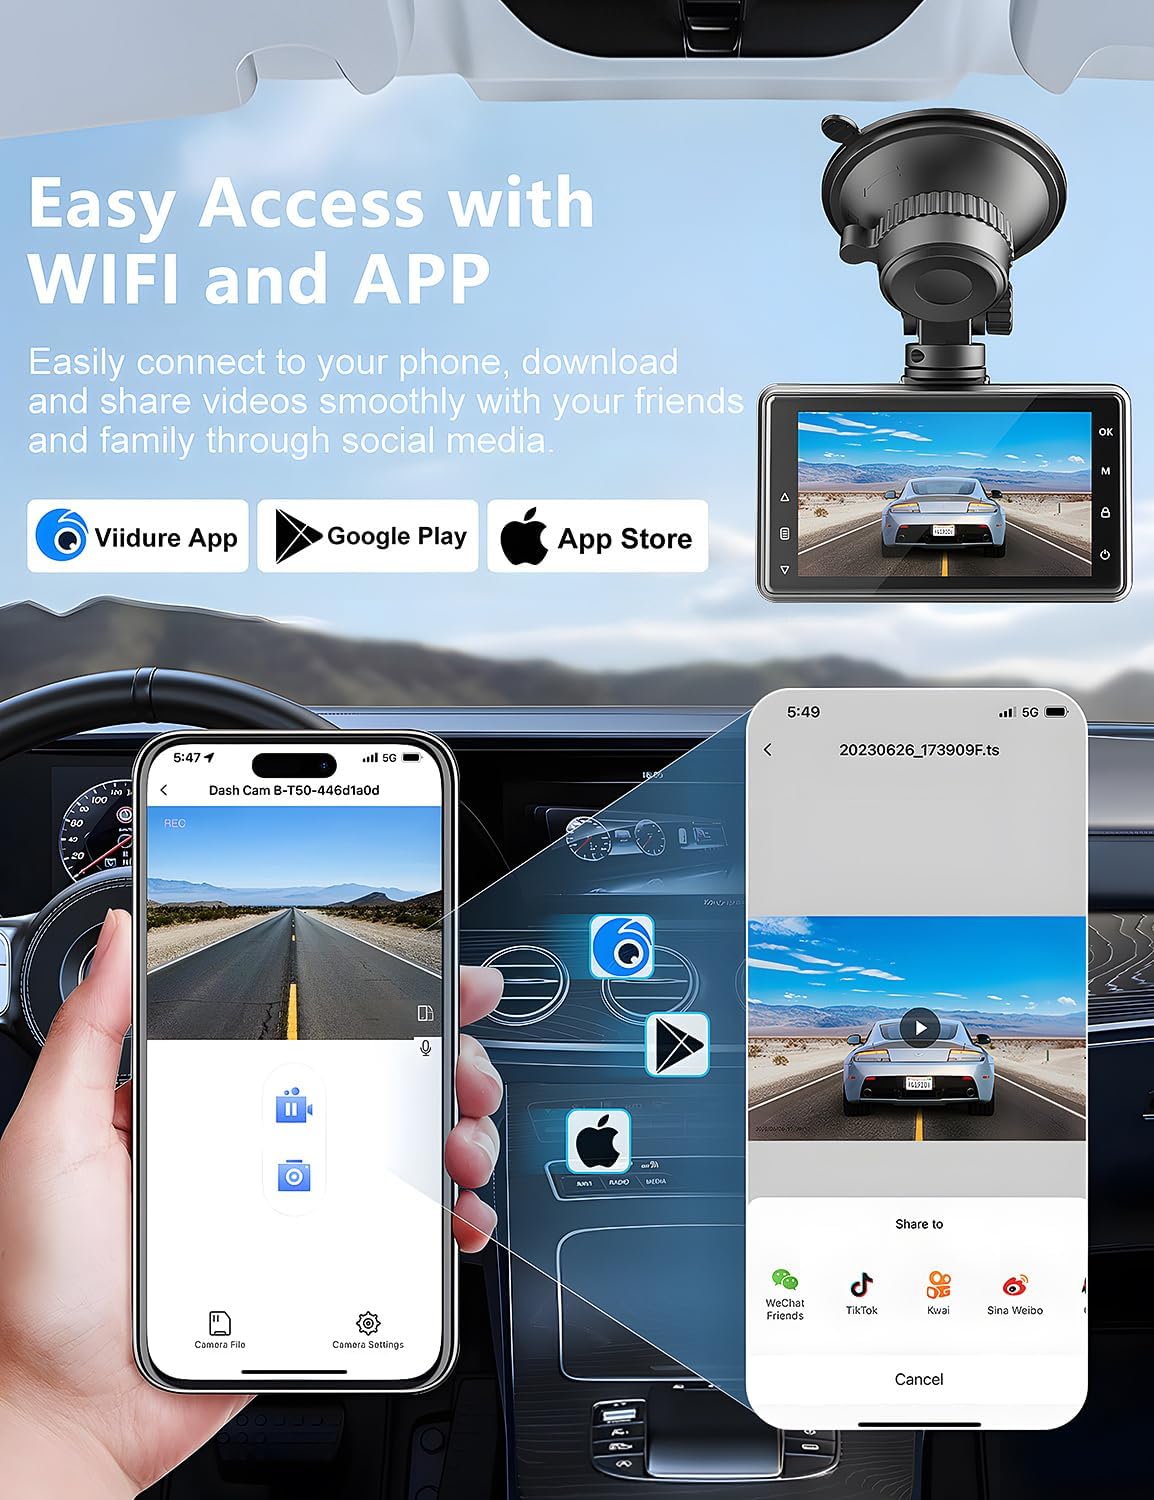
Figura 11: Conectividade Wi-Fi e controle por aplicativo.

Figure 12: Sharing videos via Wi-Fi.
4.3 Sensor G (Trava de Emergência)
The built-in G-Sensor automatically detects sudden shakes or collisions. When triggered, it locks the current video footage to prevent it from being overwritten by loop recording, ensuring critical evidence is preserved.

Figure 13: G-Sensor feature.

Figure 14: G-Sensor icon.
4.4 Gravação de Loop
The dash cam continuously records video in a loop. When the memory card is full, the oldest unlocked video files are automatically overwritten to make space for new recordings. This ensures uninterrupted recording.

Figure 15: Loop Recording icon.
4.5 Parking Monitor & Motion Detection
When enabled, the parking monitor function detects collisions or motion around your parked vehicle. If an event is detected, the dash cam will automatically turn on and record a short video, providing 24/7 surveillance. For continuous 24-hour monitoring, a hardwire kit (not included) is required to connect the dash cam directly to the car's battery.

Figure 16: 24-hour parking monitor.

Figure 17: Parking monitor icon.
Figure 18: Motion detection in parking mode.
4.6 Super Visão Noturna
The dash cam is equipped with an F1.8 aperture lens and WDR (Wide Dynamic Range) technology, enhancing its ability to capture clear and detailed footage in low-light conditions, including license plates at night.

Figure 19: Super Night Vision capabilities.

Figure 20: Night vision clarity for license plates.
5. Manutenção
5.1 Gerenciamento de cartão SD
Regularly format the SD card to ensure optimal performance and prevent data corruption. Formatting can be done through the dash cam's menu settings or via the Viidure app.
- It is recommended to format the SD card once a month.
- Always back up important videos before formatting.
5.2 Limpeza
Keep the camera lenses and screen clean for clear recordings and display.
- Use a soft, lint-free cloth to wipe the lenses and screen.
- Evite usar produtos de limpeza abrasivos ou solventes.
5.3 Considerações Ambientais
The dash cam is designed for automotive use but extreme temperatures can affect its performance and longevity.
- Avoid prolonged exposure to direct sunlight in extremely hot climates when the vehicle is parked.
- If the camera is exposed to extreme heat, allow it to cool down before operation.
6. Solução De Problemas
If you encounter issues with your Otovoda B-T50 Dash Cam, refer to the following common problems and solutions:
| Problema | Possível causa | Solução |
|---|---|---|
| Dash cam turns on and off repeatedly. | Unstable power connection; faulty power cable; internal issue. |
|
| Rear camera is not recognized or not working. | Loose connection; damaged cable; faulty rear camera. |
|
| Suction cup mount does not stay attached to the windshield. | Dirty windshield; improper application; worn suction cup. |
|
| Viidure app is slow or unresponsive. | App cache; outdated app version; phone's Wi-Fi interference. |
|
| Slow video download to phone. | Grande file size; Wi-Fi interference; phone processing speed. |
|

Figure 21: Settings and troubleshooting.
7. Especificações
| Recurso | Detalhe |
|---|---|
| Nome do modelo | B-T50 |
| Dimensões do produto | 0.59 x 3.15 x 1.77 polegadas |
| Peso do item | 1.1 libras |
| Resolução de captura de vídeo | Frente: 2.5K (1440P), Traseira: 1080P |
| Ângulo da câmera frontal | Ângulo amplo de 170° |
| Ângulo da câmera traseira | Ângulo amplo de 140° |
| Mostrar | Tela de 3 polegadas |
| Tecnologia de Conectividade | Sem fio (Wi-Fi) |
| Características especiais | Built-In WiFi/Smart APP Control, Parking Monitor, Super Night Vision, G-Sensor, Loop Recording, WDR |
| Suporte para cartão de memória | Até 256 GB (64 GB incluídos) |
| Porta de alimentação | Tipo C |
| Tipo de montagem | Windshield Mount, License Plate Mount |
| Tipo de serviço do veículo | Minivan, ônibus, carro, caminhão |
8. Garantia e Suporte
Otovoda is committed to providing high-quality products and excellent customer service.
- Garantia: The Otovoda B-T50 Dash Cam comes with an extendable 2-year repair warranty.
- Retornos: Full refunds are available within 30 days of purchase.
- Suporte técnico: For any questions, missing accessories, or technical assistance, please contact our support team. We aim to respond within 24 hours.
- E-mail de contato: dashcam@bestservices.vip

Figure 22: Otovoda Brand Logo.


