1. Introdução
This manual provides comprehensive instructions for the installation, operation, maintenance, and troubleshooting of the Vivotek FE9391-EHV-V2 12MP Outdoor Fisheye IR Illumination Camera. Please read this manual thoroughly before using the product to ensure proper setup and functionality. Retain this manual for future reference.
2. Produto acabadoview
2.1 Principais Características
- 12 Megapixel Effective Still Resolution for high-quality imaging.
- Fisheye Lens with 1.2mm focal length for wide-area surveillance.
- Integrated IR Illumination for clear night vision up to 20 meters.
- WDR Pro technology for optimal image visibility in high contrast lighting.
- H.265/H.264/MJPEG compression for efficient video streaming.
- IP66-rated weather-resistant enclosure for outdoor use.
- Motion-only alert type for event detection.
- Wi-Fi Connectivity Protocol for flexible network integration.
2.2 Conteúdo da embalagem
Verifique se todos os itens estão presentes na embalagem:
- Vivotek FE9391-EHV-V2 Camera Unit
- Kit de montagem (parafusos, buchas)
- Conector à prova d'água
- Guia de instalação rápida
- Software CD (or download link information)
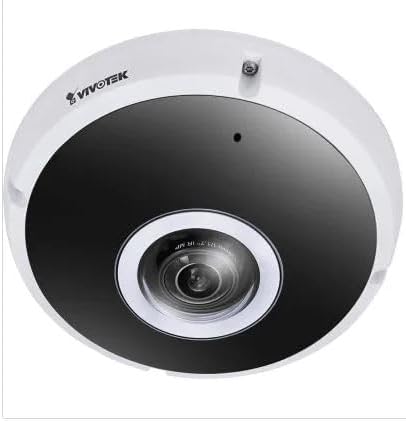
Figura 2.1: Frente view of the Vivotek FE9391-EHV-V2 12MP Outdoor Fisheye IR Illumination Camera, showing the lens and IR illuminators.
3. Informações de segurança
- Leia todas as instruções cuidadosamente antes da instalação e operação.
- Ensure the power source matches the camera's requirements (Corded Electric).
- Não tente desmontar ou modificar a câmera. Isso anulará a garantia.
- Avoid pointing the camera directly at strong light sources for extended periods.
- A instalação deve ser realizada por pessoal qualificado, de acordo com as normas elétricas locais.
- Protect cables from being walked on or pinched.
4. Configuração e instalação
4.1 Local de Montagem
Select a suitable outdoor location for mounting. Consider the desired surveillance area, proximity to power, and network connectivity (Wi-Fi or wired Ethernet). The camera is IP66 rated for outdoor use.

Figure 4.1: Dimensional drawing of the Vivotek FE9391-EHV-V2 camera, showing a diameter of 150mm and height of 68.2mm.
4.2 Instalação Física
- Prepare a superfície de montagem: Utilize o gabarito de montagem fornecido (se incluído) para marcar os furos.
- Furos de perfuração: Faça furos-guia e insira buchas de parede, se necessário.
- Proteja a câmera: Attach the camera base securely to the mounting surface using the provided screws.
- Cabos de conexão:
- Poder: Conecte o cabo de alimentação a uma fonte de alimentação adequada.
- Rede: Connect an Ethernet cable for wired network access, or ensure Wi-Fi signal strength is adequate for wireless connection. Use the waterproof connector for outdoor Ethernet connections.
- Ajuste o ângulo da câmera: Loosen the adjustment screws (if applicable) to position the fisheye lens for optimal coverage. Tighten screws once adjusted.

Figure 4.2: An Ethernet cable with an RJ45 connector, used for wired network connectivity.
4.3 Configuração Inicial da Rede
After physical installation and power-up, the camera needs to be configured on your network.
- Descubra a câmera: Use the Vivotek IP Utility software (available on the manufacturer's website) to discover the camera on your network.
- Atribuir endereço IP: Assign a static IP address or ensure it obtains an IP address via DHCP.
- Acesso Web Interface: Abra um web Acesse o navegador e digite o endereço IP da câmera para acessar suas configurações. webinterface de configuração baseada.
- Conecte-se: Enter the default username and password (refer to the Quick Installation Guide for defaults). Change the default password immediately for security.
- Wi-Fi Setup (if applicable): Navigate to the network settings and configure the Wi-Fi connection if you are using wireless connectivity.
5. Instruções de operação
5.1 Ao vivo View
Once configured, you can access the live video feed through the web interface or compatible Vivotek surveillance software.
- Web Navegador: Faça login na câmera. web interface and navigate to the "Live View" seção.
- Surveillance Software: Add the camera to your Vivotek NVR or VMS (Video Management Software) for centralized monitoring.
- Aplicativo móvel: Download the Vivotek mobile app and add your camera for remote viewindo.

Figura 5.1: Example of surveillance footage from multiple cameras displayed on a tablet device, demonstrating remote monitoring capabilities.

Figure 5.2: A monitor displaying a split-screen view of four camera feeds, labeled CAM1 through CAM4, illustrating a typical surveillance setup.
5.2 Gravação e Armazenamento
The camera supports various recording options:
- Armazenamento local: Insert a microSD card (not included) into the camera's slot for edge recording. Configure recording schedules and event triggers (e.g., motion detection).
- Gravador de vídeo em rede (NVR): Connect the camera to a compatible NVR for continuous or event-based recording.
- Armazenamento em nuvem: Some Vivotek models or third-party services may offer cloud storage integration. Refer to the camera's web interface for specific options.
5.3 Detecção de Movimento e Alertas
Configure motion detection zones and sensitivity settings in the camera's web interface. When motion is detected, the camera can trigger actions such as:
- Recording video to local storage or NVR.
- Sending email notifications with snapshots.
- Uploading footage to an FTP server.
6. Manutenção
- Limpeza de lentes: Gently wipe the camera lens with a soft, clean cloth. For stubborn dirt, use a lens cleaning solution designed for optical surfaces. Do not use abrasive cleaners.
- Limpeza de residências: Limpe a carcaça da câmera com aditivoamp cloth. Avoid using strong detergents or solvents.
- Atualizações de firmware: Regularly check the Vivotek website for firmware updates. Updating firmware can improve performance, add features, and enhance security.
- Inspeção de cabos: Periodically inspect all cables for signs of wear or damage, especially for outdoor installations.
- Verificação ambiental: Certifique-se de que o ambiente operacional da câmera permaneça dentro das faixas de temperatura e umidade especificadas.
7. Solução De Problemas
7.1 Sem transmissão de vídeo
- Verifique a potência: Ensure the camera is receiving power. Verify power adapter and cable connections.
- Conexão de rede: Confirm the Ethernet cable is securely connected or that the Wi-Fi signal is strong and the camera is connected to the correct network.
- Endereço IP: Verify the camera's IP address and ensure it is not conflicting with another device on the network.
- Firewall: Check if any firewall settings on your network or computer are blocking access to the camera.
7.2 Qualidade de imagem ruim
- Lente limpa: Certifique-se de que a lente da câmera esteja limpa e livre de poeira ou manchas.
- Condições de iluminação: Adjust camera settings for optimal exposure in varying light conditions. Ensure IR illuminators are functioning at night.
- Configurações de resolução: Verify that the video resolution and quality settings are configured appropriately in the camera's web interface.
- Largura de banda da rede: Insufficient network bandwidth can lead to choppy or low-quality video. Check network load.
7.3 Detecção de movimento não funciona
- Ativar detecção de movimento: Ensure motion detection is enabled in the camera's settings.
- Sensitivity and Zones: Adjust motion detection sensitivity and define detection zones correctly.
- Cronograma de Gravação: Verify that the recording schedule is active for motion-triggered events.
8. Especificações
| Recurso | Detalhe |
|---|---|
| Número do modelo | FE9391-EHV-V2 |
| Resolução Estática Efetiva | 12 MP |
| Lente | Lente olho de peixe de 1.2 mm |
| IR Illumination Range | 20 m |
| Tecnologia WDR | WDR Pro |
| Compressão de vídeo | H.265 / H.264 / MJPEG |
| Protocolo de conectividade | Wi-fi |
| Avaliação de proteção internacional | IP66 |
| Fonte de energia | Elétrico com fio |
| Dimensões do produto (C x L x A) | 5.9 x 5.9 x 2.68 polegadas (150 x 150 x 68.2 mm) |
| Fabricante | Vivotek Inc. |
| Usos recomendados | Segurança ao ar livre |
9. Garantia e Suporte
For warranty information, technical support, and additional resources, please visit the official Vivotek website ou entre em contato com o departamento de atendimento ao cliente.
- Fabricante: Vivotek Inc.
- Website: www.vivotek.com (Examp(O link, o link real pode variar)
- Contato: Consulte o webSite com informações de contato para suporte regional.
Please have your model number (FE9391-EHV-V2) and purchase date available when contacting support.


