Introdução
Welcome to the CHEFMAN InstaCoffee Max Lift+ Single Serve Coffee Maker. This manual provides essential information for the safe and efficient operation of your new coffee machine. This versatile appliance is designed to brew 6 to 14 ounces of coffee using either K-Cup® pods or ground coffee, featuring an adjustable cup lift to accommodate various mug sizes.

Image: The CHEFMAN InstaCoffee Max Lift+ Single Serve Coffee Maker in operation, dispensing coffee into a yellow mug. K-Cup pods and the reusable filter are visible nearby.
Salvaguardas importantes
When using electrical appliances, basic safety precautions should always be followed to reduce the risk of fire, electric shock, and injury to persons. Read all instructions carefully before use.
- Não toque em superfícies quentes. Use alças ou botões.
- Para evitar choques elétricos, não mergulhe o cabo, os plugues ou o aparelho em água ou qualquer outro líquido.
- É necessária supervisão rigorosa quando qualquer aparelho for usado por crianças ou perto delas.
- Desligue da tomada quando não estiver em uso e antes de limpar. Deixe esfriar antes de colocar ou retirar peças e antes de limpar o aparelho.
- Não opere nenhum aparelho com o cabo ou plugue danificado, ou após o aparelho apresentar mau funcionamento ou ter sido danificado de qualquer forma.
- O uso de acessórios não recomendados pelo fabricante do aparelho pode resultar em incêndio, choque elétrico ou ferimentos às pessoas.
- Não utilize ao ar livre.
- Não deixe o cabo pendurado na borda da mesa ou do balcão, nem toque em superfícies quentes.
- Não coloque sobre ou perto de um queimador a gás ou elétrico quente, nem em um forno aquecido.
- Sempre conecte primeiro o plugue ao aparelho e, em seguida, ligue o cabo na tomada. Para desconectar, gire qualquer controle para a posição "desligado" e, em seguida, retire o plugue da tomada.
- Não utilize o aparelho para outro fim que não o pretendido.
- Podem ocorrer escaldamentos se a tampa for removida durante o ciclo de preparo.
Peças e Características
Familiarize yourself with the components of your CHEFMAN InstaCoffee Max Lift+.
- Tampa do reservatório de água
- K-Cup Pod Holder / Ground Coffee Filter Basket
- Cabeça de cerveja
- Adjustable Cup Lift Platform
- Bandeja coletora removível
- Power Button / Brew Button
- Cabo de alimentação

Image: An annotated diagram of the coffee maker, pointing out key features such as the reusable coffee filter, self-cleaning function, overheat protection, adjustable cup lift, and removable drip tray.
Antes do primeiro uso
Before using your coffee maker for the first time, it is recommended to clean all removable parts and run a few cycles with water only.
- Desembale a cafeteira e remova todos os materiais de embalagem.
- Wash the reusable coffee filter, K-Cup pod holder, and drip tray in warm, soapy water. Rinse thoroughly and dry.
- Limpe o exterior da cafeteira com adamp pano.
- Fill the water reservoir with clean water up to the MAX fill line.
- Place a large mug or container on the drip tray.
- Feche a tampa do cabeçote de infusão.
- Press the Power/Brew button to run a water-only cycle. Discard the hot water.
- Repeat steps 4-7 two more times to ensure the system is clean.
Instruções de operação
Preparando café com cápsulas K-Cup
- Ensure the coffee maker is plugged into a standard electrical outlet.
- Lift the water reservoir lid and fill the reservoir with the desired amount of fresh water (6 to 14 oz). Do not exceed the MAX fill line.
- Lift the brew head handle to open the K-Cup pod holder.
- Insert a K-Cup pod into the holder, ensuring it is seated correctly.
- Feche firmemente a alavanca do cabeçote de preparo até ouvir um clique.
- Place your mug on the adjustable cup lift platform. Adjust the platform height as needed to minimize splashing.
- Press the Power/Brew button. The light will illuminate, indicating brewing has started.
- Brewing will stop automatically once the cycle is complete. The light will turn off.
- Carefully remove your mug and enjoy your coffee.
- After brewing, lift the brew head handle to remove and discard the used K-Cup pod.
Preparando com café moído
- Follow steps 1 and 2 from 'Brewing with K-Cup Pods'.
- Lift the brew head handle.
- Place the reusable coffee filter into the K-Cup pod holder.
- Add your desired amount of ground coffee into the reusable filter. Do not overfill.
- Feche firmemente a alavanca do cabeçote de preparo até ouvir um clique.
- Place your mug on the adjustable cup lift platform.
- Press the Power/Brew button. The light will illuminate, indicating brewing has started.
- Brewing will stop automatically once the cycle is complete. The light will turn off.
- Carefully remove your mug and enjoy your coffee.
- After brewing, lift the brew head handle to remove the reusable filter and discard the used coffee grounds.
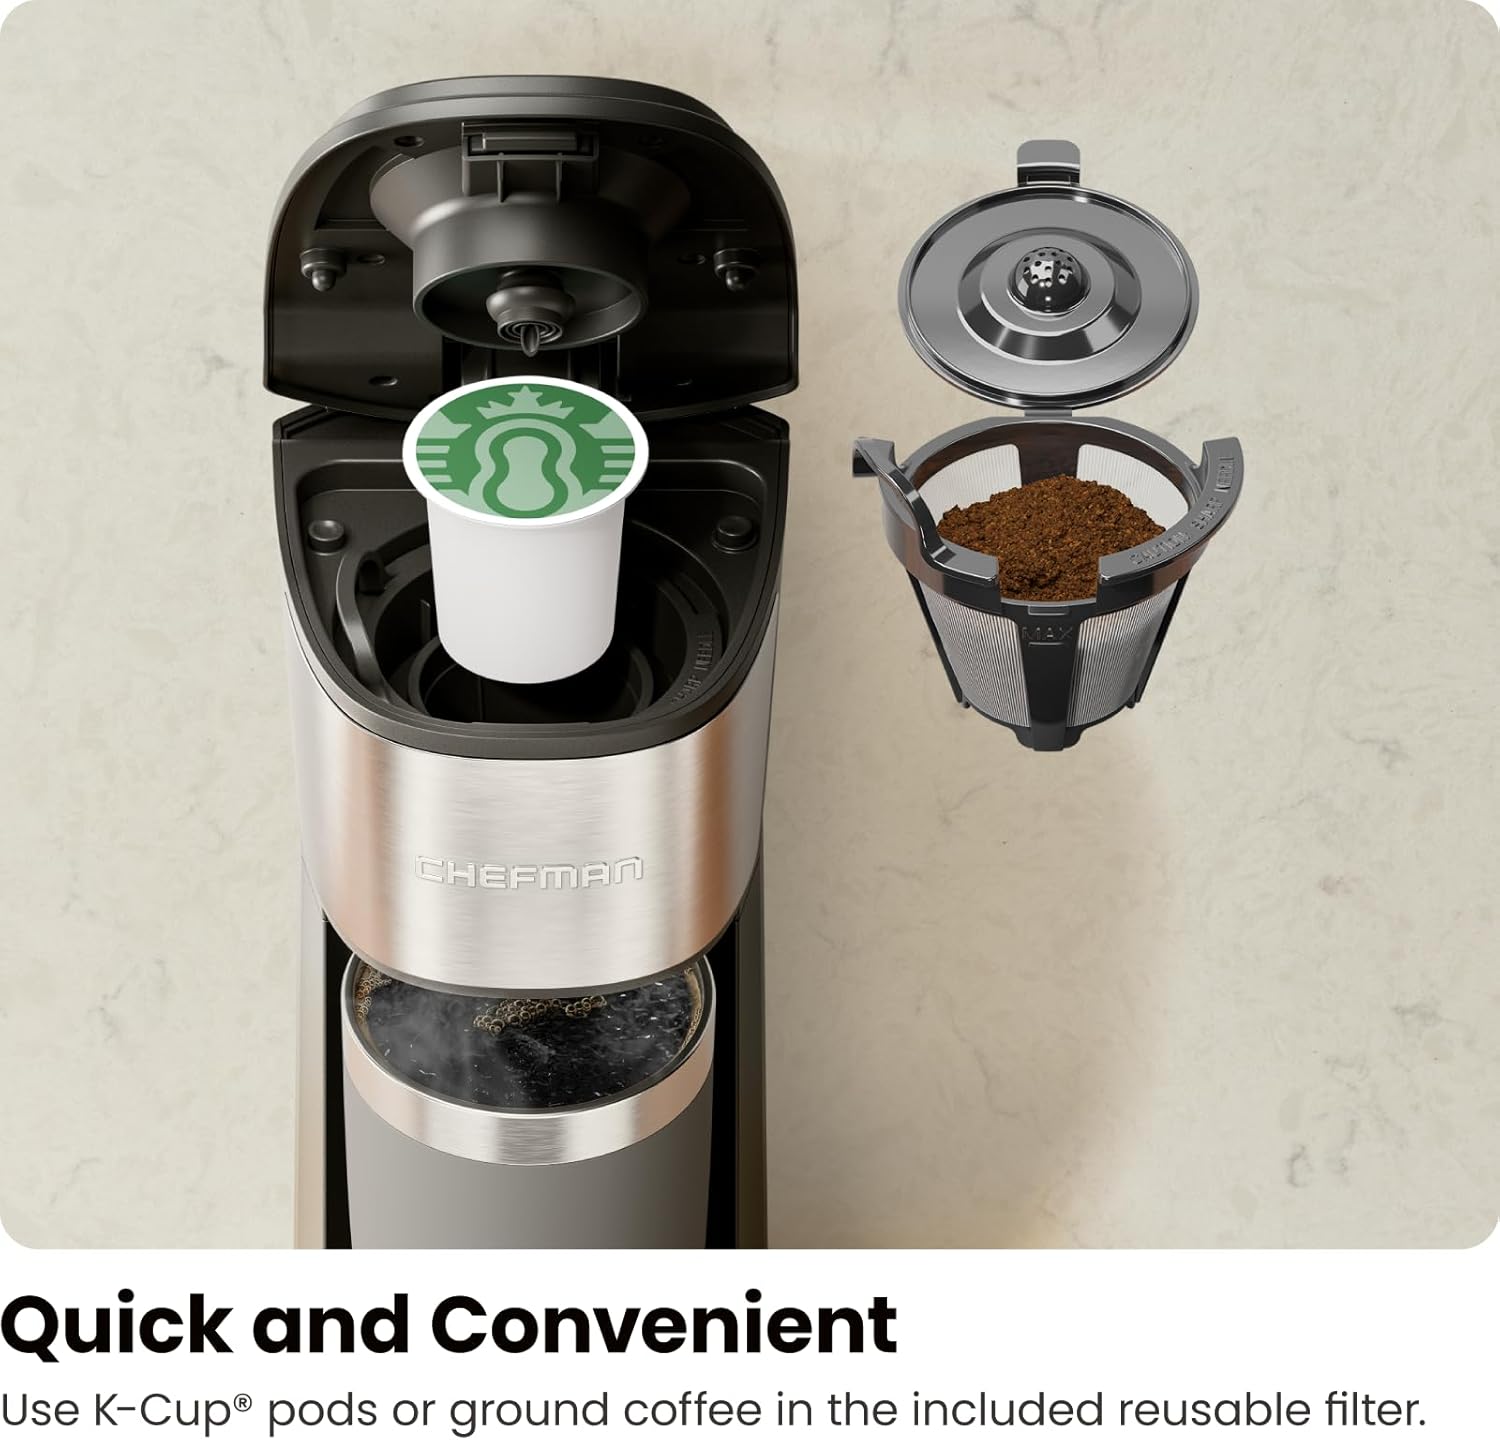
Image: The open brew head of the coffee maker, illustrating the placement of a K-Cup pod and the reusable filter for ground coffee.
Adjustable Cup Lift
The coffee maker features an adjustable cup lift platform to accommodate various mug sizes, from standard coffee cups to travel mugs up to 16 oz. Simply slide the platform up or down to the desired height before brewing to prevent splashing.

Image: A visual comparison of the coffee maker with its adjustable cup lift set for a standard mug and a taller travel mug, demonstrating its versatility.
Limpeza e Manutenção
A limpeza regular garante o desempenho ideal e prolonga a vida útil da sua cafeteira.
Limpeza diária
- Sempre desligue a cafeteira antes de limpá-la.
- Remove and wash the K-Cup pod holder/reusable filter and drip tray in warm, soapy water. Rinse and dry thoroughly.
- Limpe o exterior da cafeteira com adamp pano. Não use produtos de limpeza abrasivos ou esfregões.
- Não mergulhe a cafeteira em água ou qualquer outro líquido.
Descalcificação
Mineral deposits (calcium and lime) can build up in your coffee maker over time, affecting performance. Descale your machine every 3-6 months, or more frequently if you have hard water.
- Encha o reservatório de água com uma mistura de uma parte de vinagre branco e duas partes de água.
- Coloque uma caneca grande na bandeja coletora.
- Run a brew cycle without a K-Cup pod or ground coffee.
- After the cycle, let the coffee maker sit for 30 minutes with the vinegar solution inside.
- Run another brew cycle.
- Repeat the process with fresh water only at least three times to rinse out any vinegar residue.
Solução de problemas
Se você tiver problemas com sua cafeteira, consulte os problemas comuns e suas soluções a seguir:
| Problema | Possível causa | Solução |
|---|---|---|
| O café não se prepara. | No water in reservoir; brew head not fully closed; power issue. | Fill water reservoir; ensure brew head is clicked shut; check power connection. |
| O café tem gosto fraco ou aguado. | Too much water for coffee amount; K-Cup pod punctured incorrectly; grounds too coarse. | Use less water; ensure K-Cup is properly seated; use finer grounds for ground coffee. |
| Coffee overflows or splashes. | Mug too small; cup lift not adjusted. | Use a larger mug; adjust the cup lift platform to the appropriate height. |
| Slow brewing or clogged. | Acúmulo de minerais (incrustações). | Perform a descaling cycle as described in the 'Cleaning and Maintenance' section. |
| Borra de café. | Reusable filter not seated correctly; overfilled filter. | Ensure reusable filter is properly inserted; do not overfill with grounds. |
Especificações
- Marca: cozinheiro
- Nome do modelo: InstaCoffee Max Lift+
- Número do modelo do item: RJ14-IC-L-V3
- Cor: Preto
- Dimensões do produto: 6.23"P x 4.57"L x 13.24"A
- Peso do item: 2.5 libras
- Volumetage: 120 Volts
- O quetage: 1100 Watts
- Tipo de entrada de café: K-Cup Pods and Ground Coffee
- Capacidade de fabricação de cerveja: 6-14 onças
- Características especiais: Large Reusable Coffee Filter, Adjustable Cup Lift, Overheat Protection
- Código UPC: 810087846923

Image: A visual representation of the coffee maker with its key dimensions labeled for reference.
Garantia e Suporte ao Cliente
This CHEFMAN InstaCoffee Max Lift+ Single Serve Coffee Maker is backed by a garantia de um ano provided by Chefman. For detailed warranty information, product registration, or customer support, please refer to the official Chefman website ou entre em contato diretamente com o atendimento ao cliente.
For additional information and a downloadable PDF user guide, please visit the official product page or download the PDF User Guide here.


