1. Introdução
This manual provides essential information for the safe and efficient operation, installation, and maintenance of your MELLCOM 100-inch Electric Fireplace Insert. Please read all instructions carefully before installation and use. Retain this manual for future reference.
The MELLCOM electric fireplace offers realistic flame effects with 12 adjustable colors and 5 brightness options, complemented by a crystal ember bed. It features a heating function with two power levels (750W/1500W) and a temperature range of 62°F to 82°F, capable of heating up to 400 square feet. The flame effect and heating function can operate independently. Control is available via a screen button panel and a remote control, with an integrated timer function.
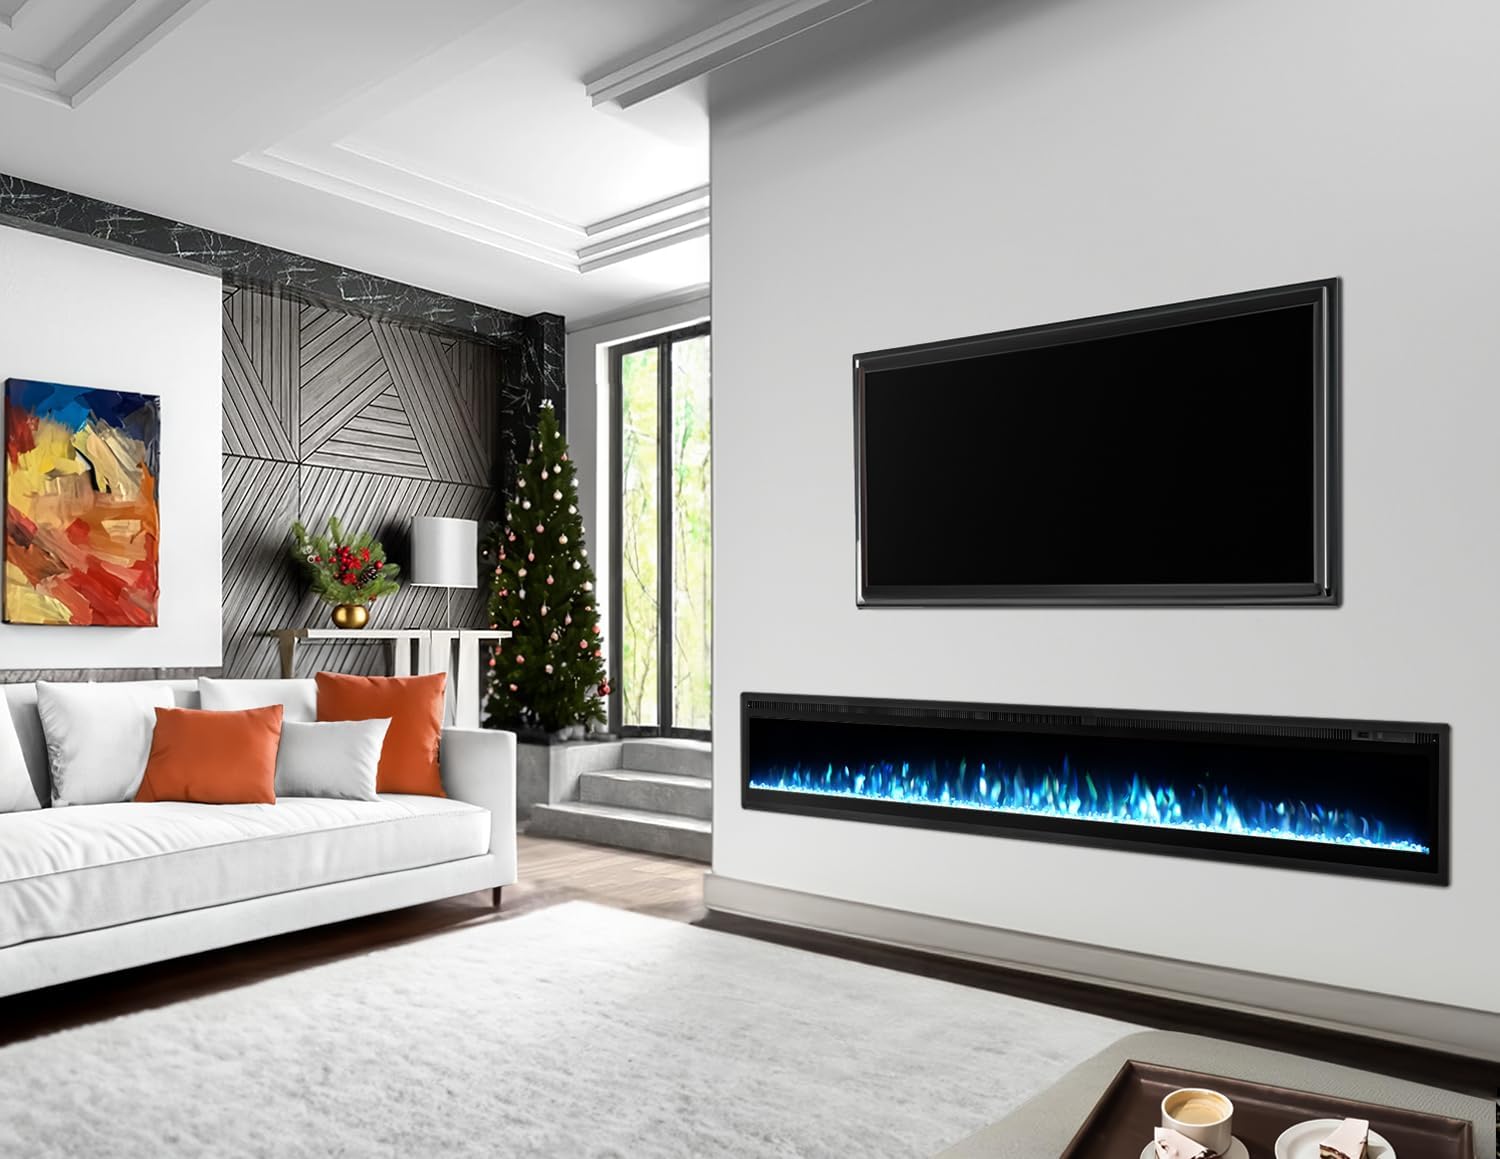
Image 1.1: MELLCOM 100-inch Electric Fireplace installed in a modern living room, showcasing blue flame effects.
2. Informações de segurança
Adherence to the following safety guidelines is crucial to prevent electric shock, fire, injury, or property damage.
- Este aparelho é somente para uso interno.
- Ensure the power source matches the requirements specified on the rating label of the appliance.
- Não utilize a lareira se o cabo ou a ficha estiverem danificados, ou se o aquecedor apresentar mau funcionamento, tiver caído ou sofrido qualquer tipo de dano.
- To prevent overheating, do not cover the heater or block the air inlets/outlets.
- Maintain a minimum clearance of 8 inches (20 cm) above the top exhaust for proper heat dissipation.
- Keep combustible materials such as furniture, pillows, bedding, papers, clothes, and curtains at least 3 feet (0.9 meters) from the front of the heater.
- This fireplace is equipped with a safety thermal cut-out for overheating protection. If the temperature becomes too high, the heater will automatically shut off.
- Não insira nem permita que objetos estranhos entrem em nenhuma abertura de ventilação ou exaustão, pois isso pode causar choque elétrico ou incêndio, ou danificar o aquecedor.
- Sempre desligue a lareira quando não estiver em uso.
3. Conteúdo da embalagem
Ao abrir a embalagem, verifique se todos os componentes estão presentes e sem danos:
- MELLCOM 100-inch Electric Fireplace Insert Unit
- Controle remoto
- Mounting Hardware (screws, brackets, etc. - specific to installation type)
- Manual do usuário (este documento)
If any parts are missing or damaged, do not attempt to assemble or operate the fireplace. Contact customer support immediately.
4. Especificações
| Recurso | Especificação |
|---|---|
| Marca | MELLCOM |
| Nome do modelo | d75d59bd-b118-4564-b887-c937f1472a1c |
| Dimensões do produto | 5.6"P x 100"L x 13.4"A |
| Fonte de energia | 110-120V AC |
| Saída de calor | 5120 Unidades Térmicas Britânicas (BTU) |
| Níveis de aquecimento | 750 W / 1500 W |
| Cobertura de aquecimento | Até 400 pés quadrados |
| Cores da chama ajustáveis | 12 |
| Flame Brightness Options | 5 |
| Função de temporizador | 1 a 8 horas |
| Tipo de instalação | Recessed, Wall Mounted, Freestanding |
| Material | Aço inoxidável |
| Peso do item | 108 libras |
| Certificações | CSA, ETL Safety Certified |

Image 4.1: Dimensional diagram of the MELLCOM 100-inch Electric Fireplace.
5. Instalação
The MELLCOM electric fireplace supports three installation methods: recessed, wall-mounted, and freestanding. The unit requires no assembly; simply connect the power supply after installation.
5.1 Instalação embutida
For a recessed installation, ensure the wall opening dimensions are appropriate for the fireplace unit. Consult the dimensional diagram (Image 4.1) for precise measurements. Ensure adequate clearance around the unit, especially for the top exhaust, as specified in the safety guidelines.
5.2 Instalação na parede
To wall-mount the fireplace, use the provided mounting hardware. Select a sturdy wall location that can support the weight of the unit. Mark the drilling points according to the mounting bracket positions. Secure the brackets to the wall, then carefully lift and attach the fireplace unit to the brackets.

Imagem 5.1: Example of a wall-mounted MELLCOM electric fireplace with remote control.
5.3 Instalação Independente
For freestanding use, ensure the fireplace is placed on a stable, level surface. No additional mounting is required. This option allows for immediate use by simply connecting to a power outlet.
Importante:
- Always ensure the fireplace is connected to a grounded outlet.
- Do not run the power cord under carpeting or cover it with throw rugs, runners, or similar coverings.
- Ensure the power cord is not pinched or in contact with sharp edges.
6. Operação
The fireplace can be controlled using the touch screen buttons on the unit or the included remote control.
6.1 Painel de controle e controle remoto
The control panel is located on the unit, typically on the right side. The remote control provides convenient operation from a distance.

Image 6.1: Remote control and touch screen button functions.
6.2 Ligar/Desligar
- Pressione o Poder Botão no painel de controle ou no controle remoto para ligar ou desligar a unidade.
6.3 Adjusting Flame Effects
The fireplace features 12 realistic flame colors and 5 brightness options.
- Pressione o Cor button to cycle through the 12 flame color options.
- Pressione o Chama button to adjust the flame brightness (5 levels).

Imagem 6.2: Examples of 12 adjustable flame colors and the crystal ember bed.
6.4 Função de aquecimento
The heating function operates independently of the flame effect. It offers two power levels and a temperature range.
- Pressione o Aquecedor button to activate the heating function.
- Pressione o Temperatura button to adjust the desired temperature between 62°F and 82°F.
- The heater can operate at 750W or 1500W, automatically adjusting based on the set temperature and room conditions.
- After the heater turns off, the fan will continue to blow cool air for 30 seconds to prevent overheating.

Image 6.3: Heating power levels and temperature range.
6.5 Função do temporizador
The integrated timer allows you to set an automatic shut-off time.
- Pressione o Temporizador button to set the automatic shutdown time from 1 hour to 8 hours.

Image 6.4: Electronic timer function for automatic shut-off.
7. Manutenção
A manutenção regular garante a longevidade e o desempenho ideal da sua lareira elétrica.
7.1 Limpeza
- Desligue sempre a lareira da tomada antes de limpá-la.
- Limpe as superfícies exteriores com um pano macio, damp pano. Não use produtos de limpeza abrasivos ou solventes.
- Gently clean the glass panel with a soft cloth and glass cleaner.
- Periodically vacuum the air inlets and outlets to remove dust and debris, ensuring proper airflow.
7.2 Armazenamento
If storing the fireplace for an extended period, unplug it and store it in a dry, dust-free location. It is recommended to keep the original packaging for storage.
8. Solução De Problemas
Consulte a tabela a seguir para obter informações sobre problemas comuns e suas soluções.
| Problema | Possível causa | Solução |
|---|---|---|
| Lareira não acende | No power supply; Power cord not plugged in; Circuit breaker tripped; Unit is off. | Ensure the unit is plugged into a working outlet. Check the circuit breaker. Press the power button on the unit or remote. |
| Sem saída de calor | Heater function not activated; Temperature setting too low; Overheating protection activated. | Press the Heater button. Increase the temperature setting. Unplug the unit for 15 minutes to reset the thermal cut-out, then ensure proper clearance. |
| Controle remoto não funciona | As pilhas estão descarregadas ou inseridas incorretamente; o controle remoto está muito longe ou obstruído. | Replace batteries. Ensure correct polarity. Operate the remote within range and without obstructions. |
| O efeito de chama não é visível ou está oscilando. | Flame brightness set too low; LED components issue. | Adjust flame brightness using the Flame button. If the issue persists, contact customer support. |
If you encounter problems not listed here or if the issue persists after attempting the suggested solutions, please contact MELLCOM customer support.
9. Garantia e Suporte
9.1 Garantia limitada
This MELLCOM electric fireplace comes with a limited warranty. Please refer to the warranty card included with your purchase or contact customer support for specific terms and conditions. The warranty typically covers manufacturing defects and malfunctions under normal use.
9.2 Suporte ao cliente
For technical assistance, warranty claims, or any questions regarding your MELLCOM electric fireplace, please contact MELLCOM customer support through the retailer where the product was purchased or visit the official MELLCOM website para informações de contato.


