1. Introdução
This manual provides detailed instructions for the installation, operation, and maintenance of your G.SKILL MD1 Mid-Tower ATX PC Case. Please read this manual thoroughly before beginning assembly to ensure proper setup and to maximize the lifespan of your components.
The G.SKILL MD1 is designed for compatibility with ATX, mATX, and mini-ITX motherboards, offering a versatile foundation for various PC builds. It features a 4mm tempered glass side panel and front/top mesh panels for optimal airflow and component visibility.
2. Recursos do Produto
- ATX PC Case: Compatible with ATX, mATX, and mini-ITX motherboard sizes.
- Painel lateral em vidro temperado: 4mm thick tempered glass for clear internal component visibility.
- Front/Top Mesh Design: Engineered for enhanced airflow and cooling performance.
- Suporte do radiador: Supports up to a 360mm AIO radiator for advanced cooling solutions.
- GPU Length Support: Accommodates graphics cards up to 404mm in length.
- Storage Drive Bays: Includes 2x 2.5" bays and 2x 3.5" bays for ample armazenamento.
- Tool-less Side Panel: Hinge design for easy access and maintenance.
- Front Panel I/O: 2x USB 3.0, 1x USB Type-C, 1x Audio-Out, 1x Mic-In for convenient connectivity.
3. Conteúdo da embalagem
Verifique se todos os componentes listados abaixo estão presentes em sua embalagem:
- G.SKILL MD1 Mid-Tower ATX PC Case
- Accessory Box (screws, cable ties, standoffs)
- Manual do usuário (este documento)
4. Configuração e instalação
4.1. Preparando o Caso
Before installing components, ensure the case is placed on a stable, flat surface. Remove the tempered glass side panel by gently pulling it open from the rear hinge, then lifting it off. The opposite side panel can be removed by unscrewing the thumb screws at the rear and sliding the panel backward.

Figura 1: Explodido view showing the removal of the front panel, top panel, and side panels.
4.2. Instalação da placa-mãe
Install the appropriate standoffs for your motherboard size (ATX, mATX, or mini-ITX). Carefully place your motherboard into the case, aligning it with the standoffs, and secure it with screws. Ensure the I/O shield is properly seated before installing the motherboard.
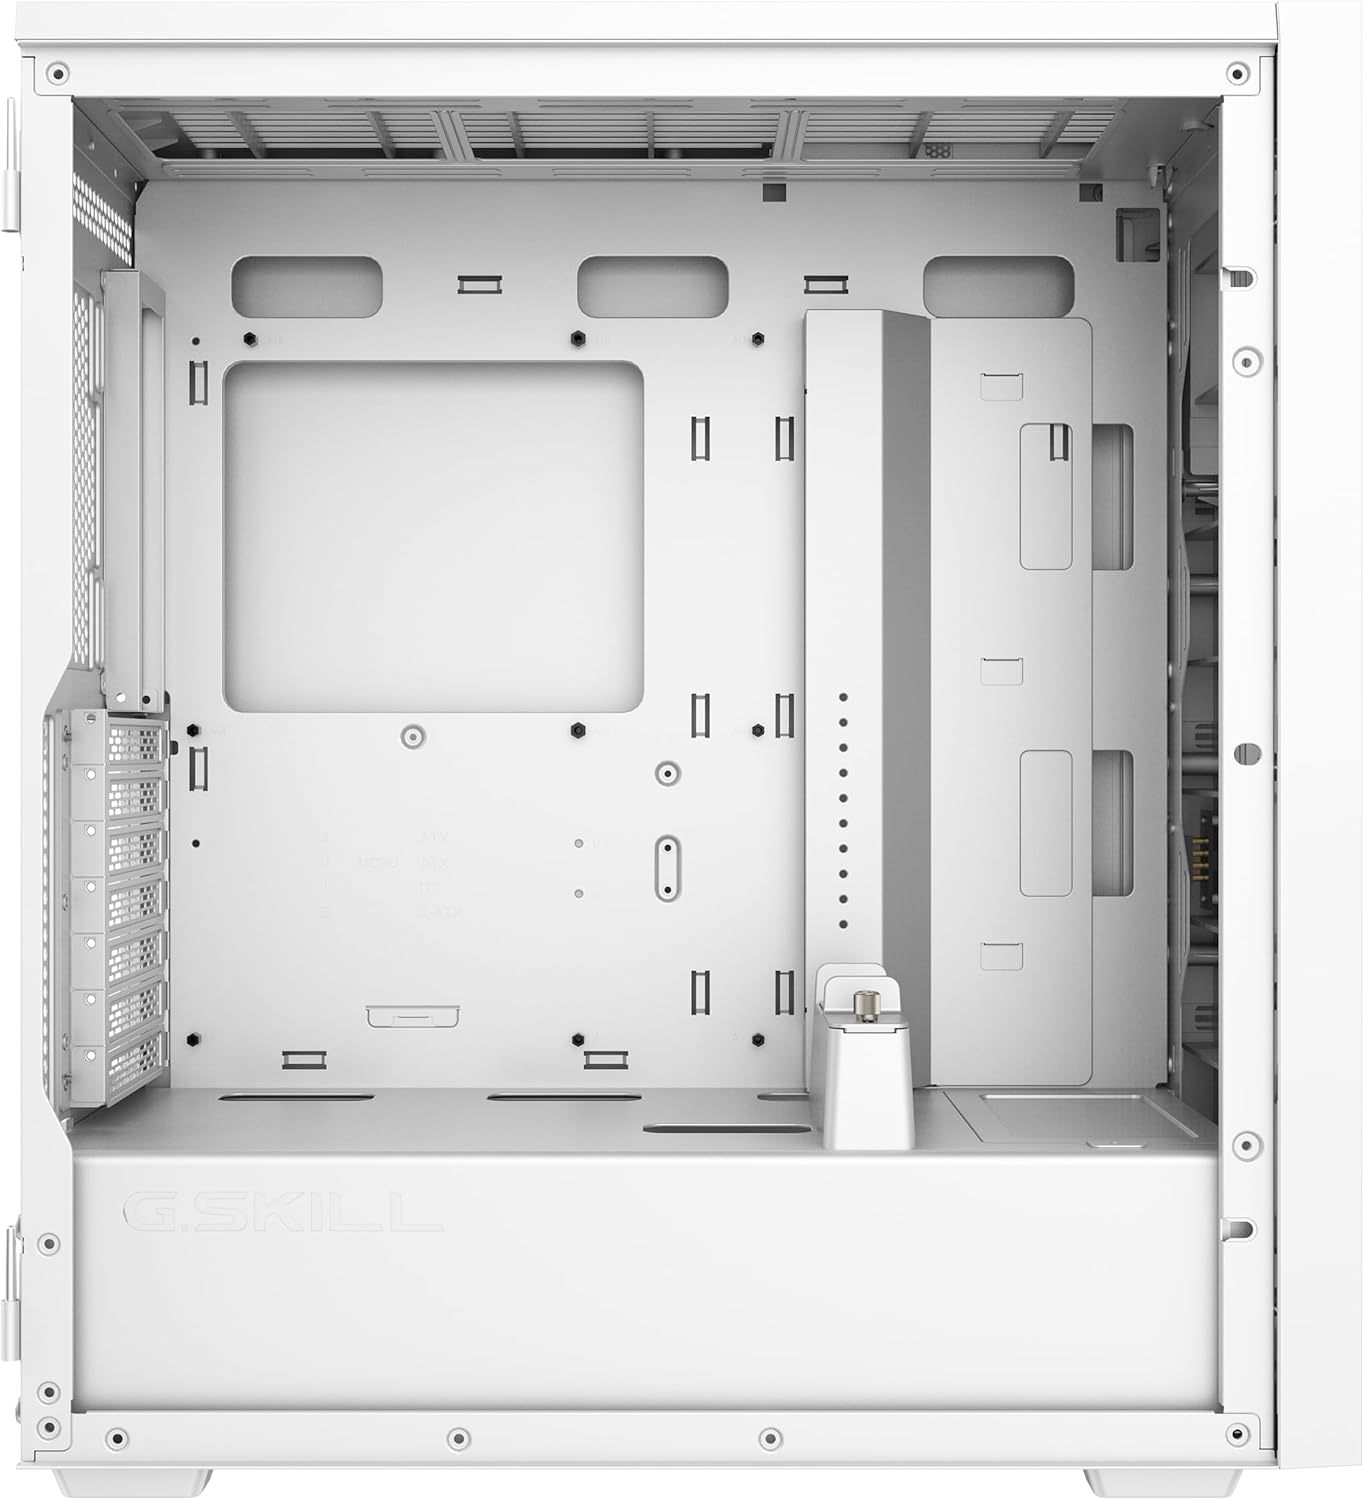
Figure 2: Main internal compartment of the G.SKILL MD1 case, illustrating the motherboard mounting area.
4.3. Instalação da unidade de armazenamento
The case supports 2x 2.5" drives and 2x 3.5" drives. Locate the drive bays and secure your SSDs or HDDs using the provided screws. Ensure proper cable management for power and data connections.

Figura 3: Interior traseiro view of the G.SKILL MD1 case, highlighting the 2.5" and 3.5" drive bays behind the motherboard tray.
4.4. Instalação da placa gráfica (GPU)
Install your graphics card into the appropriate PCIe slot on your motherboard. The case supports GPUs up to 404mm in length. Secure the GPU with the retention clip and any necessary screws. An included GPU support bracket can be used to prevent sag for longer cards.

Figura 4: interno view of the G.SKILL MD1 case with a graphics card installed, demonstrating the use of the GPU support bracket.
4.5. Conexões de E/S do Painel Frontal
Connect the front panel cables (USB 3.0, USB Type-C, Audio-Out, Mic-In, Power, Reset) to their corresponding headers on your motherboard. Refer to your motherboard manual for exact header locations.

Figure 5: Close-up of the G.SKILL MD1 case's front panel I/O, showing USB 3.0, USB Type-C, Audio-Out, Mic-In, Power, and Reset buttons.
5. Instruções de operação
Once all components are securely installed and connected, replace the side panels. Connect your power supply to a wall outlet and press the power button on the front panel to start your system.

Figura 6: Frente view of the G.SKILL MD1 case, showcasing the mesh panel and G.SKILL branding.
6. Manutenção
Regular maintenance helps ensure optimal performance and longevity of your PC components. The G.SKILL MD1 case features mesh panels that act as dust filters.
6.1. Limpeza do filtro de poeira
Periodically clean the front and top mesh panels to prevent dust buildup, which can restrict airflow and lead to overheating. These panels can be removed for easy cleaning with compressed air or a soft brush.
6.2. Limpeza Interior
With the side panels removed, use compressed air to clear dust from internal components such as CPU coolers, GPU fans, and power supply vents. Ensure the system is powered off and unplugged before performing any interior cleaning.
7. Solução De Problemas
If you encounter issues with your PC build within the G.SKILL MD1 case, consider the following common troubleshooting steps:
- Sistema não liga:
- Check all power connections, including the 24-pin ATX, 8-pin CPU, and GPU power cables.
- Certifique-se de que o interruptor da fonte de alimentação esteja na posição 'LIGADO'.
- Verifique a conexão do botão liga/desliga do painel frontal com a placa-mãe.
- Componentes superaquecidos:
- Limpe os filtros de poeira e os componentes internos.
- Ensure case fans are properly installed and functioning, directing airflow efficiently.
- Verify CPU cooler and GPU cooler are correctly seated and making good contact.
- Sem saída de vídeo:
- Ensure the monitor cable is connected to the graphics card, not the motherboard (if a dedicated GPU is installed).
- Reinstale a placa gráfica e os módulos de RAM.
8. Especificações
| Recurso | Detalhe |
|---|---|
| Marca | HABILIDADE G |
| Número do modelo | GC-AWGW1-MD1 |
| Tipo de caso | Torre Média |
| Compatibilidade da placa-mãe | ATX, mATX, mini-ITX |
| Painel lateral | 4mm Tempered Glass (Hinged) |
| Painel frontal | Design de malha |
| Painel superior | Design de malha |
| Comprimento máximo da GPU | 404 mm |
| Suporte para radiador | Up to 360mm (AIO) |
| Baias de unidade de 2.5" | 2 |
| Baias de unidade de 3.5" | 2 |
| Portas de E / S frontais | 2x USB 3.0, 1x USB Type-C, 1x Audio-Out, 1x Mic-In |
| Dimensões (CxLxA) | 19.84 x 8.7 x 17.7 polegadas |
| Peso do item | 19.91 libras (9.05 kg) |

Figure 7: Diagram illustrating the dimensions of the G.SKILL MD1 Mid-Tower ATX PC Case.
9. Garantia e Suporte
For warranty information and technical support, please refer to the official G.SKILL webou entre em contato diretamente com o serviço de atendimento ao cliente. Guarde o comprovante de compra para eventuais solicitações de garantia.
G.SKILL Official Website: www.gskill.com


