1. Introdução
This manual provides instructions for the safe operation, maintenance, and troubleshooting of your FLEX 24V Brushless Cordless 1/2-Inch Hammer Drill Turbo Mode Kit, model FX1271T-2B. Please read this manual thoroughly before using the tool to ensure proper and safe operation.
The FLEX FX1271T-2B is a powerful 24V brushless cordless hammer drill designed for demanding drilling and driving applications. It features a 1/2-inch full-metal ratcheting chuck, two-speed settings, a Turbo Mode for increased speed, and an anti-kickback safety feature. This kit includes the drill, a 2.5Ah Lithium-Ion Battery, a 5.0Ah Lithium-Ion Battery, and a 160W Fast Charger.
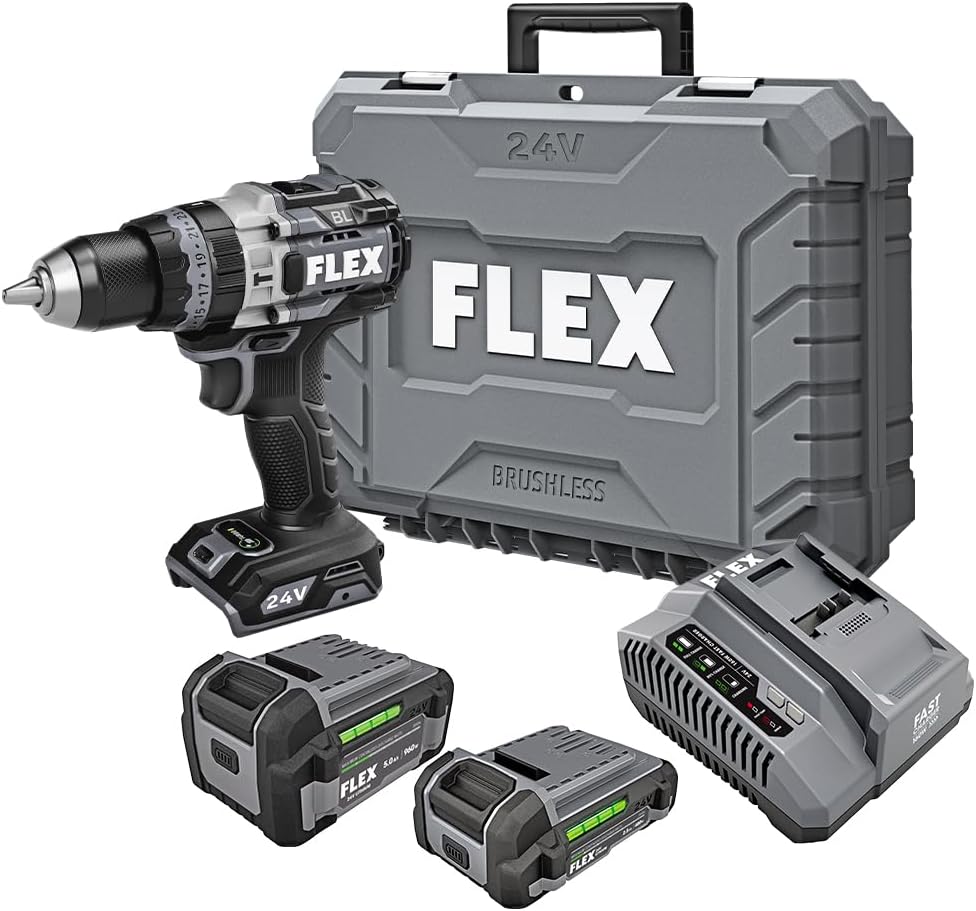
Figure 1: FLEX 24V Brushless Cordless 1/2-Inch Hammer Drill Kit (FX1271T-2B) including drill, two batteries, charger, and carrying case.
2. Instruções gerais de segurança
AVISO: Leia todos os avisos de segurança, instruções, ilustrações e especificações fornecidos com esta ferramenta elétrica. O não cumprimento de todas as instruções listadas abaixo pode resultar em choque elétrico, incêndio e/ou ferimentos graves.
2.1 Segurança da Área de Trabalho
- Mantenha a área de trabalho limpa e bem iluminada. Áreas desorganizadas ou escuras convidam a acidentes.
- Não opere ferramentas elétricas em atmosferas explosivas, como na presença de líquidos inflamáveis, gases ou poeira. Ferramentas elétricas criam faíscas que podem inflamar a poeira ou os vapores.
- Mantenha crianças e espectadores afastados enquanto estiver operando uma ferramenta elétrica. Distrações podem fazer com que você perca o controle.
2.2 Segurança elétrica
- Os plugues das ferramentas elétricas devem corresponder à tomada. Nunca modifique o plugue de forma alguma. Não use nenhum plugue adaptador com ferramentas elétricas aterradas. Plugues não modificados e tomadas correspondentes reduzirão o risco de choque elétrico.
- Evite contato corporal com superfícies aterradas, como canos, radiadores, fogões e geladeiras. Há um risco maior de choque elétrico se seu corpo estiver aterrado.
- Não exponha ferramentas elétricas à chuva ou condições úmidas. A entrada de água em uma ferramenta elétrica aumentará o risco de choque elétrico.
2.3 Segurança Pessoal
- Use sempre proteção para os olhos. Utilize óculos de segurança, óculos de proteção ou protetor facial.
- Use protetores auriculares ao operar a ferramenta por períodos prolongados.
- Vista-se adequadamente. Não use roupas largas ou joias. Mantenha seu cabelo e roupas longe de peças móveis.
- Fique alerta, observe o que está fazendo e use o bom senso ao operar uma ferramenta elétrica.
2.4 Uso e Cuidados da Ferramenta
- Não force a ferramenta elétrica. Use a ferramenta elétrica correta para sua aplicação.
- Desconecte a bateria da ferramenta elétrica antes de fazer ajustes, trocar acessórios ou guardar ferramentas elétricas.
- Guarde ferramentas elétricas ociosas fora do alcance de crianças e não permita que pessoas não familiarizadas com a ferramenta elétrica ou com estas instruções a operem.
- Faça a manutenção de ferramentas elétricas e acessórios. Verifique se há desalinhamento ou travamento de peças móveis, quebra de peças e qualquer outra condição que possa afetar a operação da ferramenta elétrica.
2.5 Uso e Cuidados com a Ferramenta a Bateria
- Recarregue somente com o carregador especificado pelo fabricante. Um carregador que seja adequado para um tipo de bateria pode criar risco de incêndio quando usado com outra bateria.
- Use ferramentas elétricas somente com baterias especificamente designadas. O uso de quaisquer outras baterias pode criar risco de ferimentos e incêndio.
- Quando a bateria não estiver em uso, mantenha-a longe de outros objetos de metal, como clipes de papel, moedas, chaves, pregos, parafusos ou outros pequenos objetos de metal, que podem fazer uma conexão de um terminal a outro. O curto-circuito dos terminais da bateria pode causar queimaduras ou incêndio.
- Em condições abusivas, o líquido pode ser ejetado da bateria; evite contato. Se ocorrer contato acidental, lave com água. Se o líquido entrar em contato com os olhos, procure ajuda médica adicional. O líquido ejetado da bateria pode causar irritação ou queimaduras.
3. Componentes incluídos
Your FLEX 24V Brushless Cordless 1/2-Inch Hammer Drill Kit (FX1271T-2B) includes the following items:
- FLEX 24V Brushless Cordless 1/2-Inch Hammer Drill
- (1) FLEX 24V 2.5Ah Lithium-Ion Battery (FX0111-1)
- (1) FLEX 24V 5.0Ah Lithium-Ion Battery (FX0121-1)
- Carregador rápido FLEX de 160 W
- Alça auxiliar
- Estojo de transporte

Figure 2: The FLEX Advantage highlights the included 2.5Ah and 5.0Ah Lithium-Ion batteries, emphasizing their power, runtime, and fast charging capabilities.
4. Configuração e uso inicial
4.1 Carregando a bateria
- Connect the 160W Fast Charger to a standard power outlet.
- Deslize a bateria sobre o carregador até ouvir um clique.
- The charger's indicator lights will show the charging status. A fully charged battery will be indicated by a solid green light.
- Depois de totalmente carregada, remova a bateria do carregador.
4.2 Instalando a bateria
- Align the battery pack with the battery port on the base of the drill handle.
- Slide the battery into the port until it locks securely into place. Ensure it is fully seated to prevent accidental dislodgement during operation.
- Para remover a bateria, pressione o(s) botão(ões) de liberação nas laterais do compartimento da bateria e deslize-o para fora.
4.3 Fixação da alça auxiliar
For improved control and safety, especially during high-torque applications or hammer drilling, attach the auxiliary handle.
- Solte a alça auxiliar clamp girando-o no sentido anti-horário.
- Slide the handle over the front of the drill body, positioning it to your preferred angle.
- Aperte o clamp girando-o no sentido horário até que a alça esteja firmemente presa.

Figure 3: The drill with the auxiliary handle attached, providing enhanced control and stability, particularly when the anti-kickback feature engages.
4.4 Instalação de brocas ou acessórios
- Certifique-se de que a furadeira esteja desligada e a bateria removida por segurança.
- Grip the rear collar of the 1/2-inch full-metal ratcheting chuck and rotate the front collar counter-clockwise to open the chuck jaws.
- Insert the drill bit or accessory fully into the chuck jaws.
- Rotate the front collar clockwise to tighten the chuck jaws firmly around the bit. The ratcheting mechanism will provide an audible click when securely tightened.
- Gently pull on the bit to ensure it is properly secured.

Figure 4: Detail of the 1/2-inch full-metal ratcheting chuck, designed for secure bit retention and durability.
5. Instruções de operação
5.1 Ligar/Desligar e Controle de Velocidade
- Interruptor de gatilho: Squeeze the trigger switch to turn the drill on. Release it to turn the drill off.
- Velocidade variável: The trigger switch is pressure-sensitive, allowing for variable speed control. Pressing the trigger further increases the speed.
- Seletor de marcha à frente/ré: Located above the trigger, push the selector left for forward rotation (drilling/driving) and right for reverse rotation (removing screws). Center position locks the trigger for safety.
5.2 Gear Selection (2-Speed)
The drill features a 2-speed gearbox for optimal performance across various applications.
- Primeira marcha (baixa velocidade, alto torque): Slide the gear selector switch to position '1'. Ideal for driving screws, drilling large holes, or applications requiring maximum torque.
- 2ª marcha (alta velocidade, torque reduzido): Slide the gear selector switch to position '2'. Suitable for fast drilling of smaller holes in wood or metal.
NOTE: Always ensure the drill is stopped before changing gear settings to prevent damage to the gearbox.
5.3 Mode Selection (Drill, Drive, Hammer Drill)
Rotate the collar behind the chuck to select the desired operating mode:
- Modo de perfuração (ícone de furadeira): Para furar madeira, metal e plástico.
- Modo de acionamento (ícone de parafuso): For driving screws. The clutch settings (numbered ring) allow you to adjust the torque to prevent over-driving screws or damaging materials.
- Modo Furadeira de Impacto (Ícone de Martelo): For drilling into masonry, brick, and concrete. This mode combines rotary action with a hammering motion.
5.4 Modo Turbo
The Turbo Mode button, located on top of the drill, provides an immediate increase in speed for faster results when needed.
- Pressione o TURBO button during operation to engage maximum speed.
- Release the button to return to the previously selected speed setting.

Figure 5: The Turbo Mode button, when pressed, provides increased speed for rapid task completion.
5.5 Anti-Kickback Feature
The drill is equipped with an advanced anti-kickback braking technology. If the drill bit binds during operation, the system will detect the sudden rotational force and rapidly stop the motor to reduce the risk of kickback and potential injury.
5.6 Luz LED integrada
An LED light is integrated into the drill to illuminate the work area, improving visibility in dimly lit conditions. The light activates when the trigger is pressed.

Figure 6: The integrated LED light provides illumination for improved visibility in dark work environments.
5.7 Drilling into Masonry (Hammer Drill Mode)
When drilling into masonry, brick, or concrete:
- Select Hammer Drill Mode.
- Ensure the auxiliary handle is securely attached and held firmly with both hands.
- Use appropriate masonry drill bits.
- Apply steady, firm pressure to the drill, allowing the hammering action to break up the material.

Figure 7: The FLEX hammer drill in action, demonstrating its capability to drill into tough materials with 1,400 in-lbs of torque.
6. Manutenção
6.1 Limpeza
- Desconecte sempre a bateria antes de realizar qualquer limpeza ou manutenção.
- Use uma escova macia ou ar comprimido para limpar a poeira e os detritos das aberturas de ventilação.
- Limpe a carcaça da ferramenta com o produto.amp pano. Não use produtos químicos agressivos ou produtos de limpeza abrasivos.
- Mantenha as garras do mandril limpas e livres de detritos para garantir uma fixação adequada da broca.
6.2 Armazenamento
- Guarde a ferramenta, as baterias e o carregador em local fresco e seco, longe da luz solar direta e da umidade.
- Ensure batteries are partially charged (not fully depleted or fully charged for long-term storage) before storing.
- Store the tool in its carrying case to protect it from damage.
7. Solução De Problemas
| Problema | Possível causa | Solução |
|---|---|---|
| A furadeira não inicia. | Bateria não carregada ou instalada incorretamente. Forward/Reverse selector in center (locked) position. | Charge battery and ensure it is securely installed. Move selector to forward or reverse position. |
| Perda de energia durante o funcionamento. | A carga da bateria está baixa. Proteção contra sobrecarga ativada. | Recarregue a bateria. Reduza a pressão sobre a ferramenta; deixe-a arrefecer. |
| A broca escorrega no mandril. | O mandril não está suficientemente apertado. As garras do mandril estão sujas ou desgastadas. | Aperte bem o mandril. Limpe as garras do mandril. Se o problema persistir, pode ser necessário substituir o mandril. |
| Vibração ou ruído excessivo. | Broca danificada ou torta. Componentes soltos. | Replace drill bit. Check for loose screws or parts. If problem persists, discontinue use and contact service. |
8. Especificações
| Recurso | Detalhe |
|---|---|
| Número do modelo | FX1271T-2B |
| Volumetage | 24 Volts |
| Tamanho do mandril | 1/2 polegada |
| Tipo de mandril | Full-Metal Ratcheting |
| Torque máximo | 1400 polegadas libras |
| Velocidade Rotacional Máxima | 2500 RPM |
| Número de velocidades | 2 |
| Capacidade da bateria (incluída) | 2.5 Ah, 5.0 Ah Lithium-Ion |
| Charger Type (Included) | Carregador rápido de 160 W |
| Características especiais | Turbo Mode, Anti-Kickback, LED Light, Brushless Motor |
| Peso do item | 15.37 libras (Kit) |
| Dimensões do produto | 7.2"L x 4"W x 10"H (Tool) |
| Capacidade de perfuração (madeira) | 2 polegadas |
| Capacidade de perfuração (metal) | 2 polegadas |
9. Garantia e Suporte
9.1 Garantia vitalícia limitada FLEX
This FLEX tool is protected by the FLEX Limited Lifetime Warranty. To qualify for this warranty, you must register your new FLEX tool, battery, or charger within 30 days of purchase through December 31, 2025. Registration can be completed at registermyFLEX.com.
Please refer to the official FLEX website or your product packaging for full terms and conditions of the warranty.
9.2 Suporte ao cliente
For technical assistance, replacement parts, or warranty claims, please contact FLEX customer support. Contact information can typically be found on the FLEX official website ou na embalagem do seu produto.
When contacting support, please have your model number (FX1271T-2B) and purchase date available.


