1. Introdução
The BRINKS Keyless Entry Electronic Deadbolt Lock provides enhanced security and convenient keyless access for your home or office. This deadbolt features a programmable keypad, allowing for multiple user codes, and includes traditional key access as a backup. Designed for durability and ease of use, it integrates advanced security features to protect against common entry methods.

Os principais recursos incluem:
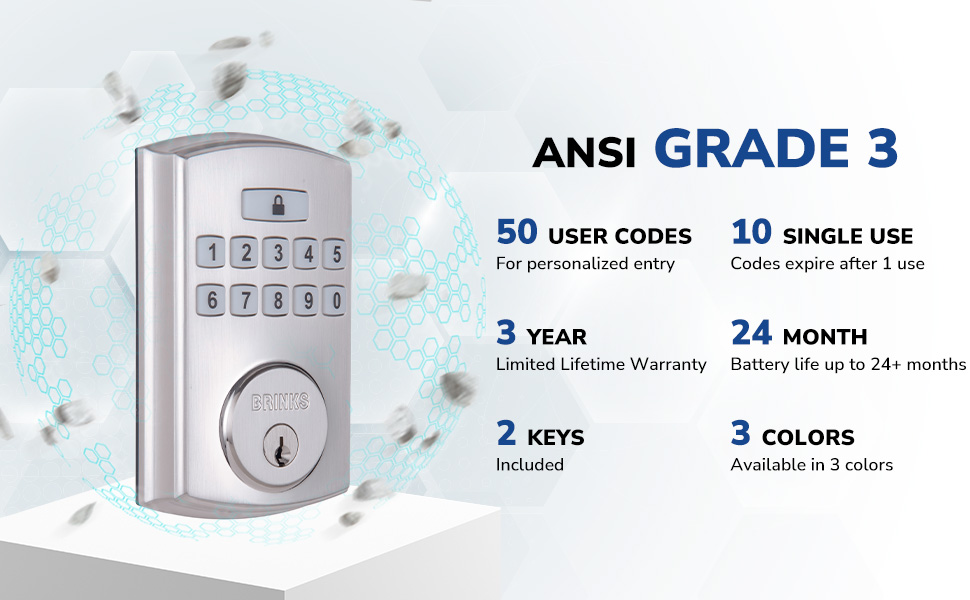
- Up to 50 customizable user codes.
- Optional auto-locking functionality.
- One-touch locking for quick security.
- PRO-GUARD security features: anti-tamper alarm, anti-pry shield, pick/bump/drill resistant keyway.
- Hardened steel anti-saw pin in the deadbolt latch.

2. Informações de segurança
Leia e compreenda todas as instruções antes de instalar e usar este produto. O não cumprimento destas instruções pode resultar em mau funcionamento do produto, danos materiais ou ferimentos.
- Do not attempt to disassemble or modify the lock beyond the instructions provided.
- Use only the specified battery type (4 AA alkaline batteries). Do not mix old and new batteries or different battery types.
- Guarde as chaves em um local seguro, longe da fechadura.
- Ensure all components are securely fastened during installation.
- Avoid exposing the lock to excessive moisture or extreme temperatures.
3. Conteúdo da embalagem
Verify that all parts are present before beginning installation. If any parts are missing or damaged, contact BRINKS customer support.
- Conjunto de teclado externo
- Montagem Interior
- Trava da fechadura
- Placa de montagem
- Placa de ataque
- Placa de Reforço
- Parafusos de montagem
- 2 Traditional Keys
- Hardware de instalação

4. Instalação
Installation of the BRINKS Electronic Deadbolt Lock is designed to be straightforward, requiring only a Phillips head screwdriver. No additional wiring is necessary.
4.1 Verificações de pré-instalação
- Espessura da porta: Ensure your door thickness is between 1.375 inches (35mm) and 1.75 inches (44mm).
- Fundo: The deadbolt is compatible with both 2-3/8 inches (60mm) and 2-3/4 inches (70mm) backsets. Adjust the latch as needed.
- Manipulação da porta: The lock is universally compatible with both right-handed and left-handed doors.

4.2 Etapas de instalação
- Instale a trava da fechadura: Insert the deadbolt latch into the door edge. Ensure the 'UP' arrow on the latch is pointing upwards. Secure with screws.
- Instalar teclado externo: Feed the cable from the exterior keypad through the hole in the door. Position the keypad flush against the door.
- Instale a placa de montagem: Route the cable through the mounting plate. Secure the mounting plate to the door using the provided screws, ensuring it is aligned correctly.
- Cabos de conexão: Conecte o cabo do teclado externo ao conjunto interno.
- Instale o conjunto interno: Mount the interior assembly onto the mounting plate, ensuring the thumb turn operates smoothly. Secure with screws.
- Instalar a placa de impacto: Install the strike plate and reinforcement plate on the door frame, aligning them with the deadbolt latch.
- Insira as baterias: Open the battery cover on the interior assembly and insert 4 AA alkaline batteries. Close the cover.

5. Configuração e Programação
After installation, you will need to program your lock with a Master Code and user codes.
5.1 Configurando o Código Mestre
The Master Code is used to program the lock and should be kept confidential. It cannot be used to unlock the door.
- Press the 'Program' button on the interior assembly.
- Insira um novo código mestre de 4 a 8 dígitos.
- Press the 'Lock' button.
- Re-enter the new Master Code.
- Press the 'Lock' button to confirm.
5.2 Adicionando Códigos de Usuário
You can program up to 50 unique user codes for regular entry.
- Press the 'Program' button.
- Insira seu código mestre.
- Press the 'Lock' button.
- Insira um novo código de usuário de 4 a 8 dígitos.
- Press the 'Lock' button to confirm.
5.3 Adding Single-Use Codes
Up to 10 single-use codes can be created, which expire after one use.
- Press the 'Program' button.
- Insira seu código mestre.
- Press the 'Lock' button twice.
- Enter a new 4-8 digit Single-Use Code.
- Press the 'Lock' button to confirm.
5.4 Setting Auto-Locking Feature
The auto-locking feature automatically locks the deadbolt after a set period (1-99 seconds) once unlocked.
- Press the 'Program' button.
- Insira seu código mestre.
- Press the 'Lock' button three times.
- Enter the desired auto-lock delay in seconds (e.g., '10' for 10 seconds).
- Press the 'Lock' button to confirm.

6. Instruções de operação
6.1 Destrancamento da porta
- Utilizando um código de usuário: Enter your 4-8 digit user code on the keypad. The deadbolt will retract, and the door can be opened.
- Usando uma chave: Insert the traditional key into the keyway and turn to unlock.
6.2 Travando a porta
- Bloqueio com um toque: Press the 'Lock' button on the keypad. The deadbolt will extend.
- Bloqueio automático: If enabled, the deadbolt will automatically extend after the set delay once the door is closed and unlocked.
- Usando uma chave: Insert the traditional key into the keyway and turn to lock.
The keypad is illuminated for visibility in low-light conditions.
7. Manutenção
7.1 Substituição da bateria
The lock is powered by 4 AA alkaline batteries. A low battery indicator will alert you when batteries need replacement. Battery life is approximately 24 months or longer.
- Remova a tampa da bateria na parte interna do conjunto.
- Remova as pilhas velhas.
- Insira 4 pilhas alcalinas AA novas, certificando-se da polaridade correta.
- Recoloque a tampa da bateria.
7.2 Limpeza
Limpe a parte externa da fechadura com um pano macio e seco.amp pano. Evite produtos de limpeza abrasivos ou solventes, pois podem danificar o acabamento ou os componentes eletrônicos.
8. Solução De Problemas
- A fechadura não responde: Check battery levels. Replace batteries if necessary. Ensure the cable connection between the exterior and interior assemblies is secure.
- Códigos não funcionam: Verify that the correct Master Code is being used for programming. Re-enter user codes carefully. Ensure the lock is not in programming mode when attempting to unlock.
- A tranca não estende/retrai completamente: Check for obstructions in the door frame or latch area. Ensure the deadbolt latch is installed correctly and aligned with the strike plate.
- Keypad not illuminating: Verifique os níveis da bateria.
9. Especificações
| Recurso | Especificação |
|---|---|
| Nome do modelo | 4390-122 |
| Tipo de bloqueio | Deadbolt |
| Material | Níquel |
| Cor | Satin Nickel (other finishes available) |
| Dimensões (C x L x A) | 7.87 x 3.54 x 5.51 polegadas |
| Peso do item | 2.94 libras |
| Códigos de Usuário | Até 50 |
| Single-Use Codes | Até 10 |
| Auto-Locking Delay | 1-99 seconds (customizable) |
| Fonte de energia | 4 pilhas alcalinas AA (não incluídas) |
| Duração da bateria | 24+ meses |
| Classificação de Segurança | ANSI Grau 3 |
| Características especiais | Anti-Bump, Anti-Tamper Alarm, Anti-Pry Shield, Illuminated Keypad |
10. Garantia e Suporte
10.1 Informações de garantia
This BRINKS Electronic Deadbolt Lock comes with a Garantia vitalícia limitada de 3 anos. Please refer to the warranty card included with your product for full terms and conditions. The warranty covers defects in material and workmanship under normal use.
10.2 Suporte ao cliente
For technical assistance, troubleshooting, or warranty claims, please contact BRINKS customer support. Contact information can typically be found on the BRINKS official website ou na embalagem do produto.


