1. Introdução
The Blaupunkt BPA-E1001 is a 1-channel Class D monoblock amplifier designed to enhance the low-frequency output of your car audio system. This amplifier delivers powerful and clear bass, making it suitable for driving subwoofers. Its Class D architecture ensures high efficiency and compact design, allowing for flexible installation in various vehicle environments.
This manual provides essential information for the proper installation, operation, and maintenance of your BPA-E1001 ampAmplificador. Leia atentamente as instruções antes de tentar instalar ou usar o aparelho.
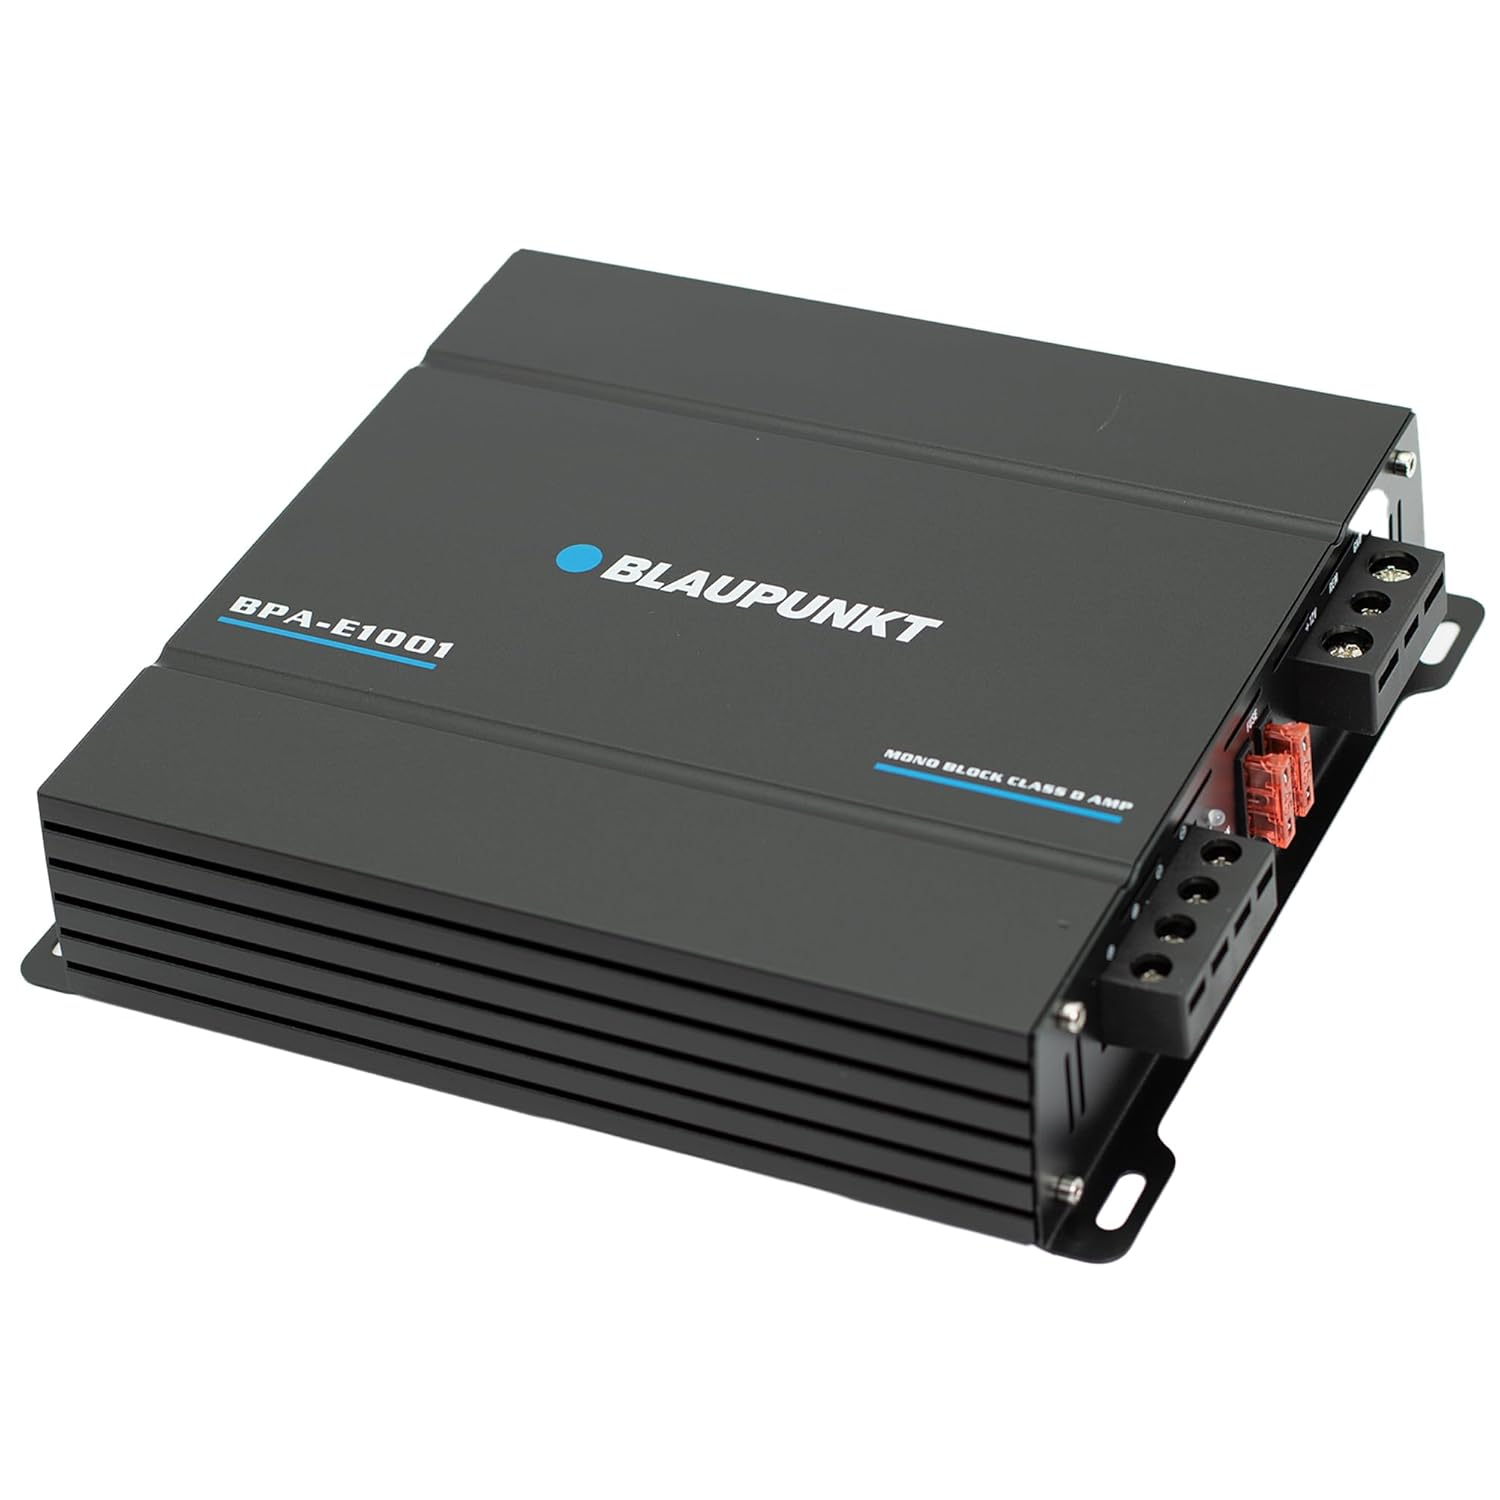
Imagem 1.1: Topo view of the Blaupunkt BPA-E1001 Monoblock Amplifier, showing the brand logo and model number.
2. Informações de segurança
Observe sempre as seguintes precauções de segurança durante a instalação e operação:
- Disconnect the vehicle's battery negative terminal before any electrical work to prevent short circuits.
- Ensure all wiring is properly insulated to prevent damage and electrical hazards.
- Monte o ampInstale o amplificador em um local seguro que permita ventilação adequada e esteja protegido da umidade e do calor excessivo.
- Utilize fios com a bitola adequada para as conexões de alimentação, aterramento e alto-falantes, conforme especificado neste manual.
- Não opere o ampAmplificador se estiver danificado ou com mau funcionamento. Encaminhe a manutenção para pessoal qualificado.
3. Conteúdo da embalagem
Verifique se todos os itens estão presentes na embalagem:
- Blaupunkt BPA-E1001 Monoblock Ampmais vivo
- Remote Bass Control Unit
- Parafusos de montagem
- Fuses (spare or pre-installed)
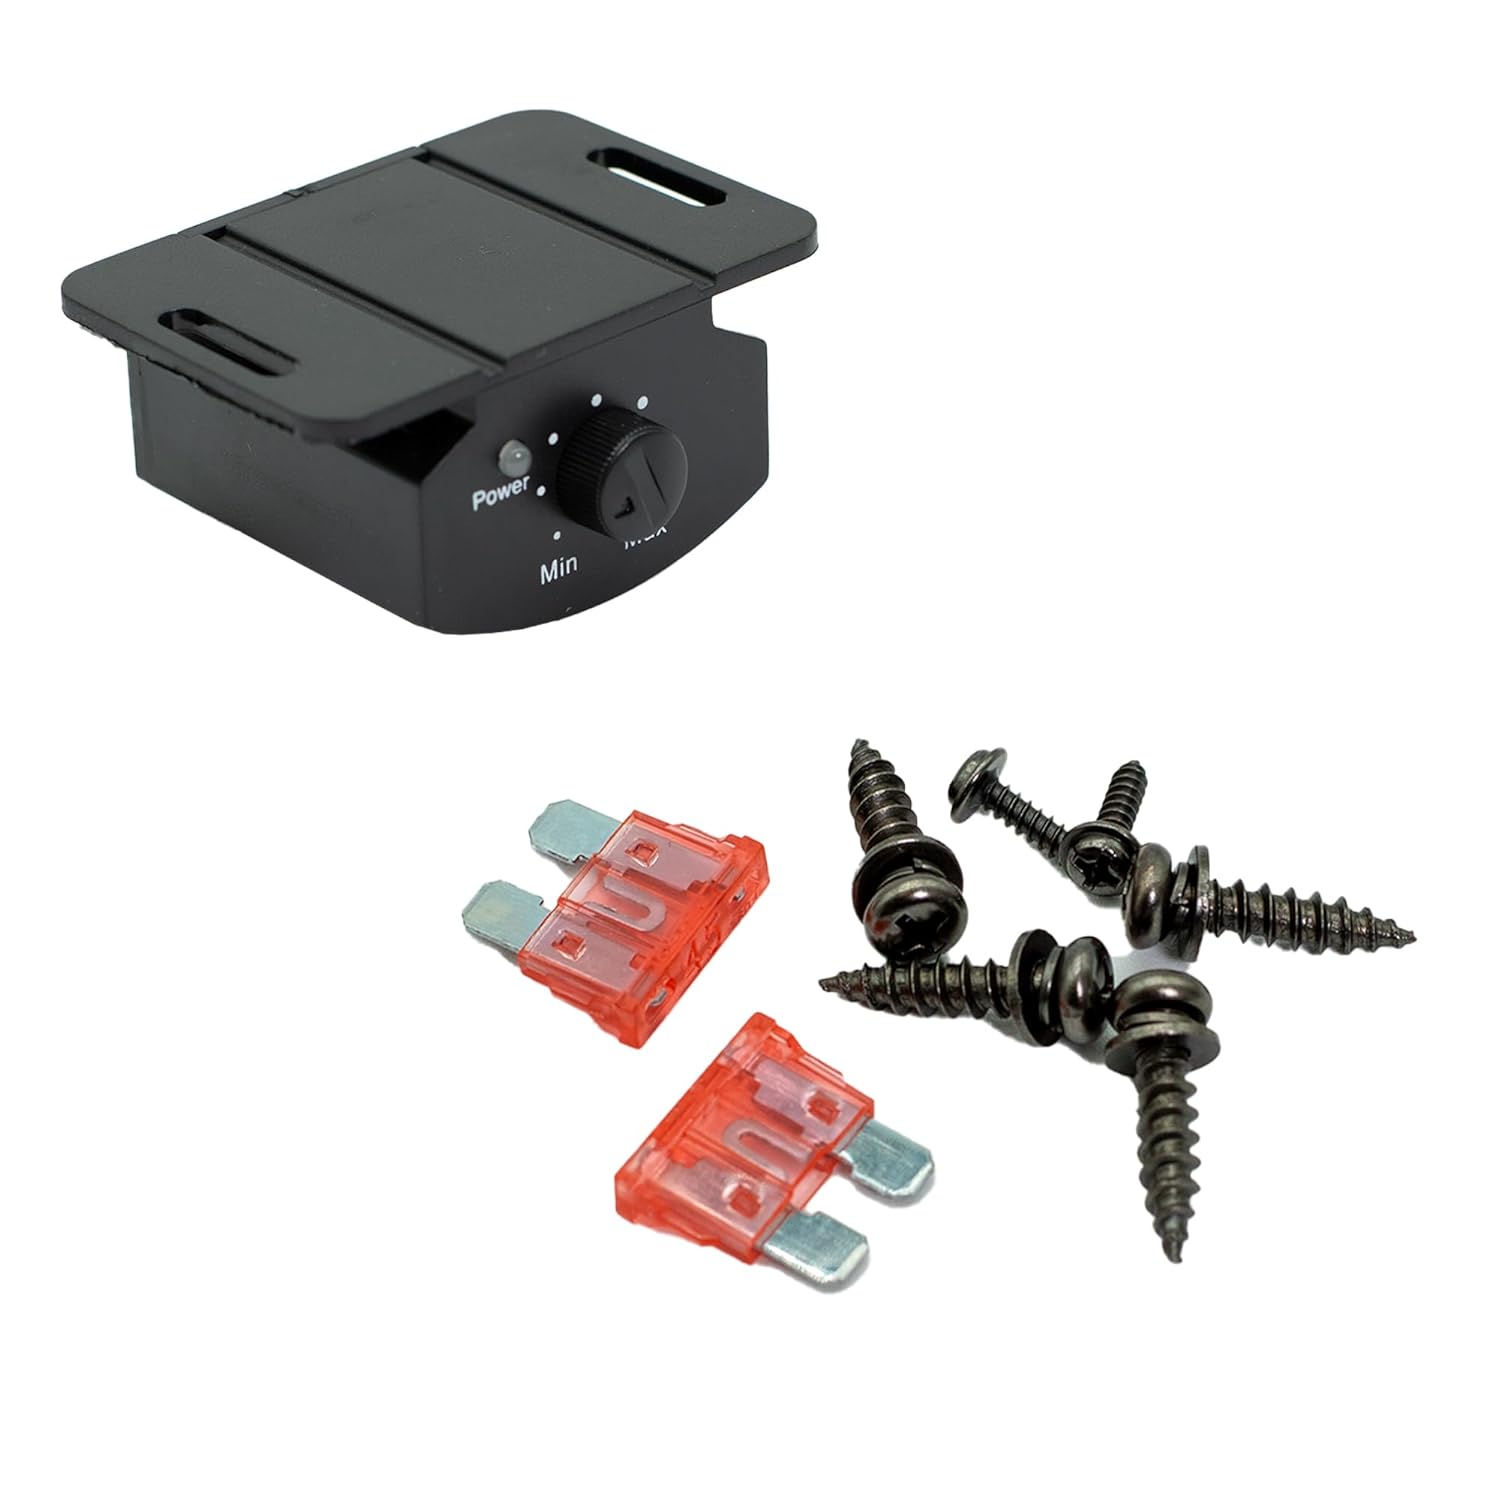
Image 3.1: Included accessories: remote bass control unit, fuses, and mounting screws.
4. Configuração e instalação
A instalação correta é crucial para o desempenho e a segurança ideais. Se tiver dúvidas sobre algum passo, consulte um instalador profissional.
4.1 AmpLayout do lificador

Image 4.1: Control panel side of the amplifier, detailing input and adjustment controls.
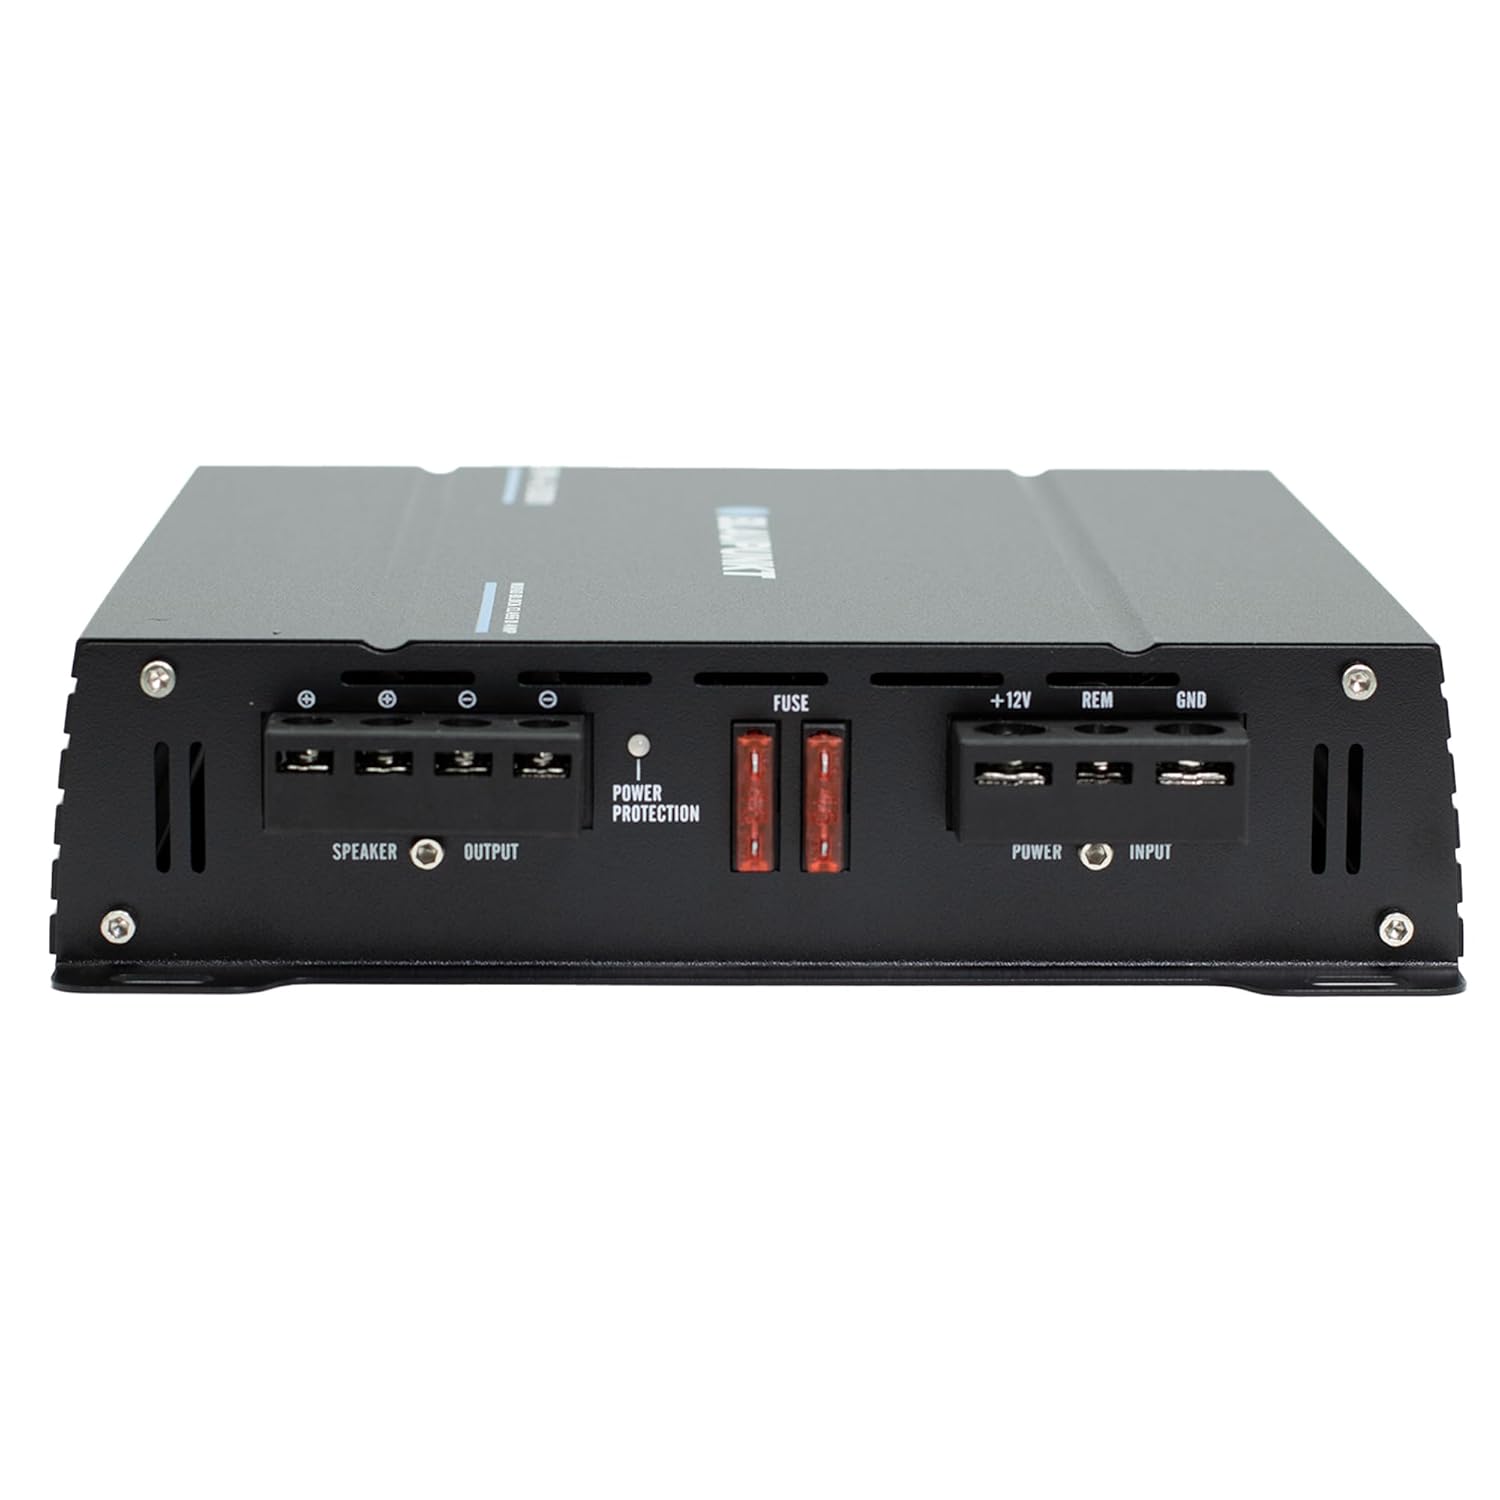
Image 4.2: Power and speaker terminal side of the amplifier, showing power input, remote, ground, and speaker output connections.
4.2 Conexões de Fiação
- Conexão de energia (+12V): Connect a heavy-gauge power cable (e.g., 4-gauge) from the vehicle's positive battery terminal to the +12V terminal on the amplifier. Install an in-line fuse holder with an appropriate fuse (refer to specifications) within 18 inches of the battery.
- Conexão de aterramento (GND): Connect a heavy-gauge ground cable of the same length as the power cable from the GND terminal on the ampConecte o amplificador a uma superfície metálica limpa e sem pintura no chassi do veículo. Certifique-se de que a conexão elétrica esteja em boas condições.
- Ativação remota (REM): Conecte um fio de ativação remota da saída remota da sua unidade principal ao terminal REM do... ampamplificador. Este fio ativa o ampLigar e desligar o amplificador com a unidade principal do seu aparelho.
- Audio Input (LINE INPUT): Connect RCA cables from your head unit's subwoofer or full-range RCA outputs to the LINE INPUT (L and R) on the ampmais vivo.
- Saída de áudio (SPEAKER OUTPUT): Connect your subwoofer(s) to the SPEAKER OUTPUT terminals. Ensure correct polarity (+ to + and - to -). Refer to your subwoofer's impedance rating and the amplifier's specifications for compatible loads.
4.3 Montagem
Monte o amplifier securely using the provided screws. Choose a location that is dry, well-ventilated, and away from direct sunlight or heat sources. Ensure sufficient space around the amplifier para circulação de ar.
5. Instruções de operação
Após a instalação, ajuste o ampAjustes do amplificador para um desempenho de áudio ideal.
5.1 Control Panel Adjustments
- GANHO: Este controle corresponde ao ampAjuste a sensibilidade de entrada do amplificador à saída da sua unidade principal. Comece com o ganho no mínimo e aumente-o gradualmente até ouvir distorção; em seguida, reduza-o um pouco. Não use o controle de ganho como um botão de volume.
- FASE (0°/180°): Adjust this switch to match the phase of the subwoofer with the rest of your audio system. Listen for the strongest bass response.
- SUB SONIC (10Hz-50Hz): This is a high-pass filter for subwoofers, removing extremely low frequencies that are inaudible and can cause damage to the subwoofer. Set it slightly below your subwoofer's resonant frequency.
- BASS BOOST (0dB-12dB): This control provides a boost at a specific low frequency. Use sparingly to avoid distortion and potential speaker damage.
- LOW PASS (50Hz-250Hz): This is a low-pass filter that allows only frequencies below the set point to pass to the subwoofer. Adjust it to blend smoothly with your main speakers.
5.2 Controle remoto de graves
The included remote bass control unit connects to the 'REMOTE' port on the amplifier. This allows you to conveniently adjust the subwoofer output level from the driver's seat.
6. Manutenção
To ensure the longevity and performance of your ampmais vital:
- Verifique periodicamente se todas as conexões da fiação estão bem apertadas e se há corrosão.
- Mantenha o ampLimpe o amplificador, removendo poeira e detritos. Use um pano macio e seco para a limpeza.
- Assegurar que o ampAs aletas de resfriamento do amplificador não estão obstruídas para manter a dissipação de calor adequada.
7. Solução De Problemas
Se você tiver problemas com seu ampPara solucionar problemas com o amplificador, consulte as seguintes etapas comuns:
- Sem energia: Verifique o fusível em linha próximo à bateria e os fusíveis no amplifier. Verify all power and ground connections are secure. Ensure the remote turn-on wire is receiving +12V when the head unit is on.
- Sem som: Check RCA input connections from the head unit. Verify speaker wire connections and ensure correct polarity. Check head unit settings for subwoofer output.
- Som distorcido: Reduce the GAIN setting. Check for proper impedance matching between the amplifier and subwoofer(s). Ensure speaker wires are not shorted.
- AmpSuperaquecimento do amplificador: Garanta ventilação adequada ao redor do amplifier. Check for proper impedance load on the speaker outputs.
If problems persist after following these steps, contact customer support or a qualified technician.
8. Especificações
The following are the technical specifications for the Blaupunkt BPA-E1001 Monoblock Ampmais vital:
| Recurso | Especificação |
|---|---|
| Marca | BLAUPUNKT |
| Número do modelo | BPA-E1001 |
| Número de canais | 1 |
| Potência de saída (máx.) | 2000 Watts |
| Potência RMS (4 Ohms) | 420 W |
| Potência RMS (2 Ohms) | 720 W |
| Potência RMS (1 Ohms) | 1000 W |
| Resposta de frequência | 10Hz a 250Hz |
| Ampclasse mais vital | Classe D |
| Dimensões da embalagem | 12.5 x 9 x 3 polegadas |
| Peso do item | 4.84 libras |
| UPC | 850053034848 |
| Especificação Atendida | FCC |
9. Garantia e Suporte
Blaupunkt products are designed and manufactured to the highest quality standards. For warranty information and customer support, please refer to the documentation included with your purchase or visit the official Blaupunkt website. Guarde o comprovante de compra para solicitações de garantia.


