1. Introdução
This manual provides comprehensive instructions for the installation, operation, and maintenance of your Geloo H-GJ001 Motorcycle LCD Speedometer and Tachometer. This multi-functional instrument combines a speedometer, tachometer, odometer, and fuel gauge into a single unit, designed for motorcycles with 1, 2, or 4 cylinders. Its robust construction ensures durability and reliable performance.
Os principais recursos incluem:
- Integrated speedometer, tachometer (up to 12,000 RPM), odometer, and fuel gauge.
- High-precision speed sensor for accurate readings.
- Durable ABS housing with a clear lens, resistant to minor impacts.
- Low fuel warning indicator (last cell flashes automatically).
- Overspeed warning light activates above 10,000 RPM.
- Waterproof and dustproof design for various riding conditions.
2. Informações de segurança
Please read all safety instructions before installation and operation to prevent damage to the product or injury. Improper installation or use can lead to malfunction.
- Ensure the motorcycle's power is off before beginning installation.
- All wiring connections must be secure and correctly insulated to prevent short circuits.
- Consult a professional mechanic if you are unsure about any installation steps.
- Do not attempt to disassemble or modify the unit, as this may void the warranty and cause damage.
- Keep the display clean and free from obstructions to ensure clear visibility while riding.
3. Conteúdo da embalagem
Verifique se todos os componentes estão presentes na embalagem:
- 1 x Geloo H-GJ001 Motorcycle Speedometer/Tachometer Unit
- 1 x Speed Sensor
- Mounting Hardware (nuts, washers, clips)
- Chicote de Fiação
4. Produto acabadoview
The Geloo H-GJ001 unit features a clear LCD display and robust construction. Below are images illustrating the product and its components.
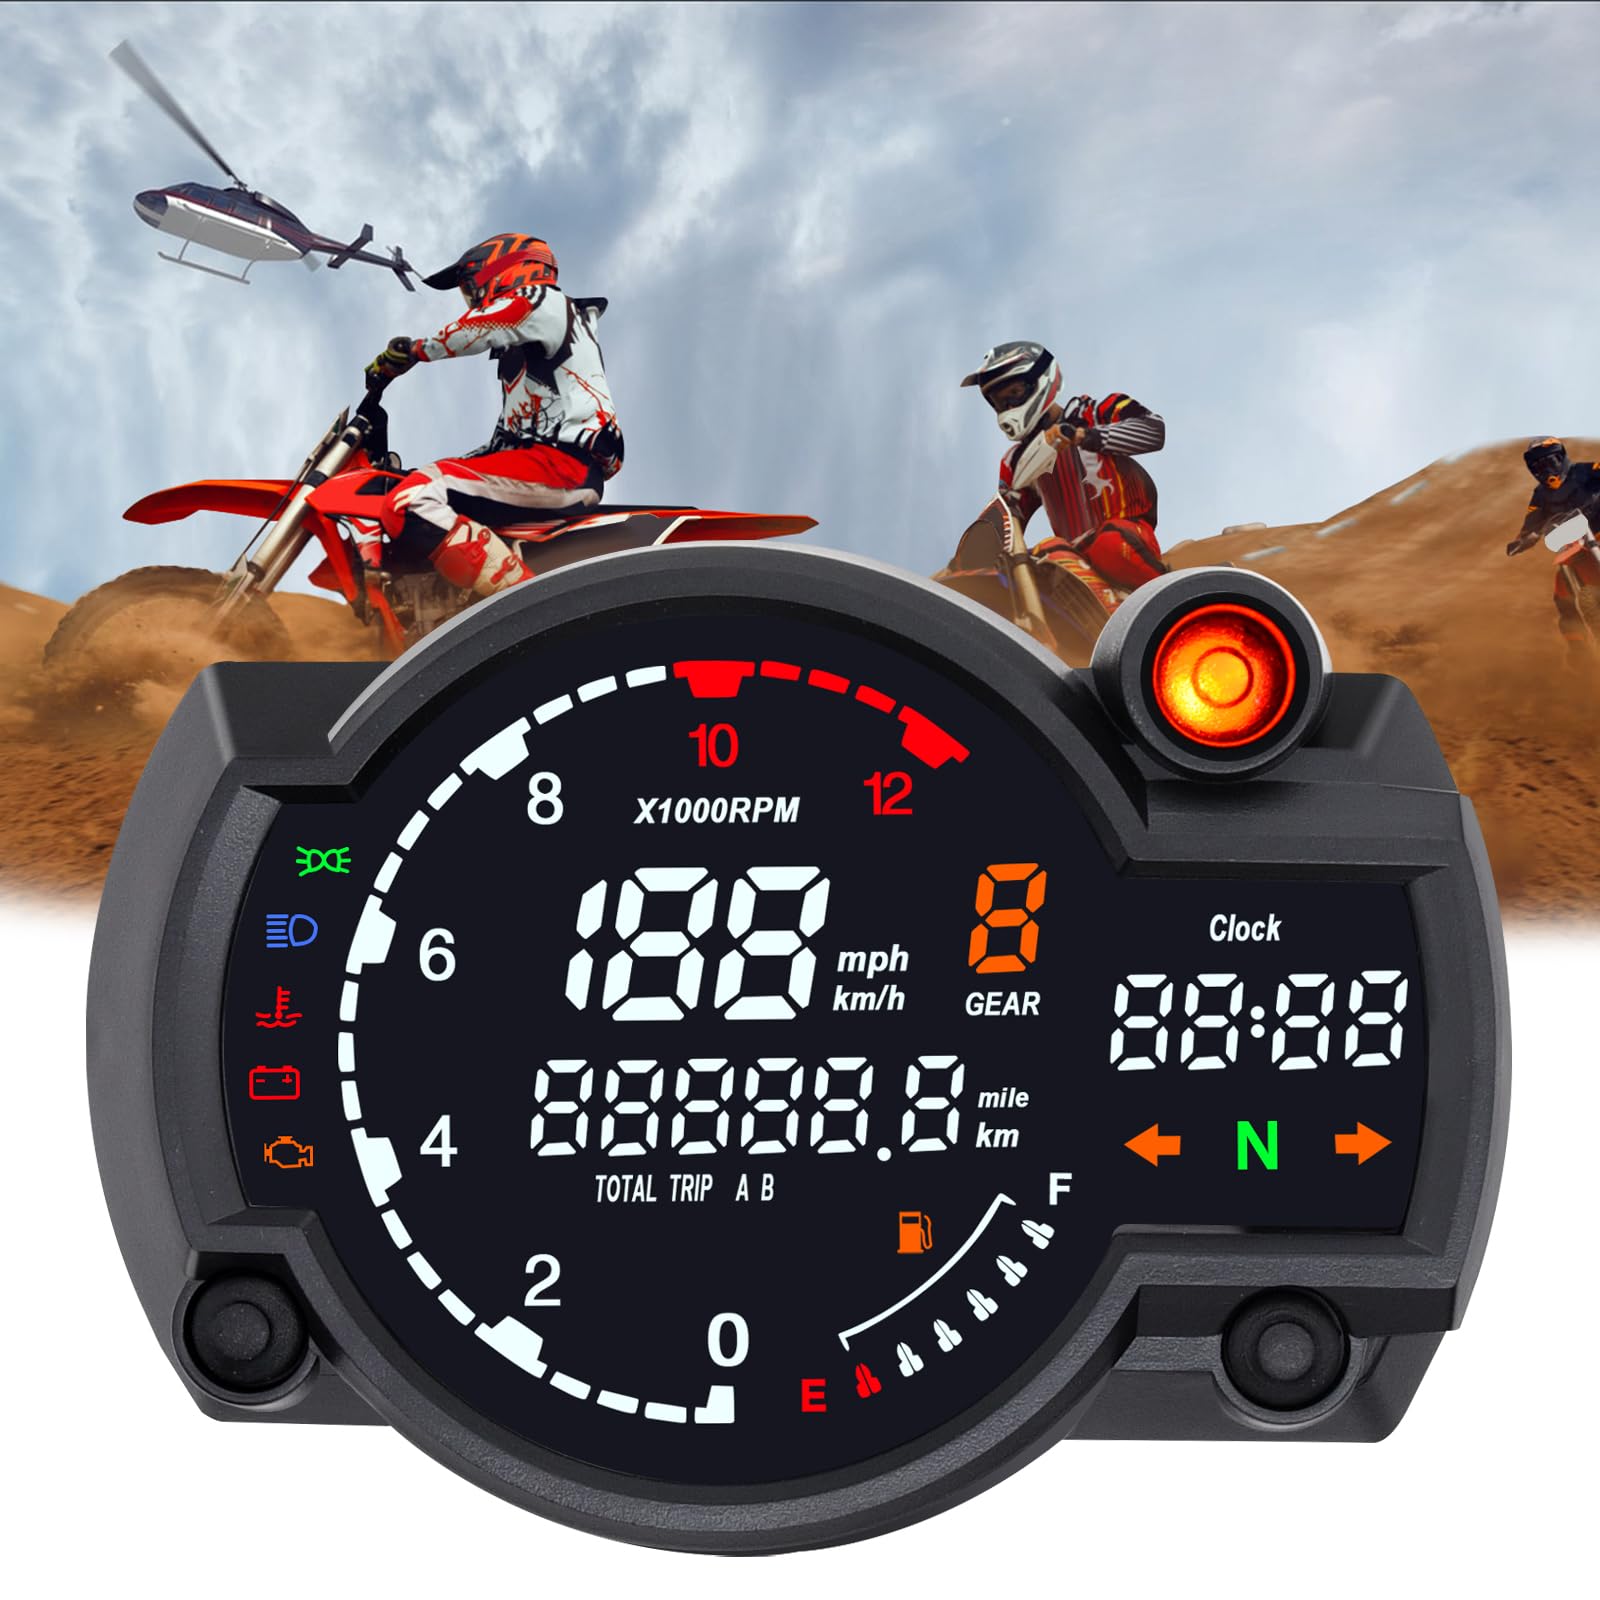
Figura 4.1: Frente view of the Geloo H-GJ001 Motorcycle LCD Speedometer and Tachometer, showing the display and buttons.

Figure 4.2: Illustration of the speedometer's waterproof and dustproof capabilities, submerged in water.

Figure 4.3: Dimensions of the Geloo H-GJ001 unit, showing approximate measurements of 141mm width, 100.5mm height, and 41.3mm depth.

Figura 4.4: Close view of the wiring harness connectors for the speedometer.

Figura 4.5: Traseira view of the speedometer unit, showing the integrated wiring harness connection point.
5. Especificações
| Recurso | Especificação |
|---|---|
| Número do modelo | H-GJ001 |
| Marca | Geloo |
| Material | Acrilonitrila Butadieno Estireno (ABS) |
| Dimensões (C x L x A) | 15 x 7 x 10 cm (aprox. 141 x 100.5 x 41.3 mm) |
| Peso | 310 gramas |
| RPM máx. | 12,000 RPM |
| Cylinder Compatibility | 1, 2, 4 Cylinders |
| Tipo de exibição | LCD com luz de fundo |
| Características | Speedometer, Tachometer, Odometer, Fuel Gauge, Gear Indicator (1-6), Low Fuel Warning, Overspeed Warning |
6. Configuração e instalação
Proper installation is crucial for the correct functioning of the speedometer. Follow these steps carefully.
6.1 Montagem da Unidade
- Choose a suitable location on your motorcycle's handlebars or dashboard that provides clear visibility and does not obstruct your view ou controles.
- Use the provided mounting hardware to securely attach the speedometer unit. Ensure it is firmly fixed to prevent vibration-induced damage.
6.2 Conexões de Fiação
The speedometer comes with a multi-pin wiring harness. Refer to your motorcycle's wiring diagram and the following general guide for connections. It is highly recommended to have this done by a qualified technician if you are not familiar with motorcycle electrical systems.
- Fonte de energia: Connect the main power wires (typically red for positive, black for negative/ground) to the motorcycle's ignition-switched power source.
- Sensor de velocidade: Connect the speed sensor wires to the designated input on the speedometer harness. The sensor should be mounted near a rotating part (e.g., wheel, sprocket) to accurately measure speed.
- Tachometer Signal: Connect the tachometer signal wire to the motorcycle's ignition coil or ECU tachometer output.
- Indicador de combustível: Connect the fuel level sensor wire to the motorcycle's fuel tank sender unit.
- Indicador de marcha: Connect the gear position sensor wires (if applicable and supported by your motorcycle) to the corresponding inputs.
- Luzes indicadoras: Connect wires for turn signals, high beam, neutral, etc., to their respective motorcycle circuits.
Ensure all connections are insulated with electrical tape or heat shrink tubing to prevent short circuits and corrosion.
6.3 Configuração Inicial
After wiring, turn on the motorcycle's ignition. The speedometer will power on. You may need to configure initial settings such as:
- Cylinder Setting: Adjust the setting to match your motorcycle's engine (1, 2, or 4 cylinders) for accurate RPM readings. Refer to the operating instructions for button functions.
- Circunferência da roda: Input the correct wheel circumference for accurate speed and odometer readings.
- Configuração de tempo: Defina a hora atual.

Figure 6.1: The Geloo H-GJ001 speedometer mounted on motorcycle handlebars, showing the display with gear indicator and LCD backlight.
7. Instruções de operação
The Geloo H-GJ001 speedometer is designed for intuitive operation. The LCD display provides clear information day or night.
7.1 Funções de Exibição
The main display shows:
- Velocidade: Digital display in km/h or mph.
- RPM: Analog bar graph and digital display (x1000 RPM).
- Odômetro: Distância total percorrida.
- Medidor de viagem: Resettable distance for individual trips.
- Indicador de combustível: 6-cell indicator. The last cell flashes when fuel is low.
- Indicador de marcha: Displays current gear (1-6) or Neutral (N).
- Relógio: Exibição de tempo.
- Luzes indicadoras: Neutral, High Beam, Turn Signals, Engine Check, Overspeed Warning.
7.2 Funções dos botões
The unit typically features two buttons for navigation and setting adjustments:
- Pressão curta: Cycles through display modes (e.g., Odometer, Trip A, Trip B).
- Pressão longa: Enters setting mode or resets trip meters (depending on context).
To adjust settings (e.g., cylinder count, wheel circumference, time, units):
- With the ignition on, press and hold one or both buttons (refer to specific product instructions if available) to enter the setting menu.
- Use short presses to cycle through options.
- Use long presses to confirm a selection or adjust values.
- Exit setting mode by waiting for a timeout or confirming the last setting.
7.3 Indicadores de advertência
- Low Fuel Warning: The fuel gauge's last cell will flash when the fuel level is critically low, prompting you to refuel.
- Overspeed Warning: If your engine speed exceeds 10,000 RPM, a dedicated warning light will illuminate to alert you.

Figure 7.1: The speedometer display visible while riding on a road, showing speed, RPM, and other indicators.
8. Manutenção
To ensure the longevity and optimal performance of your Geloo H-GJ001 speedometer, follow these maintenance guidelines:
- Limpeza: Limpe o visor e a carcaça da unidade com um pano macio e seco.amp cloth. Avoid abrasive cleaners or solvents that could damage the plastic or LCD screen.
- Selo à prova d'água: Periodically inspect the unit for any signs of damage to the housing or seals that might compromise its waterproof and dustproof integrity.
- Fiação: Check wiring connections periodically for looseness or corrosion. Ensure all connections remain secure and insulated.
- Sensor: Keep the speed sensor clean and free from debris to ensure accurate readings.
9. Solução De Problemas
If you encounter issues with your Geloo H-GJ001 speedometer, refer to the following common problems and solutions:
| Problema | Possível causa | Solução |
|---|---|---|
| Sem energia/Tela desligada | Loose power connection, blown fuse, faulty wiring. | Check power wires, motorcycle fuse box, and all connections. |
| Leitura de velocidade imprecisa | Incorrect wheel circumference setting, faulty speed sensor, sensor not properly aligned. | Verify wheel circumference setting. Check speed sensor connection and alignment. Inspect sensor for damage. |
| Leitura de RPM imprecisa | Incorrect cylinder setting, faulty tachometer signal wire connection. | Adjust cylinder setting to match your engine. Check tachometer signal wire connection to ignition coil/ECU. |
| Fuel gauge not working | Faulty fuel level sensor, loose connection to fuel sender. | Check connection to the motorcycle's fuel sender unit. Test the fuel sender unit if possible. |
| Tela piscando ou fraca | Fonte de alimentação instável, conexão solta, falha interna. | Check power connections. Ensure stable voltage from motorcycle. If problem persists, contact support. |
If the problem persists after attempting these solutions, please contact Geloo customer support.
10. Garantia e Suporte
Information regarding specific warranty terms and conditions for the Geloo H-GJ001 is not available in the provided product details. Please refer to the retailer or Geloo's official website para obter as informações de garantia mais atualizadas.
For technical support or inquiries, please contact Geloo customer service through their official channels. Keep your purchase receipt and product model number (H-GJ001) handy when contacting support.


