1. Introdução
Obrigado pela compra.asing the Timex TW14 Alarm Clock with Wireless Charger. This compact device combines a digital alarm clock with a convenient 15W wireless charging pad, suitable for various smartphones and earbuds. This manual provides essential information for setting up, operating, and maintaining your new alarm clock.
2. Conteúdo da embalagem
Certifique-se de que todos os itens estejam presentes na embalagem:
- Timex TW14 Alarm Clock with Wireless Charger
- Cabo de alimentação USB-A para USB-C
- Manual do usuário (este documento)
Observação: A 18W QC3.0 adapter and 2 AAA batteries for backup are não incluso e deve ser adquirido separadamente.
3. Produto acabadoview
Familiarize yourself with the components and controls of your Timex TW14 alarm clock.

Imagem 3.1: Principal view of the Timex TW14 alarm clock, highlighting the control buttons and the wireless charging pad. The display shows "10:09". A USB power cable is also shown.
Painel frontal:
- Telão LED: Shows time, alarm status, and PM indicator.
Painel superior:
- Base de carregamento sem fio: Para carregar dispositivos compatíveis.
- Botão "M": Mode/Set button for time and alarm settings, also functions as snooze.
- "-" Botão: Decrease value, navigate backward, also functions as snooze.
- Botão "+": Increase value, navigate forward, also functions as snooze.
Painel traseiro:
- Entrada de alimentação USB C: Conecta-se ao cabo de alimentação.
Painel inferior:
- Compartimento da bateria: For 2 AAA backup batteries.
4. Configuração
4.1 Conexão de Energia
- Connect the supplied USB-A to USB-C power cable to the USB-C input port on the rear of the alarm clock.
- Connect the USB-A end of the cable to a compatible 18W QC3.0 USB power adapter (not included).
- Plug the power adapter into a standard wall outlet. The clock display will illuminate.
4.2 Instalação da bateria de reserva
The battery backup system maintains time and alarm settings during a temporary power outage. It does not power the clock display or wireless charging function.
- Localize o compartimento da bateria na parte inferior da unidade.
- Abra a tampa do compartimento da bateria.
- Insert 2 new AAA batteries (not included), observing the correct polarity (+ and -) as indicated inside the compartment.
- Feche bem a tampa do compartimento da bateria.
5. Instruções de operação
5.1 Definição da hora
- Pressione e segure o M Pressione o botão até que os dígitos da hora comecem a piscar.
- Use o - or + Botões para ajustar a hora. Preste atenção ao indicador PM se estiver usando o formato de 12 horas.
- Pressione o M Pressione o botão novamente para confirmar a hora, e os dígitos dos minutos piscarão.
- Use o - or + botões para ajustar os minutos.
- Pressione o M Pressione novamente o botão para confirmar os minutos e sair do modo de configuração de hora.
5.2 Configurando o Alarme
- Pressione o M button once (do not hold) to enter alarm setting mode. The alarm time will be displayed, and the alarm icon will flash.
- Pressione e segure o M Pressione o botão até que os dígitos da hora do alarme comecem a piscar.
- Use o - or + botões para ajustar a hora do alarme.
- Pressione o M button again to confirm the alarm hour, and the alarm minute digits will flash.
- Use o - or + botões para ajustar os minutos do alarme.
- Pressione o M button once more to confirm the alarm minutes and exit alarm setting mode. The alarm icon will remain lit, indicating the alarm is active.
- Para ativar/desativar o alarme, pressione o M button briefly when the current time is displayed. The alarm icon will appear or disappear.
5.3 Função de soneca
When the alarm sounds, press any of the M, -, ou + buttons to activate the snooze function. The alarm will temporarily stop and sound again after approximately 9 minutes.
To turn off the alarm completely, allow the alarm to ring for its full duration or turn off the alarm via the M button when not ringing.
5.4 Dimmer de tela
To adjust the brightness of the LED display, repeatedly press the M button (when not in setting mode) to cycle through High, Low, and Off brightness levels.
5.5 Carregamento sem fio
The Timex TW14 features a 15W wireless charging pad compatible with Qi-enabled devices such as iPhone, Android smartphones, and AirPods.

Imagem 5.1: An iPhone placed on the wireless charging pad of the Timex TW14 alarm clock, indicating active charging.
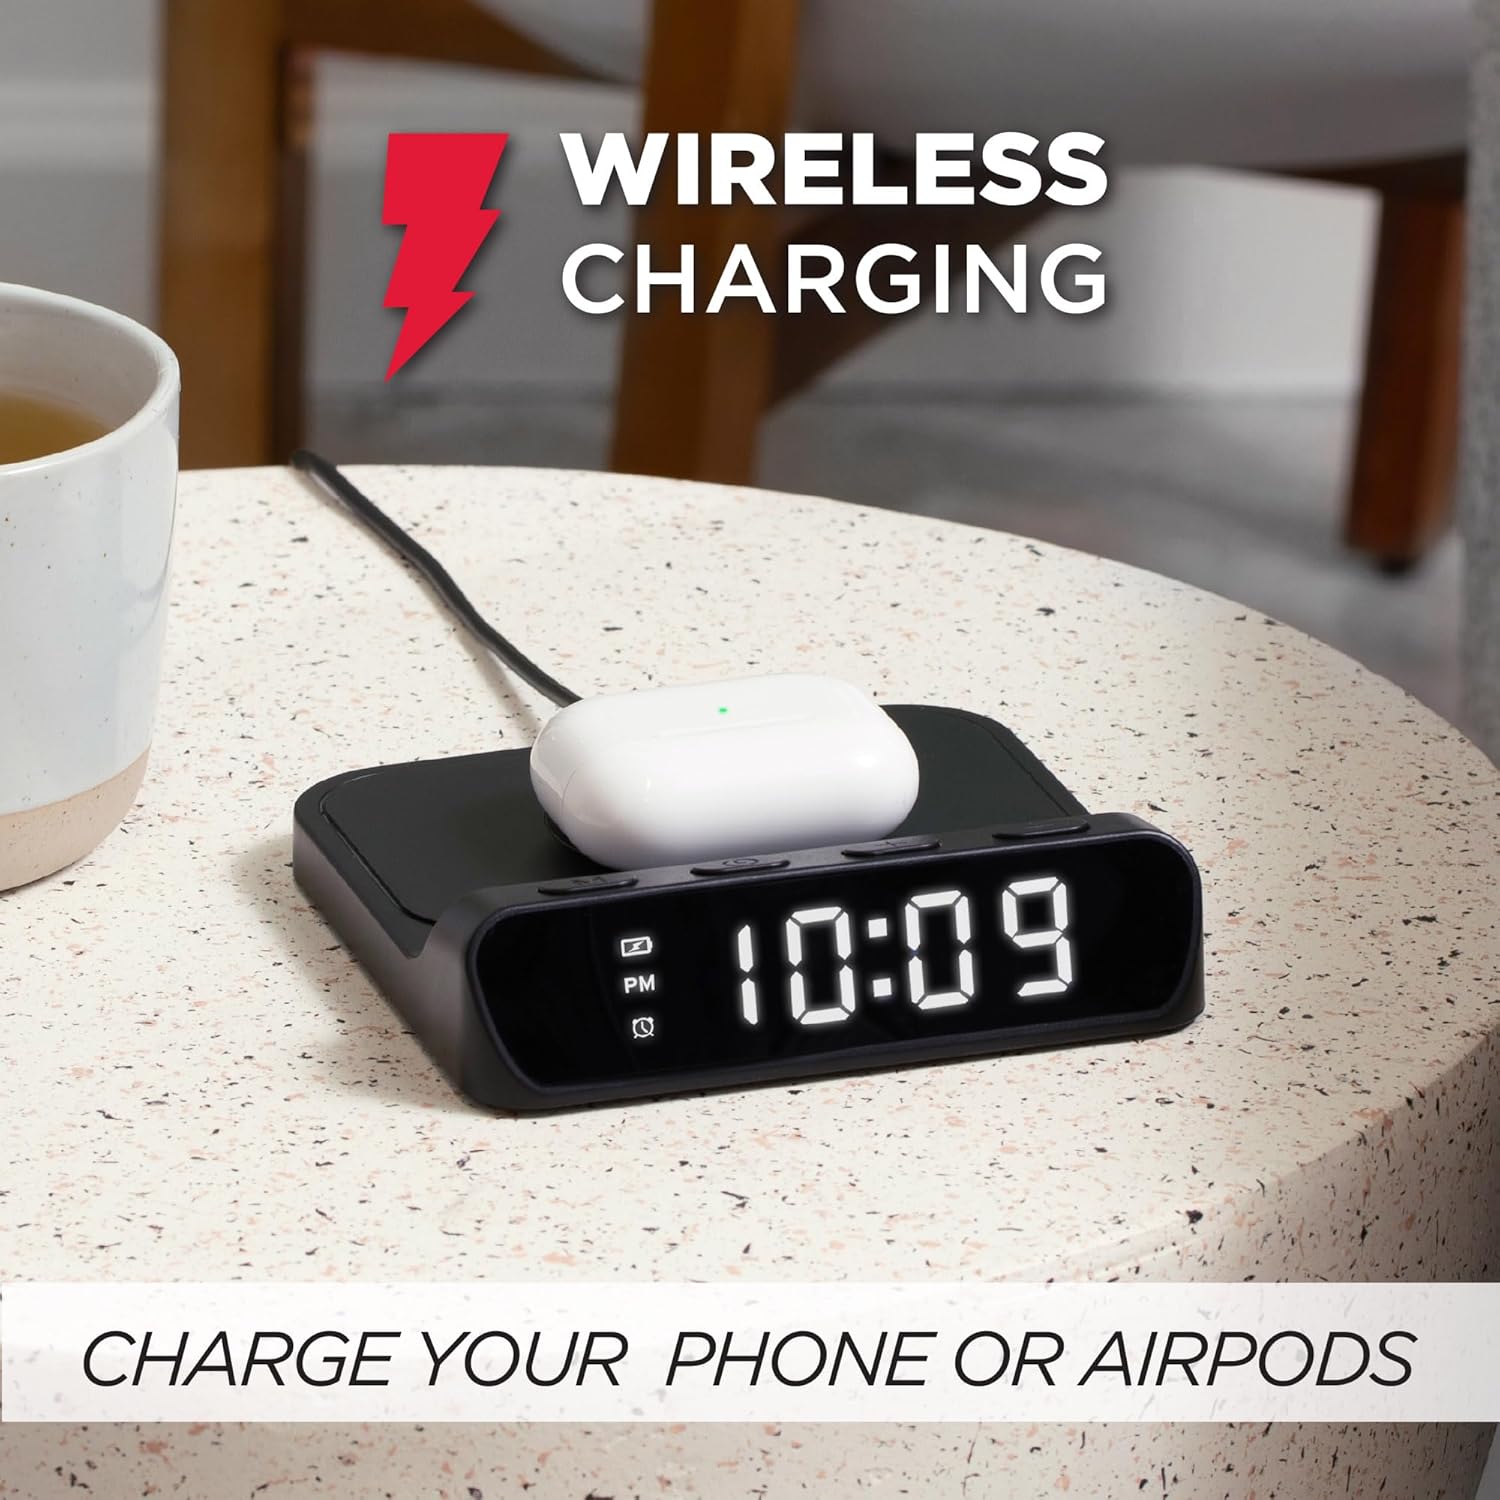
Imagem 5.2: AirPods case placed on the wireless charging pad of the Timex TW14 alarm clock, indicating active charging.
- Place your Qi-enabled device (e.g., smartphone, AirPods case) directly onto the center of the wireless charging pad on the top of the alarm clock.
- Ensure the device is properly aligned with the charging coil. A charging indicator (if available on your device) will confirm charging has begun.
- If charging does not start, slightly reposition your device on the pad.
Considerações importantes:
- For optimal charging performance, use an 18W QC3.0 power adapter.
- Thick phone cases or cases containing metal may interfere with wireless charging. Remove such cases if charging issues occur.
- Charging speed may vary depending on the device, its battery level, and environmental factors.
6. Manutenção
6.1 Limpeza
To clean the unit, gently wipe the surfaces with a soft, dry cloth. Do not use liquid cleaners, abrasive materials, or chemical sprays, as these may damage the finish or internal components.
6.2 Substituição da bateria
Replace the 2 AAA backup batteries annually or if you notice settings are not retained during power outages. Always use new batteries and dispose of old batteries responsibly.
7. Solução De Problemas
If you experience issues with your Timex TW14 alarm clock, please refer to the following common problems and solutions:
| Problema | Possível causa | Solução |
|---|---|---|
| O visor do relógio está desligado ou não funciona. | No power, loose connection, or display dimmer set to "Off". | Ensure the USB-C power cable is securely connected to the clock and a functional power adapter. Check if the adapter is plugged into a live outlet. Press the M button to cycle through display brightness settings (High/Low/Off). |
| O carregamento sem fio não está funcionando. | Device not Qi-compatible, improper alignment, phone case interference, insufficient power adapter. | Verify your device supports Qi wireless charging. Reposition the device on the center of the charging pad. Remove thick or metallic phone cases. Ensure you are using an 18W QC3.0 power adapter. |
| O carregamento sem fio é lento. | Power adapter not powerful enough, device alignment, background apps on device. | Use an 18W QC3.0 power adapter for optimal speed. Ensure perfect alignment of the device on the charging pad. Close unnecessary apps on your device. |
| Alarm settings are lost after power outage. | As baterias de reserva estão descarregadas ou não estão instaladas. | Install 2 new AAA batteries in the battery compartment, ensuring correct polarity. Replace old batteries if necessary. |
| Dificuldade em configurar a hora/alarme. | Sequência de pressionamento de botões incorreta. | Refer to sections 5.1 and 5.2 for detailed instructions on setting the time and alarm. Ensure you press and hold the M button at the correct steps. |
8. Especificações
| Marca | Timex |
| Número do modelo | TW14 |
| Cor | Preto |
| Tipo de exibição | Digital LED (0.8" white) |
| Características especiais | Alarm, 15W Wireless Charging, Display Dimmer, Battery Backup |
| Dimensões do produto | 5" (Largura) x 5" (Profundidade) x 1.2" (Altura) |
| Fonte de energia | USB-A to USB-C power cable (included), requires 18W QC3.0 adapter (not included) |
| Bateria de reserva | 2 pilhas AAA (não incluídas) |
| Material da estrutura | Plástico |
| Peso do item | 0.2 quilogramas (7 onças) |

Imagem 8.1: Timex TW14 alarm clock with its dimensions (5"W x 5"D x 1.2"H) clearly indicated.
9. Garantia e Suporte
Timex products are manufactured to high quality standards. For information regarding warranty coverage, technical support, or customer service, please refer to the warranty card included with your purchase or visit the official Timex website. Guarde o comprovante de compra para solicitações de garantia.