1. Introdução
This manual provides detailed instructions for the installation, configuration, and operation of your SODOLA 6-Port 10G Web Managed Ethernet Switch. This high-performance switch is designed to enhance network connectivity with its 4x10G RJ45 ports and 2x10G SFP+ ports, supporting various speeds and advanced management features.

Figure 1: SODOLA 6-Port 10G Web Managed Ethernet Switch (Model: 4x10G RJ45+2x10G SFP+)
The switch is compliant with IEEE 802.3, IEEE 802.3u, IEEE 802.3ab, IEEE 802.3bz, and IEEE 802.3ae standards, ensuring broad compatibility and reliable performance for demanding network environments.
2. Conteúdo da embalagem
Verifique se todos os itens estão presentes e em boas condições. Caso algum item esteja faltando ou danificado, entre em contato com o fornecedor.
- 1 x SODOLA 6-Port 10G Managed Ethernet Switch
- 1 x Manual do Usuário
- 1 x Cabo de alimentação
- 4 x Apoios para os pés
- 1 x Certificate of Inspection
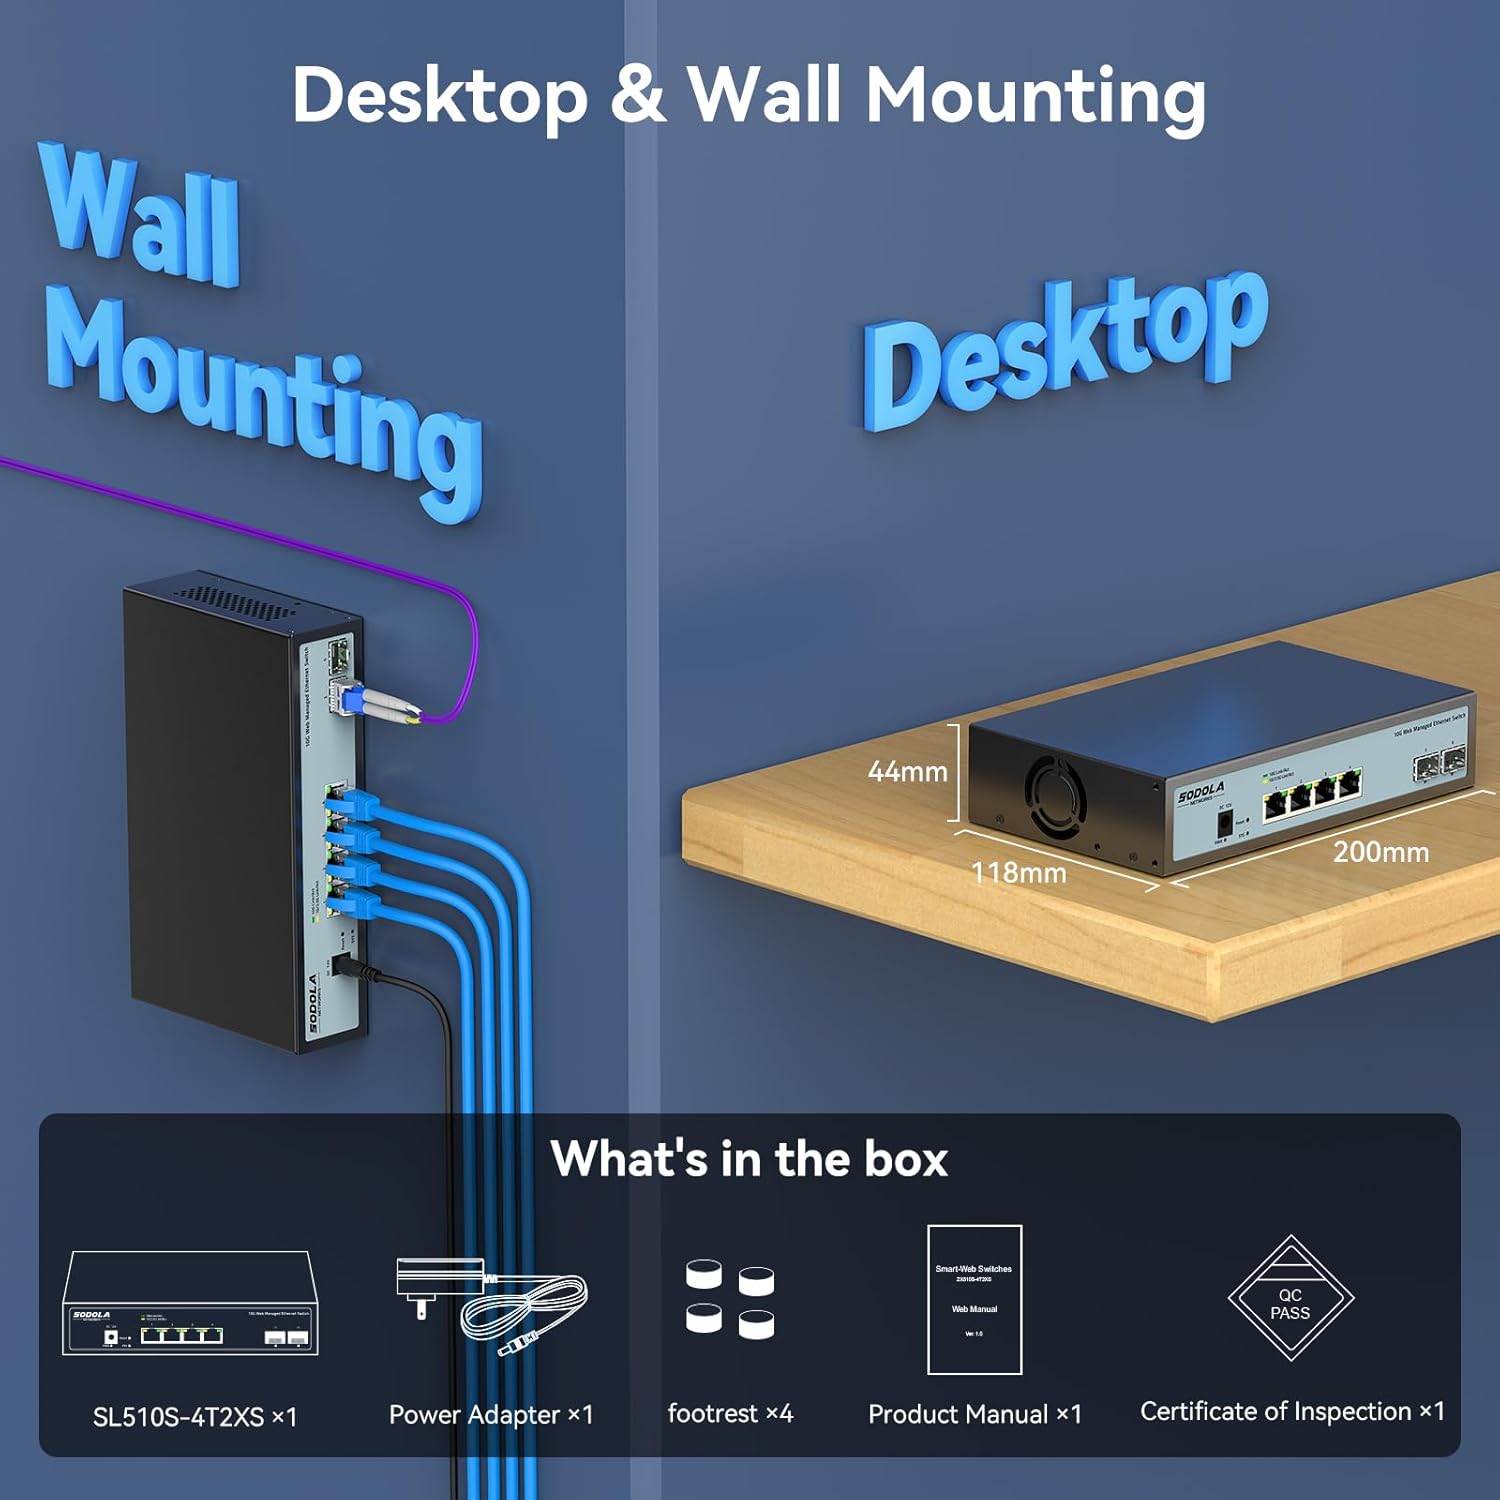
Figure 2: Included items: Switch, Power Adapter, Footrests, Product Manual, and Certificate of Inspection.
3. Hardware acabadoview
3.1 Painel Frontal
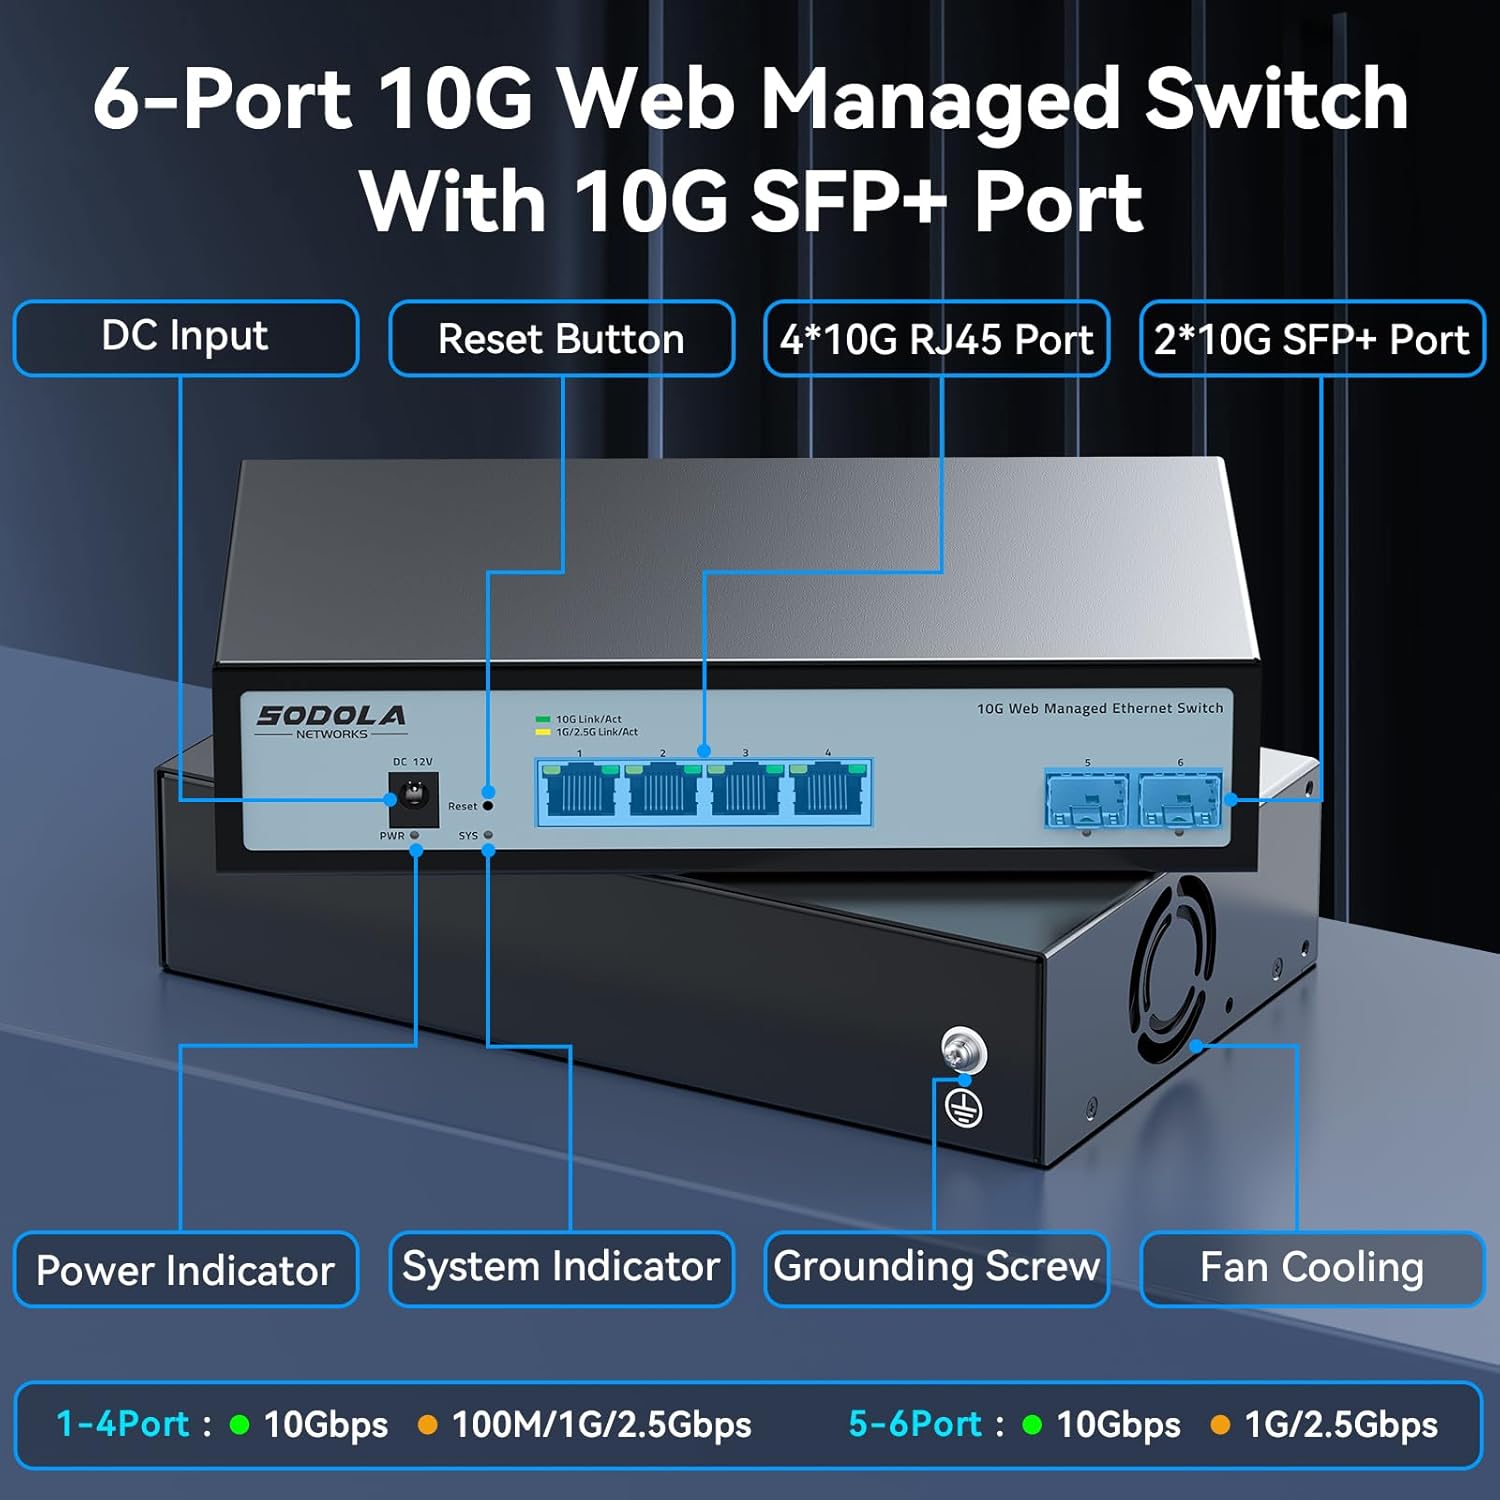
Figura 3: Layout do painel frontal
O painel frontal apresenta os seguintes componentes:
- Entrada DC: Porta de conexão de energia.
- Botão de reinicialização: Used to reset the device to factory defaults.
- 4 x 10G RJ45 Ports: Adaptive ports supporting 100M/1G/2.5G/5G/10G speeds.
- 2 portas SFP+ de 10G: Support manual switching between 10G/1G/100M or 2.5G/1G/100M adaptive.
- Indicador de energia: Indica o status de energia.
- Indicador do sistema: Indica o estado operacional do sistema.
3.2 Painel traseiro
The rear panel includes a grounding screw and fan cooling vents.
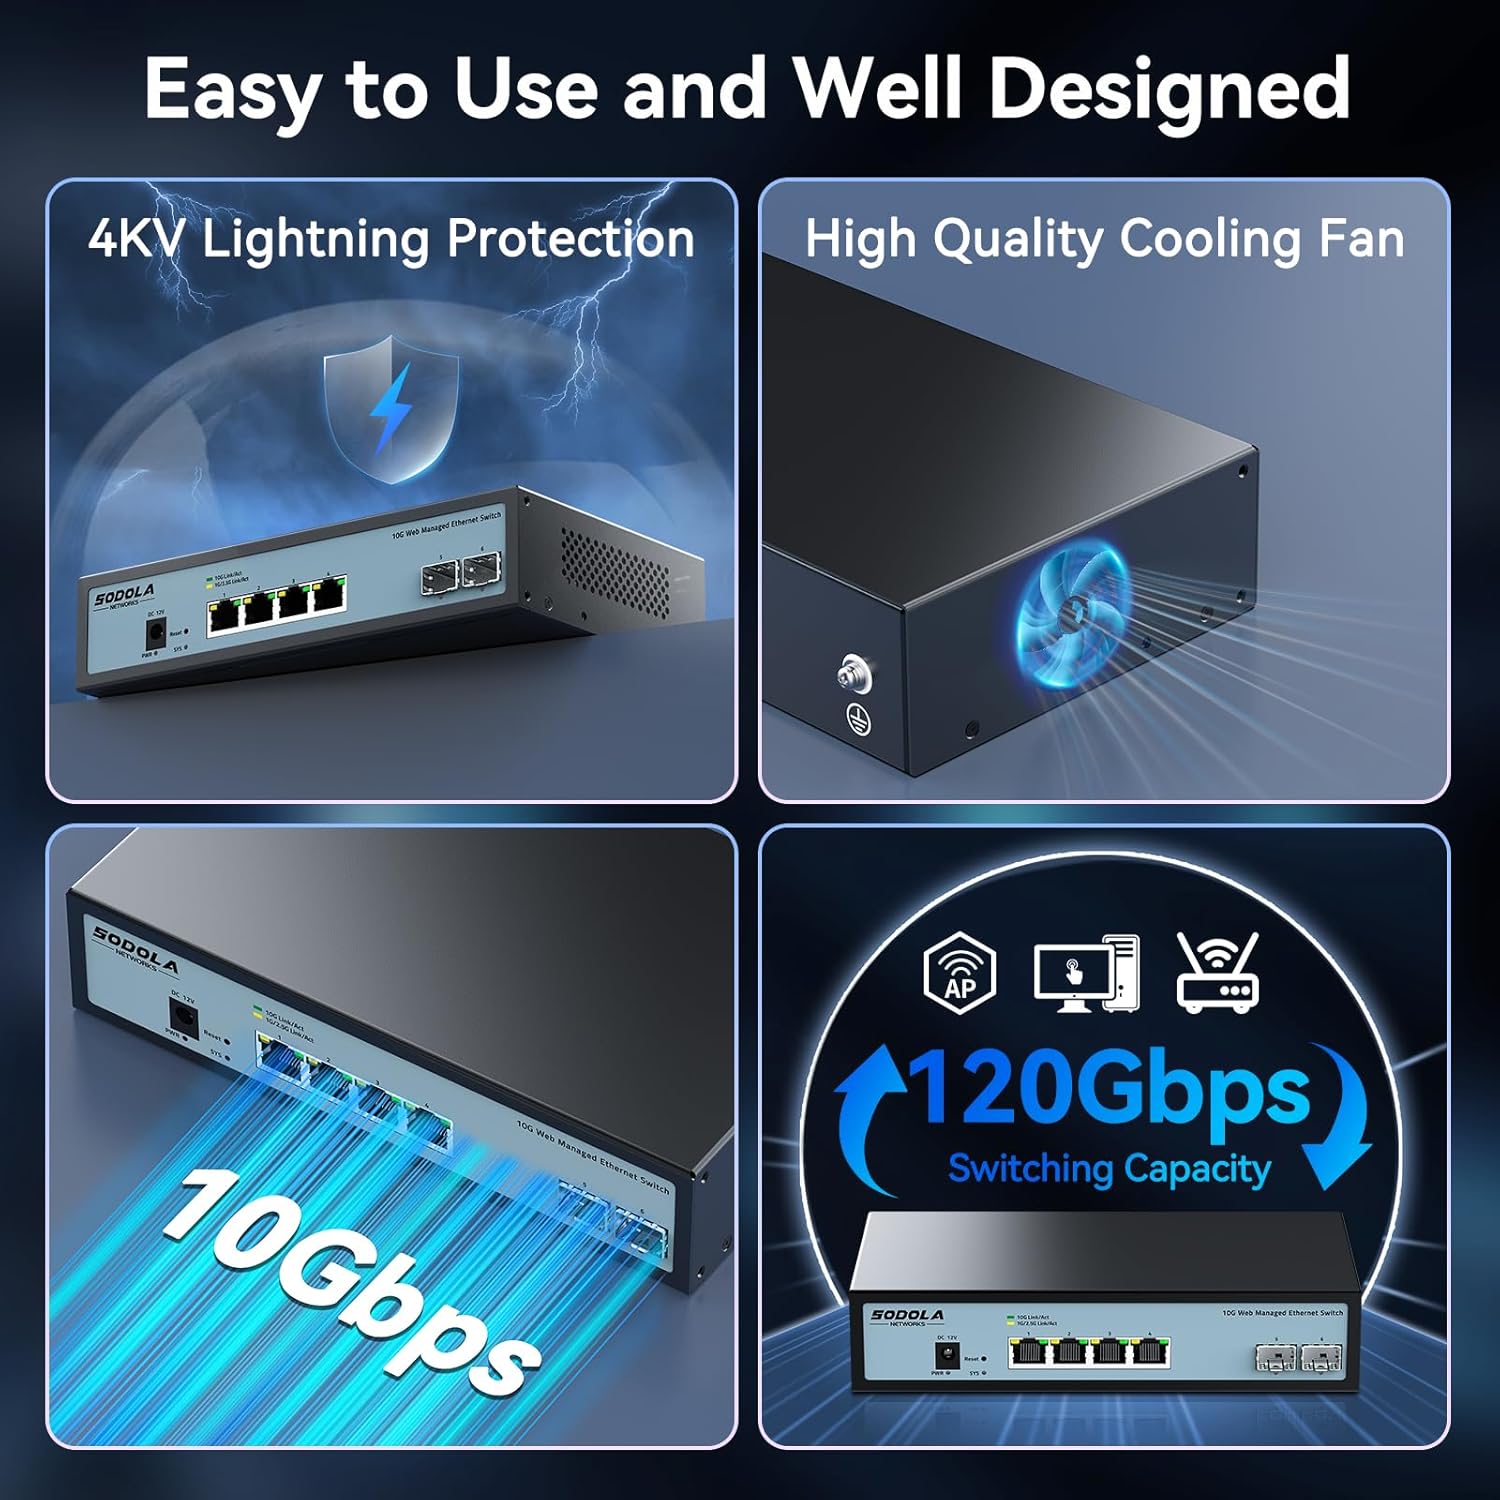
Figure 4: Rear Panel with Cooling Fan and Grounding Screw
- Parafuso de aterramento: For proper electrical grounding.
- Resfriamento do Ventilador: Internal cooling fan for heat dissipation.
4. Configuração
4.1 Instalação Física
The switch supports both desktop and wall mounting. Choose a stable, well-ventilated location for installation.

Figure 5: Desktop and Wall Mounting Options
4.2 Conectando o Interruptor
- Connect the power adapter to the DC input port on the switch and plug it into a power outlet.
- Connect your network devices (e.g., computers, servers, NAS, routers) to the RJ45 or SFP+ ports using appropriate Ethernet cables or SFP+ transceivers.
- Ensure proper grounding by connecting a grounding wire to the grounding screw.
Video 1: This video demonstrates the basic plug-and-play setup for a 10G Ethernet switch, showing connections to various network devices. While it features an unmanaged switch, the physical connection steps are similar.
5. Operando o Web Managed Interface
This switch features a web-based management interface for advanced configuration. To access it, follow these steps:
- Initial IP Configuration: Before logging in, you must set an IP address via IPv4 on your computer to match the switch's default subnet. The default IP address for the switch is typically 192.168.2.1.
- Acessando a interface: Abra um web browser and enter the switch's default IP address (e.g., http://192.168.2.1) na barra de endereço.
- Conecte-se: Enter the default credentials. The default username is administrador, and there is typically no default password (leave it blank).

Figure 6: Easy Web Managed Method for Initial Access
5.1 Key Management Features
O web interface provides access to various features for network control and monitoring:
- Configurações da porta: Configure individual port speeds (auto-negotiation is recommended for RJ45 ports), enable/disable ports, and manage flow control. For SFP+ ports, manual speed setting may be required for 2.5G or 1G devices.
- Gerenciamento de VLAN: Create and manage Virtual Local Area Networks for network segmentation.
- Agregação de links (LACP): Combine várias ligações físicas em uma única ligação lógica para aumentar a largura de banda e a redundância.
- Qualidade de Serviço (QoS): Priorize o tráfego de rede para aplicações críticas.
- Controle de tempestade: Prevent network disruptions caused by broadcast, multicast, or unknown unicast storms.
- Espelhamento de porta: Monitore o tráfego de rede enviando uma cópia dos pacotes de uma porta para outra.
- Espionagem DHCP: Aprimore a segurança da rede filtrando mensagens DHCP não confiáveis.
- SNMP: Monitor network devices from a central management station.
- RSTP (Rapid Spanning Tree Protocol): Prevent network loops.

Figura 7: Overview of Web Recursos de gerenciamento
Video 2: This video provides a demonstration of the web management interface, including login and basic configuration steps for a similar 10G managed switch. It highlights how to navigate and apply settings.
Vídeo 3: Um excessoview of a 10G web managed SFP+ switch, demonstrating its features and management capabilities. This can help users understand the interface and available options.
5.2 Salvando a configuração
After making any changes in the web interface, it is crucial to save the configuration to ensure your settings are retained after a reboot or power cycle. Navigate to the "Maintenance" or "System" section and select "Save Configuration" or a similar option, then apply the changes.

Figure 8: Remember to Save Configuration
6. Manutenção
6.1 Ventilador de resfriamento
The switch is equipped with an internal cooling fan to manage heat dissipation. If fan noise is a concern, the fan can be removed by opening the case. Ensure the device remains in a well-ventilated area if the fan is removed.
6.2 atualizações de firmware
Verifique periodicamente as instruções do fabricante. website for firmware updates to ensure optimal performance and access to the latest features and security enhancements. Follow the instructions provided with the firmware update package for proper installation.
7. Solução De Problemas
- Sem energia: Ensure the power cord is securely connected to the switch and a working power outlet. Check the power indicator LED.
- Sem ligação/atividade na porta:
- Verify the Ethernet cable is correctly connected to both the switch and the network device.
- Check the link/activity LED for the specific port.
- Certifique-se de que o dispositivo conectado esteja ligado e funcionando corretamente.
- For SFP+ ports, confirm the SFP+ module is properly inserted and compatible.
- No web interface, check the port status and ensure it is enabled and configured for the correct speed (especially for SFP+ ports).
- Não é possível acessar Web Interface:
- Ensure your computer's IP address is in the same subnet as the switch's default IP (e.g., 192.168.2.x).
- Clear your browser's cache.
- Experimente algo diferente web navegador.
- If you have changed the switch's IP address and forgotten it, you may need to perform a factory reset using the reset button.
- Velocidade de rede lenta:
- Verify that all connected devices and cables support 10G speeds for optimal performance.
- Check port speed settings in the web interface; ensure auto-negotiation is enabled for RJ45 ports or the correct speed is manually set for SFP+ ports.
- Inspecione os cabos para verificar se há danos ou terminações incorretas.
8. Especificações
| Recurso | Detalhe |
|---|---|
| Modelo | 4x10G RJ45+2x10G SFP+ (Managed) |
| Tipo de interface | 4 x 10G Base-T Ports + 2 x 10G SFP+ Ports |
| Taxa de transferência de dados | 10 Gigabit por segundo |
| Número de portas | 6 |
| Material da caixa | Metal |
| Peso do item | 2.05 libras |
| Dimensões da embalagem | 12.09 x 7.64 x 2.44 polegadas |
| Cor | Preto |
| Dispositivos compatíveis | Computador de mesa, laptop, roteador |
9. Garantia e Suporte
SODOLA offers a one-year free replacement for any non-human-induced quality issues and lifetime technical support. For assistance, please contact Sodola Networks customer service.
Para obter mais informações e suporte, visite o Sodola Store on Amazon.


