1. Introdução
Thank you for choosing the Lepro 1500LM Battery Powered LED Camping Lantern. This manual provides essential information for the safe and efficient operation, maintenance, and troubleshooting of your lantern. Please read this manual thoroughly before use and retain it for future reference.
2. Informações importantes de segurança
- Não misture pilhas novas com velhas.
- Não misture pilhas alcalinas, padrão (carbono-zinco) ou recarregáveis (níquel-cádmio).
- Always insert batteries correctly with regard to polarity (+ and -).
- Remove batteries if the lantern will not be used for an extended period.
- Mantenha fora do alcance de crianças.
- Do not stare directly into the LED light source to avoid eye strain.
- This product is IPX4 water-resistant, meaning it is protected against splashing water from all angles. It is not designed for submersion.
3. Conteúdo da embalagem
Ao abrir a embalagem, verifique se todos os itens estão presentes:
- Lepro 1500LM LED alimentado por bateria Camping Lantern (1 unit)
- Manual do usuário (este documento)
Note: 3 D-cell batteries are required and are not included in the package.
4. Produto acabadoview
Familiarize yourself with the main components of your Lepro CampLanterna:
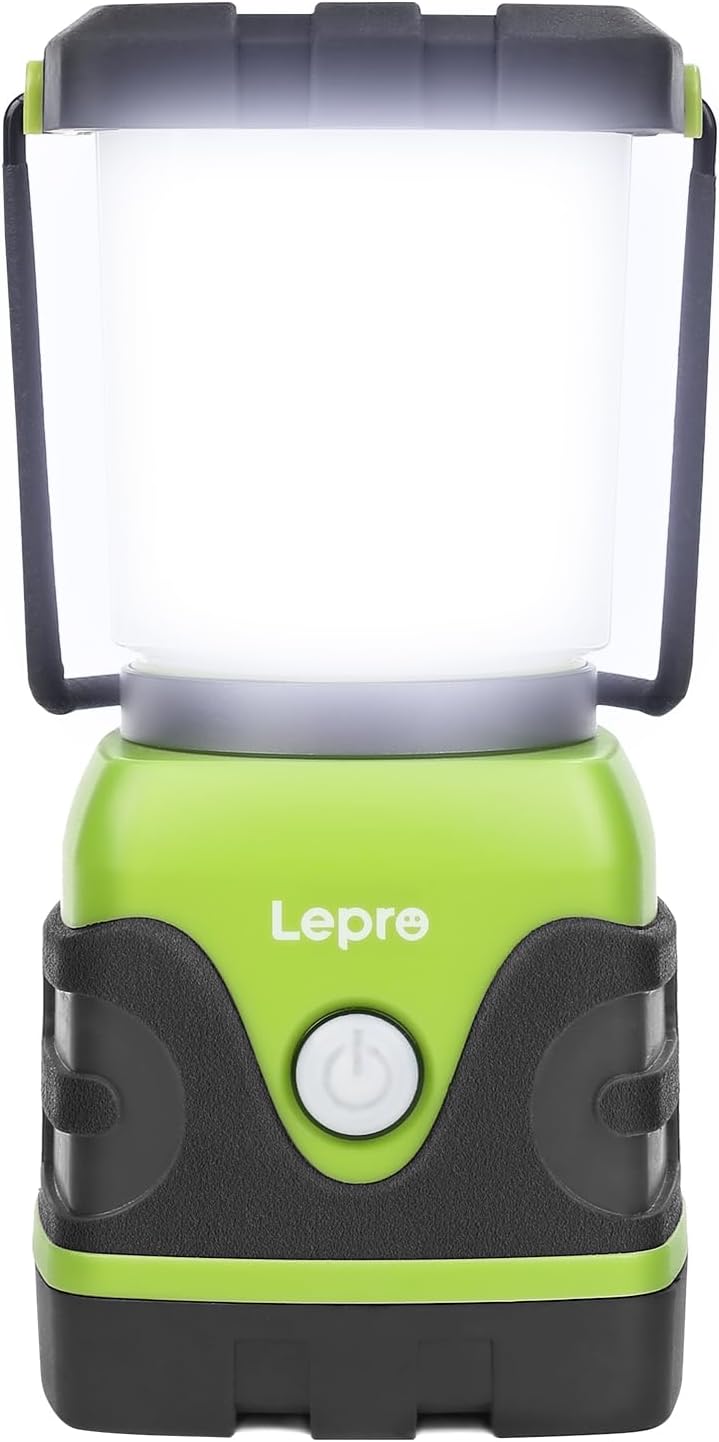
Figura 4.1: Frente view of the Lepro 1500LM LED Camping Lantern. The power button is visible on the front, and a metal handle is at the top.
- Botão de energia: Controls power on/off, light modes, and dimming.
- Alça de metal: For carrying or hanging the lantern upright.
- Bottom Hook: Located at the base, allows for inverted hanging.
- Compartimento da bateria: Located at the base, secured by a twist-lock mechanism.
5. Configuração: Instalação da bateria
The Lepro 1500LM Camping Lantern requires 3 D-cell alkaline batteries (not included).
- Twist the bottom cap of the lantern counter-clockwise to unlock and remove it.
- Insert three D-cell batteries into the battery compartment, ensuring correct polarity (+ and -) as indicated inside the compartment.
- Align the protruding pole on the bottom cap with the corresponding hole in the battery compartment.
- Place the bottom cap back onto the lantern and twist it clockwise to securely lock it in place.

Figure 5.1: Illustration of battery installation, showing the battery compartment, protruding pole, and counter-clockwise motion for opening.
6. Operação
The lantern features a single power button for all lighting controls.
6.1 Ligar/Desligar e Modos de Iluminação
Short press the power button to cycle through the following light modes:
- Branco luz do dia
- Branco quente
- Combined (Full Brightness)
- Flashing Red (Emergency Signal)
- Desligado
6.2 Ajuste de brilho (escurecimento contínuo)
When the lantern is in any of the white light modes (Daylight White, Warm White, or Combined), press and hold the power button to activate stepless dimming. The brightness will gradually increase or decrease. Release the button when the desired brightness level is reached.

Figure 6.1: Visual representation of the lantern's four light modes and the stepless dimming function.
6.3 Hanging Options
The lantern offers versatile hanging options:
- Upright Hanging: Use the metal handle at the top to hang the lantern from a hook or branch.
- Inverted Hanging: The bottom cap features a retractable hook. Remove the top diffuser by twisting it counter-clockwise, then use the bottom hook to hang the lantern upside down for broader downward illumination.

Figura 6.2: Close views of the lantern's bottom hook and top handle, illustrating its hanging capabilities.
7. Manutenção
7.1 Limpeza
- Limpe o exterior da lanterna com um pano macio eamp pano.
- Não utilize produtos de limpeza abrasivos ou solventes, pois podem danificar a superfície.
- Ensure the battery compartment is clean and dry before installing batteries.
7.2 Armazenamento
- Guarde a lanterna em local fresco e seco quando não estiver em uso.
- Remove batteries if storing for an extended period to prevent leakage and damage.
8. Solução De Problemas
If you encounter issues with your lantern, refer to the table below for common problems and solutions:
| Problema | Possível causa | Solução |
|---|---|---|
| A lanterna não liga. | As pilhas estão descarregadas ou instaladas incorretamente. | Replace with new D-cell batteries, ensuring correct polarity. Check that the bottom cap is securely locked. |
| A luz está fraca ou intermitente. | Bateria fraca. | Replace all three D-cell batteries. |
| Cannot change light modes or dim. | Botão com defeito ou bateria fraca. | Verifique se as pilhas são novas. Se o problema persistir, entre em contato com o suporte ao cliente. |
| Entrada de água após exposição à chuva. | Lantern was submerged or exposed to heavy jets of water beyond IPX4 rating. Bottom cap not securely fastened. | Ensure the bottom cap is always securely fastened. The lantern is water-resistant, not waterproof for submersion. Dry the lantern thoroughly and remove batteries if water is suspected inside. |
9. Especificações
| Recurso | Especificação |
|---|---|
| Número do modelo | PR330042-EUA |
| Fonte de luz | LIDERADO |
| Brilho | Até 1500 Lumens |
| Modos de luz | Daylight White, Warm White, Combined (Full Brightness), Flashing Red |
| Escurecimento | Stepless Dimming (long press) |
| Fonte de energia | 3 x D-cell Alkaline Batteries (not included) |
| Duração da bateria | Approx. 12 hours at 1500 lumens (up to 16 hours generally) |
| Resistência à água | IPX4 (Protected against splashing water from all angles) |
| Material | Plástico |
| Dimensões (C x L x A) | 3.74 x 3.46 x 7.24 polegadas (9.5 x 8.8 x 18.4 cm) |
| Peso (sem baterias) | 1.06 libras (0.48 kg) |
| Volumetage | 4.5 Volts |
| O quetage | 15 watts |
10. Garantia e Suporte
Para informações sobre garantia ou suporte técnico, consulte a documentação incluída na sua compra ou visite o site oficial da Lepro. website. If you have any questions or require assistance, please contact Lepro customer service.