1. Introdução
Thank you for choosing the IRONZON Fingerprint Door Lock. This biometric and keypad door lock provides enhanced security and convenience for your home, hotel, office, apartment, or bedroom. It offers multiple unlocking methods including fingerprint, passcode, and physical key. This manual provides comprehensive instructions for installation, setup, operation, and maintenance to ensure optimal performance and longevity of your lock.
Leia atentamente este manual antes da instalação e utilização, e guarde-o para futuras consultas.
2. Informações de segurança
- Do not attempt to disassemble or repair the lock yourself. Refer to qualified personnel for service.
- Use only specified AAA batteries (not included). Do not mix old and new batteries or different types of batteries.
- Ensure the emergency key is stored in a safe and accessible location outside the room where the lock is installed.
- Evite expor a fechadura à luz solar direta, chuva ou temperaturas extremas.
- Keep the fingerprint sensor and keypad clean and dry for optimal performance.
3. Conteúdo da embalagem
Verifique se todos os componentes estão presentes antes de iniciar a instalação:
- Front Handle Assembly (with keypad and fingerprint sensor)
- Rear Handle Assembly (with battery compartment)
- Parafuso de trava
- Placa de ataque
- Parafusos de montagem
- Chaves Físicas (2)
- Modelo de Instalação
- Manual do usuário
4. Produto acabadoview
The IRONZON Fingerprint Door Lock integrates advanced security features into a sleek design. The front handle features a biometric fingerprint sensor and a numeric keypad for convenient access. The rear handle houses the battery compartment and the manual override. The lock is designed for ambidextrous use and is compatible with standard US doors.

Image: The IRONZON Fingerprint Door Lock, displaying both the exterior handle with its integrated keypad and fingerprint sensor, and the interior handle. The design is sleek and modern, with black and orange accents.
5. Instalação
The IRONZON Fingerprint Door Lock is designed for DIY installation without the need for wiring or drilling, fitting US standard doors with backsets of 2-3/8″ (60mm) and 2-1/8″ (70mm), and door thicknesses from 1-3/8″ to 2-1/8″ (35mm-55mm).
5.1 Verificações pré-instalação
- Ensure your door meets the specified thickness and backset requirements.
- Confirm the door is prepared with standard boreholes for a cylindrical lock.
5.2 Installing the Latch Bolt
- Insert the latch bolt into the door edge hole. Ensure the latch is oriented correctly for your door's swing.
- Fixe o trinco com os parafusos fornecidos.
5.3 Installing the Exterior Assembly
- Feed the cable from the exterior handle through the latch bolt and the door borehole.
- Align the exterior handle with the latch bolt and the door, ensuring the spindle passes through the latch mechanism.
5.4 Installing the Interior Assembly
- Connect the cable from the exterior assembly to the corresponding port on the interior assembly.
- Align the interior assembly with the mounting posts from the exterior assembly and secure it with the provided screws.
- Insert 4 AAA batteries into the battery compartment of the interior assembly.

Image: A detailed diagram illustrating the installation process of the IRONZON Fingerprint Door Lock, including measurements for compatible door thickness (1-3/8" to 2-1/8" or 35mm-55mm) and backset distance (2-3/8" or 60mm and 2-1/8" or 70mm). It shows the latch, front handle, and behind handle components.
6. Configuração e Programação
The lock features voice navigation in English, Chinese, and Spanish to guide you through the setup process.
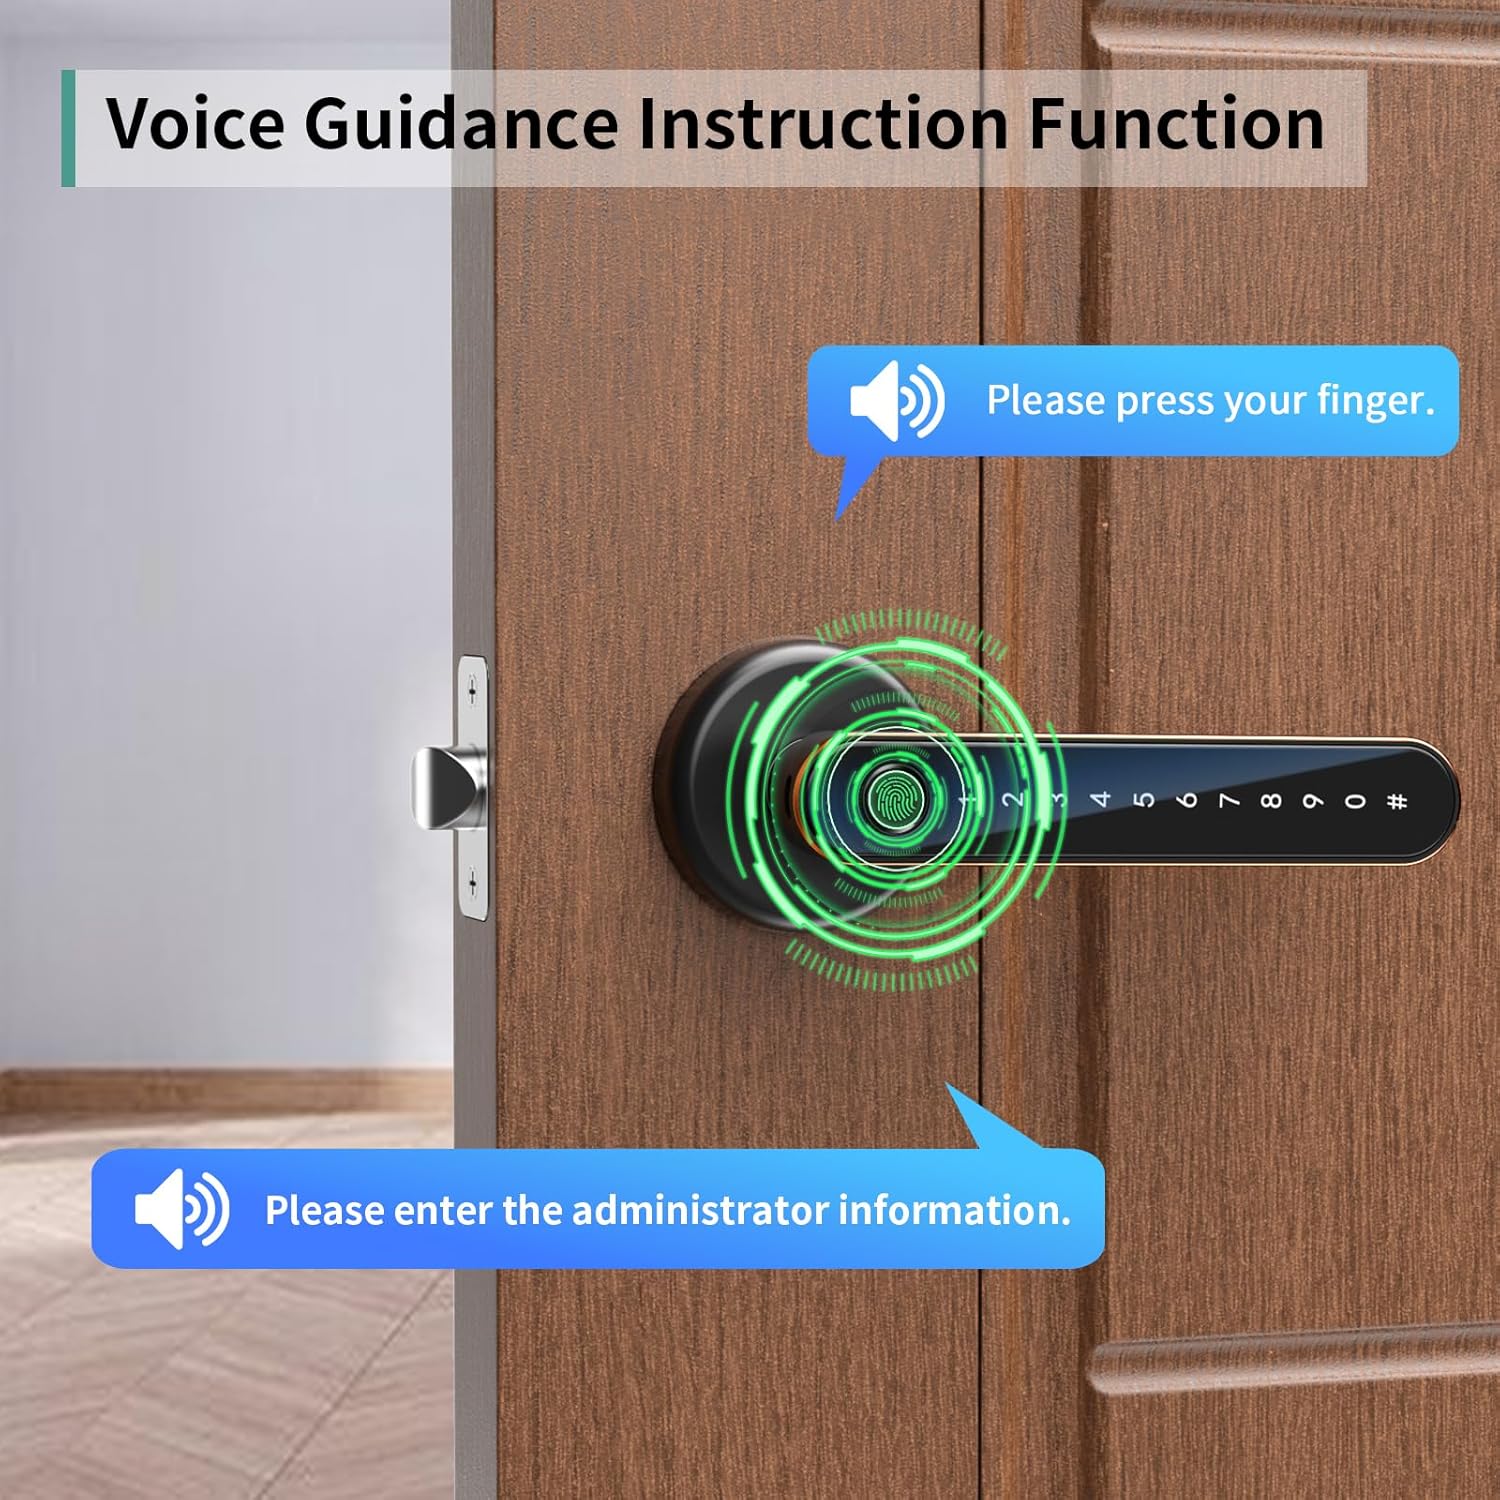
Image: A visual representation of the voice guidance function of the IRONZON Fingerprint Door Lock, showing speech bubbles with prompts like "Please press your finger" and "Please enter the administrator information" next to the lock installed on a door.
6.1 Initial Setup (Administrator Fingerprint/Passcode)
- Upon first power-up, the lock will prompt you to set an administrator.
- Follow the voice prompts to register the first fingerprint or passcode. This will be your administrator access.
- The administrator has full control over adding and deleting other users.
6.2 Adding Fingerprints
- Access the programming menu using the administrator fingerprint or passcode.
- Select the option to add a new fingerprint (refer to voice prompts).
- Place the finger on the sensor multiple times as instructed until registration is complete. Up to 50 fingerprint groups can be added.
6.3 Adding Passcodes
- Access the programming menu using the administrator fingerprint or passcode.
- Select the option to add a new passcode.
- Enter your desired passcode (minimum 6 digits) followed by the '#' key. Re-enter to confirm.
6.4 Deleting Users (Fingerprint/Passcode)
- Access the programming menu using the administrator fingerprint or passcode.
- Select the option to delete users. You may be able to delete individual users or all non-administrator users.
6.5 Voice Navigation Settings
The lock supports bilingual voice navigation. Refer to the voice prompts during setup to select your preferred language (Chinese, English, or Spanish) or to adjust the volume.
7. Instruções de operação
The IRONZON Fingerprint Door Lock offers three convenient ways to unlock your door.

Image: A visual guide demonstrating the three primary methods to unlock the IRONZON Fingerprint Door Lock: by placing a finger on the sensor (Fingerprint Unlock), by entering a code on the keypad (Passcode Unlock), and by using a physical key (Key Unlock).
7.1 Desbloqueio por Impressão Digital
- Coloque o dedo cadastrado firmemente sobre o sensor de impressões digitais.
- The lock will emit a confirmation sound and unlock if the fingerprint is recognized.
7.2 Desbloqueio por senha
- Pressione qualquer tecla para ativar o teclado.
- Enter your registered passcode followed by the '#' key.
- The lock will emit a confirmation sound and unlock if the passcode is correct.
7.3 Key Unlock
- Insert the physical key into the keyhole located on the exterior handle.
- Gire a chave para destrancar a porta manualmente.
7.4 Emergency Unlock / Charging
In case of low battery or power failure, the lock features a Type-C interface for emergency power supply.

Image: The IRONZON Fingerprint Door Lock installed on a door, with a USB Type-C cable plugged into the emergency charging port on the exterior handle, connected to a power bank. This illustrates how to provide emergency power to the lock.
- Connect a Type-C cable from a power bank or other power source to the Type-C port on the bottom of the exterior handle.
- Once temporary power is supplied, you can use your fingerprint or passcode to unlock the door.
- Note: The Type-C port is for emergency power supply only and does not charge the internal batteries.
8. Manutenção
8.1 Substituição da bateria
The lock is powered by 4 AAA batteries (not included). The lock will provide a low battery reminder. Replace all four batteries promptly when indicated.
- Locate the battery compartment on the interior handle.
- Remove the cover and replace all old batteries with new AAA batteries, ensuring correct polarity.
- Recoloque a tampa do compartimento da bateria.
8.2 Limpeza
Wipe the lock's surface, keypad, and fingerprint sensor with a soft, dry cloth. Do not use abrasive cleaners or solvents, as they may damage the finish or electronic components.
9. Solução De Problemas
| Problema | Possível causa | Solução |
|---|---|---|
| O bloqueio não responde. | Baterias descarregadas. | Replace batteries or use emergency Type-C power. |
| Impressão digital não reconhecida. | Finger not placed correctly; sensor dirty; unregistered fingerprint. | Ensure finger covers the sensor completely; clean sensor; re-register fingerprint or use another unlocking method. |
| Passcode not working. | Incorrect passcode entered; keypad not activated. | Ensure correct passcode is entered followed by '#'; press any key to activate keypad before entering code. |
| Lock is loud or voice prompts are too quiet/loud. | Configurações de volume. | Access programming menu to adjust voice volume. |
| Lock does not lock automatically. | Auto-lock feature disabled or malfunction. | Check settings for auto-lock. If issue persists, contact support. |
10. Especificações
- Marca: IRONZON
- Número do modelo: LOC191FOUSIR
- Cor: Esfera
- Acabamento Exterior: Preto
- Tipo de bloqueio: Biometric (Fingerprint) / Keypad / Key
- Fonte de energia: 4 x pilhas AAA (não incluídas)
- Energia de emergência: Porta USB tipo C
- Capacidade de impressão digital: Até 50 grupos
- Compatibilidade com espessura da porta: 1-3/8″ to 2-1/8″ (35mm-55mm)
- Compatibilidade de recuo: 2-3/8″ (60mm) and 2-1/8″ (70mm)
- Orientação das mãos: Ambidextrous (Reversible Handle)
- Material: Aço inoxidável (cabo)
- Peso do item: 1.87 libras (0.85 kg)
- Dimensões do produto: 6.3 x 2.3 x 2.3 polegadas
11. Garantia e Suporte
For warranty information and technical support, please contact IRONZON customer service through the retailer where you purchased the product or visit the official IRONZON website. Please have your model number (LOC191FOUSIR) and purchase date available when contacting support.


