1. Introdução
Obrigado pela compra.asing the Karlsson Vogue Alarm Clock. This versatile device combines a digital alarm clock, a wireless induction charger, and a Bluetooth speaker, designed to enhance your daily routine. Please read this manual carefully before using the product to ensure proper operation and to maximize its lifespan. Keep this manual for future reference.
Precauções de segurança
- Não exponha o dispositivo à água ou umidade excessiva.
- Evite temperaturas extremas.
- Não desmonte nem tente reparar o dispositivo sozinho.
- Use only the provided or recommended USB adapter for power.
- Garanta ventilação adequada ao redor do dispositivo durante a operação.
2. Produto acabadoview
The Karlsson Vogue Alarm Clock features a sleek design with a fabric-covered front and intuitive controls. Below is an overview de seus principais componentes e controles.

Figura 2.1: Frente view of the Karlsson Vogue Alarm Clock, displaying the digital time and temperature.

Figura 2.2: Traseira view of the alarm clock, highlighting the control buttons and USB-C power input.
Control Buttons (from left to right on rear panel):
- Botão Alarme 1: Press to activate/deactivate Alarm 1. Long press to set Alarm 1 time.
- Botão Alarme 2: Press to activate/deactivate Alarm 2. Long press to set Alarm 2 time.
- Brightness/Snooze Button: Press to adjust display brightness. When alarm sounds, press to snooze.
- Botão de configuração de hora: Pressione e segure para entrar no modo de configuração de hora.
- Botão para baixo: Decrease values during setting, navigate menus.
- Botão para cima: Increase values during setting, navigate menus.
- Botão Bluetooth/Reproduzir/Pausar: Long press to enter Bluetooth pairing mode. Press to play/pause music.
- Entrada de alimentação USB C: Conecte o adaptador de energia aqui.
Painel superior:
- Base de carregamento sem fio: Place compatible devices here for wireless charging.
3. Configuração
3.1 Conexão de Energia
- Connect the provided USB adapter to the USB-C Power Input port on the rear of the alarm clock.
- Plug the USB adapter into a standard wall outlet.
- O visor acenderá, indicando que o dispositivo está ligado.
3.2 Configuração inicial da hora
- Pressione e segure o Botão de ajuste de hora (clock icon) on the rear panel. The hour digits will start flashing.
- Use o Up e Botões para baixo para ajustar a hora.
- Pressione o Botão de ajuste de hora Para confirmar a hora e passar para a configuração dos minutos, os dígitos dos minutos piscarão.
- Use o Up e Botões para baixo para ajustar o minuto.
- Pressione o Botão de ajuste de hora one more time to confirm the minute and exit time setting mode.
4. Instruções de operação
4.1 Configurar alarmes
The device supports two independent alarms (Alarm 1 and Alarm 2).
- To set Alarm 1: Pressione e segure o Botão de alarme 1 (bell icon with '1'). The hour digits for Alarm 1 will flash.
- Use o Up e Botões para baixo Ajustar a hora do alarme.
- Pressione o Botão de alarme 1 Novamente, confirme a hora e passe para a configuração de minutos.
- Use o Up e Botões para baixo para ajustar o minuto do alarme.
- Pressione o Botão de alarme 1 one more time to confirm and exit alarm setting. The alarm icon will appear on the display.
- To set Alarm 2: Siga os mesmos passos usando o Botão de alarme 2 (bell icon with '2').
4.2 Activating/Deactivating Alarms
- Pressione o respectivo Botão de alarme 1 or Botão de alarme 2 briefly to toggle the alarm on or off. The alarm icon on the display will indicate its status.
4.3 Função de soneca
- Quando o alarme tocar, pressione o Brightness/Snooze Button (light bulb icon) to activate snooze. The alarm will temporarily stop and sound again after approximately 9 minutes.
- To turn off the alarm completely, press any other button on the rear panel.
Operação do alto-falante Bluetooth 4.4
- Emparelhamento: Pressione e segure o Botão Bluetooth/Reproduzir/Pausar (music note icon) until the display shows "BT" and starts flashing, indicating pairing mode.
- On your mobile device, enable Bluetooth and search for "Karlsson Vogue". Select it to connect.
- Once connected, the "BT" indicator will stop flashing. You can now play audio through the alarm clock's speaker.
- Reprodução: Pressione o Botão Bluetooth/Reproduzir/Pausar briefly to play or pause music.
- Volume control is managed via your connected mobile device.
4.5 Wireless Induction Charging
The top surface of the alarm clock features a wireless charging pad compatible with Qi-enabled devices.
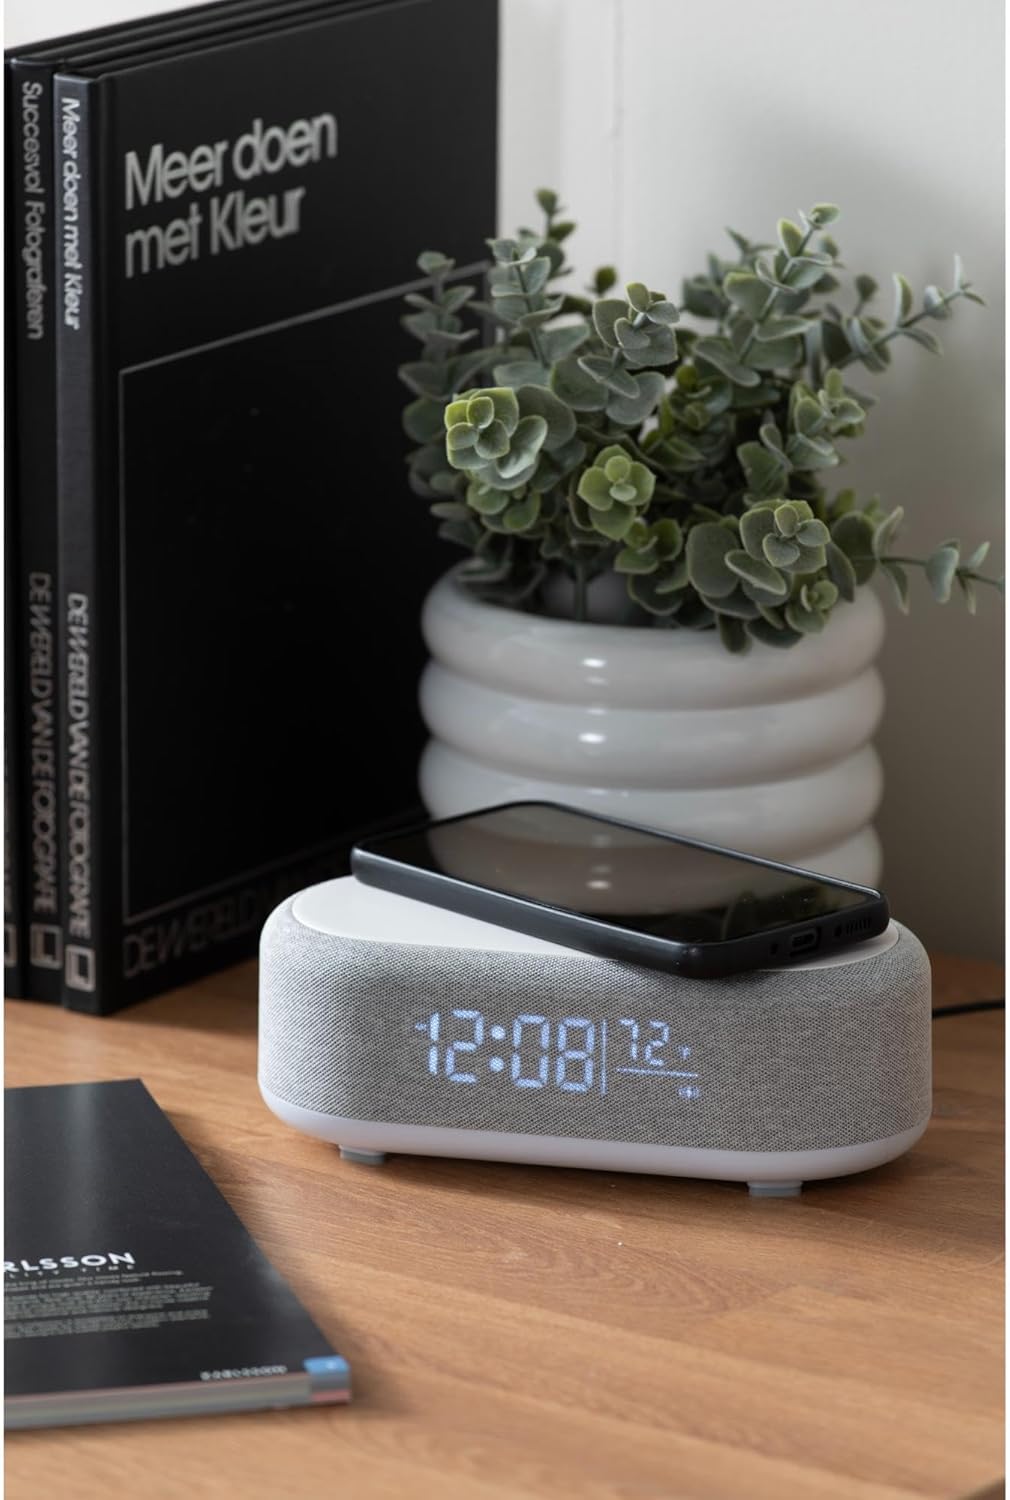
Figure 4.1: A smartphone placed on the wireless charging pad of the alarm clock.
- Place your Qi-compatible smartphone or other device directly onto the center of the top charging pad.
- Ensure the device is properly aligned. A charging indicator (usually on your phone screen) will confirm charging has begun.
- Remova o dispositivo quando estiver totalmente carregado.
4.6 Ajuste de brilho da tela
- Pressione o Brightness/Snooze Button (light bulb icon) repeatedly to cycle through different brightness levels for the display.
5. Manutenção
5.1 Limpeza
- Before cleaning, disconnect the power adapter.
- Wipe the surface of the alarm clock with a soft, dry, or slightly damp pano.
- Não utilize produtos de limpeza abrasivos, solventes ou produtos químicos fortes, pois podem danificar a superfície.
5.2 Armazenamento
- If storing the device for an extended period, disconnect it from power.
- Armazene em local fresco e seco, longe da luz solar direta e de temperaturas extremas.
6. Solução De Problemas
| Problema | Possível causa | Solução |
|---|---|---|
| O dispositivo não liga. | Sem ligação à energia ou adaptador defeituoso. | Ensure the USB-C cable is securely connected and the adapter is plugged into a working outlet. Try a different outlet. |
| O Bluetooth não está conectando. | Device not in pairing mode; already connected to another device; mobile device Bluetooth off. | Long press the Bluetooth button to enter pairing mode. Ensure no other device is connected. Turn off and on Bluetooth on your mobile device. |
| O carregamento sem fio não está funcionando. | Telefone não compatível com Qi; telefone desalinhado; capa do telefone muito grossa. | Ensure your device supports Qi wireless charging. Re-position the device on the center of the pad. Remove thick phone cases. |
| Alarme não soando. | Alarm deactivated; volume too low (for Bluetooth alarm). | Check if the alarm icon is displayed. Ensure the alarm time is set correctly. If using Bluetooth audio for alarm, ensure phone volume is adequate. |
7. Especificações
| Recurso | Detalhe |
|---|---|
| Marca | Karlsson |
| Número do modelo | KA6033GY |
| Cor | Cinza |
| Material | Plástico (ABS) |
| Dimensões (C x L x A) | 19.8 x 9.8 x 7 cm (7.8 x 3.86 x 2.76 polegadas) |
| Peso | 0.46 kg (1.01 libras) |
| Entrada de energia | USB (Adapter included) |
| Carregamento sem fio | Induction (Qi-compatible) |
| Conectividade | Bluetooth |
8. Garantia e Suporte
For warranty information and customer support, please refer to the documentation provided with your purchase or contact your retailer. You may also visit the official Karlsson website para obter mais assistência.
Website: Karlsson Official Store


