1. Introdução
This manual provides essential information for setting up, operating, maintaining, and troubleshooting your NIMO 15.6-inch FHD Business Laptop. Please read this guide thoroughly to ensure optimal performance and longevity of your device. Keep this manual for future reference.
2. O que está na caixa
Verifique se todos os itens estão presentes na embalagem:
- 1 x Nimo N154 Laptop
- 1 x Type-C 65W PD Fast Charger
- 1 x Manual do Usuário (este documento)
- Windows 11 Home (pre-installed)
3. Produto acabadoview
Familiarize yourself with the components and ports of your NIMO laptop.
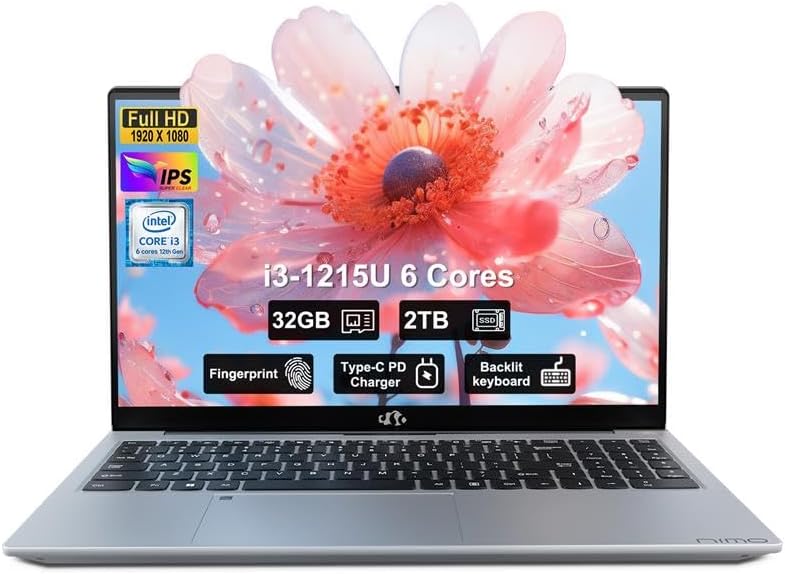
Imagem: Frente view of the NIMO 15.6-inch FHD Business Laptop, showcasing o visor e o teclado.
3.1. Portas e Conectores
The NIMO N154 laptop features a variety of ports for connecting peripherals and external devices.

Image: Diagram illustrating the various ports on the left and right sides of the NIMO laptop, including USB, HDMI, Type-C, and audio jack.
- Lado Esquerdo:
- Kensington Lock: For securing your laptop.
- Headphone Combo Jack: For audio output and microphone input.
- USB 3.0 Port (x2): For high-speed data transfer.
- USB 2.0 Port (x1): For connecting standard USB devices.
- Micro SD Card Reader: For expanding storage or transferring files de cartões de memória.
- Lado direito:
- Type-C Port (Charge Only): For connecting the 65W PD charger.
- USB 3.0 Port (x1): For high-speed data transfer.
- HDMI Port: For connecting to external displays.
- Type-C Port (Multifunction): Supports data transfer and display output.
- Charge LED Indicator: Shows charging status.
4. Configuração
4.1. Inicialização da alimentação e carregamento
- Descompacte: Retire cuidadosamente o laptop e todos os acessórios da embalagem.
- Conecte a energia: Plug the 65W Type-C PD Fast Charger into a power outlet and then connect the Type-C connector to the designated "Charge Only" Type-C port on the laptop.
- Carga da bateria: Allow the laptop to charge for at least 30 minutes before initial use, or until the charge LED indicates a full charge.
- Ligar: Open the laptop lid and press the power button, typically located on the top right of the keyboard or side.

Image: The 65W Type-C PD Fast Charger, illustrating its compact design and universal compatibility.
4.2. Configuração do Windows 11
Follow the on-screen instructions to complete the Windows 11 initial setup:
- Selecione sua região e layout de teclado.
- Conecte-se a uma rede Wi-Fi.
- Inicie sessão com a sua conta Microsoft ou crie uma nova.
- Set up a PIN for quick login.
- Review and accept privacy settings.
5. Instruções de operação
5.1. Leitor de impressões digitais
The integrated fingerprint sensor allows for secure and quick login without passwords.
- Configurar: Navigate to Windows Settings > Accounts > Sign-in options > Fingerprint recognition (Windows Hello).
- Cadastrar impressão digital: Follow the on-screen prompts to register your fingerprint. You may need to scan your finger multiple times from different angles.
- Uso: To log in, simply place your registered finger on the fingerprint sensor when prompted.

Image: Close-up of the laptop's touchpad area showing the fingerprint reader, and a separate image of the webcam with a privacy shield.
5.2. Backlit Keyboard
The backlit keyboard enhances visibility in low-light conditions.
- Alternar luz de fundo: Use the dedicated function key (often Fn + Fx, where Fx is a key with a keyboard backlight icon) to cycle through backlight brightness levels or turn it off. Refer to your keyboard for the specific key combination.
5.3. Webcam Privacy Shield
The laptop includes a physical webcam privacy shield for enhanced security.
- Ativar/Desativar: Slide the physical switch located next to the webcam to cover or uncover the camera lens.
5.4. Conectando monitores externos
You can extend your workspace by connecting an external monitor or projector.
- Conectar Cabo: Use an HDMI cable to connect your external display to the laptop's HDMI port, or a compatible Type-C to DisplayPort/HDMI adapter for the multifunction Type-C port.
- Configure Display: Imprensa Tecla Windows + P to open the Project menu. Select your preferred display mode (e.g., Duplicate, Extend, Second screen only).
6. Manutenção
6.1. Limpando seu laptop
- Tela: Use um pano macio e sem fiapos levemente dampLimpe com água ou um produto de limpeza para telas. Não borrife líquido diretamente na tela.
- Teclado e chassi: Use um pano macio e seco. Para sujeira persistente, um pano levemente umedecidoamp Pode-se usar um pano com solução de sabão neutro, garantindo que nenhum líquido entre nas aberturas.
- Portas: Use ar comprimido para remover cuidadosamente a poeira das entradas.
6.2. Cuidados com a bateria
- Evite descarregar completamente a bateria com frequência.
- Guarde o laptop em local fresco e seco se não for utilizá-lo por longos períodos.
- Não exponha o laptop a temperaturas extremas.
6.3. Atualizações de software
- Verifique e instale regularmente as atualizações do Windows para garantir a estabilidade e a segurança do sistema. Acesse Configurações > Windows Update.
- Keep device drivers updated for optimal performance.
7. Solução De Problemas
Esta seção aborda problemas comuns que você pode encontrar.
7.1. O laptop não liga.
- Certifique-se de que o carregador esteja conectado firmemente tanto ao laptop quanto a uma tomada elétrica em funcionamento.
- Verifique se a tomada está funcionando conectando outro aparelho.
- Allow the laptop to charge for at least 30 minutes if the battery is completely drained.
- Try a hard reset by holding the power button for 15-20 seconds.
7.2. Display Issues (No Image, Flickering)
- If an external monitor is connected, disconnect it to see if the laptop's screen works.
- Ajuste o brilho da tela usando as teclas de função (por exemplo, Fn + F5 / F6).
- Reinicie o laptop.
- If connected to an external display, ensure the cable is properly seated and try a different cable or port.
7.3. Problemas de conectividade Wi-Fi
- Ensure Wi-Fi is enabled in Windows Settings > Network & Internet > Wi-Fi.
- Reinicie o roteador e o modem.
- Esqueça a rede e reconecte-se.
- Atualize seus drivers de Wi-Fi.
7.4. Desempenho lento
- Feche os aplicativos desnecessários que estão sendo executados em segundo plano.
- Verifique o Gerenciador de Tarefas (Ctrl+Shift+Esc) em busca de processos que estejam consumindo muita CPU, RAM ou disco.
- Certifique-se de ter espaço livre suficiente no seu SSD.
- Run a disk cleanup and defragmentation (for HDD, though this is SSD).
- Faça uma busca por malware ou vírus.
8. Especificações
Detailed technical specifications for the NIMO N154 Laptop.

Image: Diagram illustrating the Intel Core i3-1215U processor with details on cores, threads, power consumption, and Turbo Boost frequency.

Image: Visual representation of 32GB DDR4 RAM and 2TB PCIe 4.0 SSD, highlighting dual RAM channel capability.
| Recurso | Especificação |
|---|---|
| Nome do modelo | NIMO N154 |
| Tamanho da tela | 15.6 polegadas |
| Resolução da tela | 1920 x 1080 Pixels (FHD IPS) |
| Processador | Intel Core i3-1215U (6-core, 8-thread, up to 4.4GHz) |
| BATER | 32 GB DDR4 (3200 MHz) |
| Armazenar | SSD 2 TB PCIe |
| Coprocessador gráfico | Intel Integrated Graphics |
| Sistema operacional | Windows 11 Início |
| Tipo sem fio | 802.11a/b/g/n/ac (Wi-Fi 6) |
| Portas USB | 2x USB 3.0, 1x USB 2.0, 2x Type-C (1x Charge Only, 1x Multifunction) |
| Porta HDMI | 1x HDMI 2.1 |
| Características especiais | Backlit Keyboard, Fingerprint Reader, HD Audio, Memory Card Slot, Numeric Keypad, Webcam Privacy Shield |
| Duração da bateria (média) | 5 horas |
| Peso do item | 3.8 libras |
| Dimensões do produto (CxLxA) | 14.07 x 8.98 x 0.76 polegadas |
| Cor | Prata |
9. Garantia e Suporte
Nimo Direct Inc. is committed to customer satisfaction.
- Garantia do fabricante: Your NIMO laptop is covered by a comprehensive 2-Year Manufacturer's Warranty. This warranty covers defects in materials and workmanship under normal use.
- Política de devolução: We offer 90-Day Hassle-Free Returns. If you are not satisfied with your purchase, you may return it within 90 days of receipt.
- Suporte ao cliente: Our dedicated US support team is available to provide swift issue resolution or immediate replacements. For assistance, please refer to the contact information provided on the NIMO official website ou sua documentação de compra.

Image: Illustration of NIMO's after-sales support, including partial US assembly, 90-day free returns, 2-year after-sales support, and 24/7 customer service.


