1. Introdução
Thank you for choosing the Cievie Dash Cam C200. This ultra-compact 4K dash camera is designed to provide reliable and high-quality video recording for your vehicle, ensuring peace of mind on the road and while parked. This manual will guide you through the setup, operation, and maintenance of your new dash cam.
2. O que está na caixa
- Cievie Dash Cam C200
- 64GB SD Card (Pre-installed)
- Adaptador de carregador de carro
- Suporte para carro
- Ferramenta de instalação
- Grampo de Cabo (x5)
- Adesivos eletrostáticos (x2)
- Fita adesiva 3M (2 unidades)
- Manual do usuário
3. Produto acabadoview
The Cievie C200 is engineered for discreet placement and powerful performance. Its mini design ensures it doesn't obstruct your view enquanto dirige.
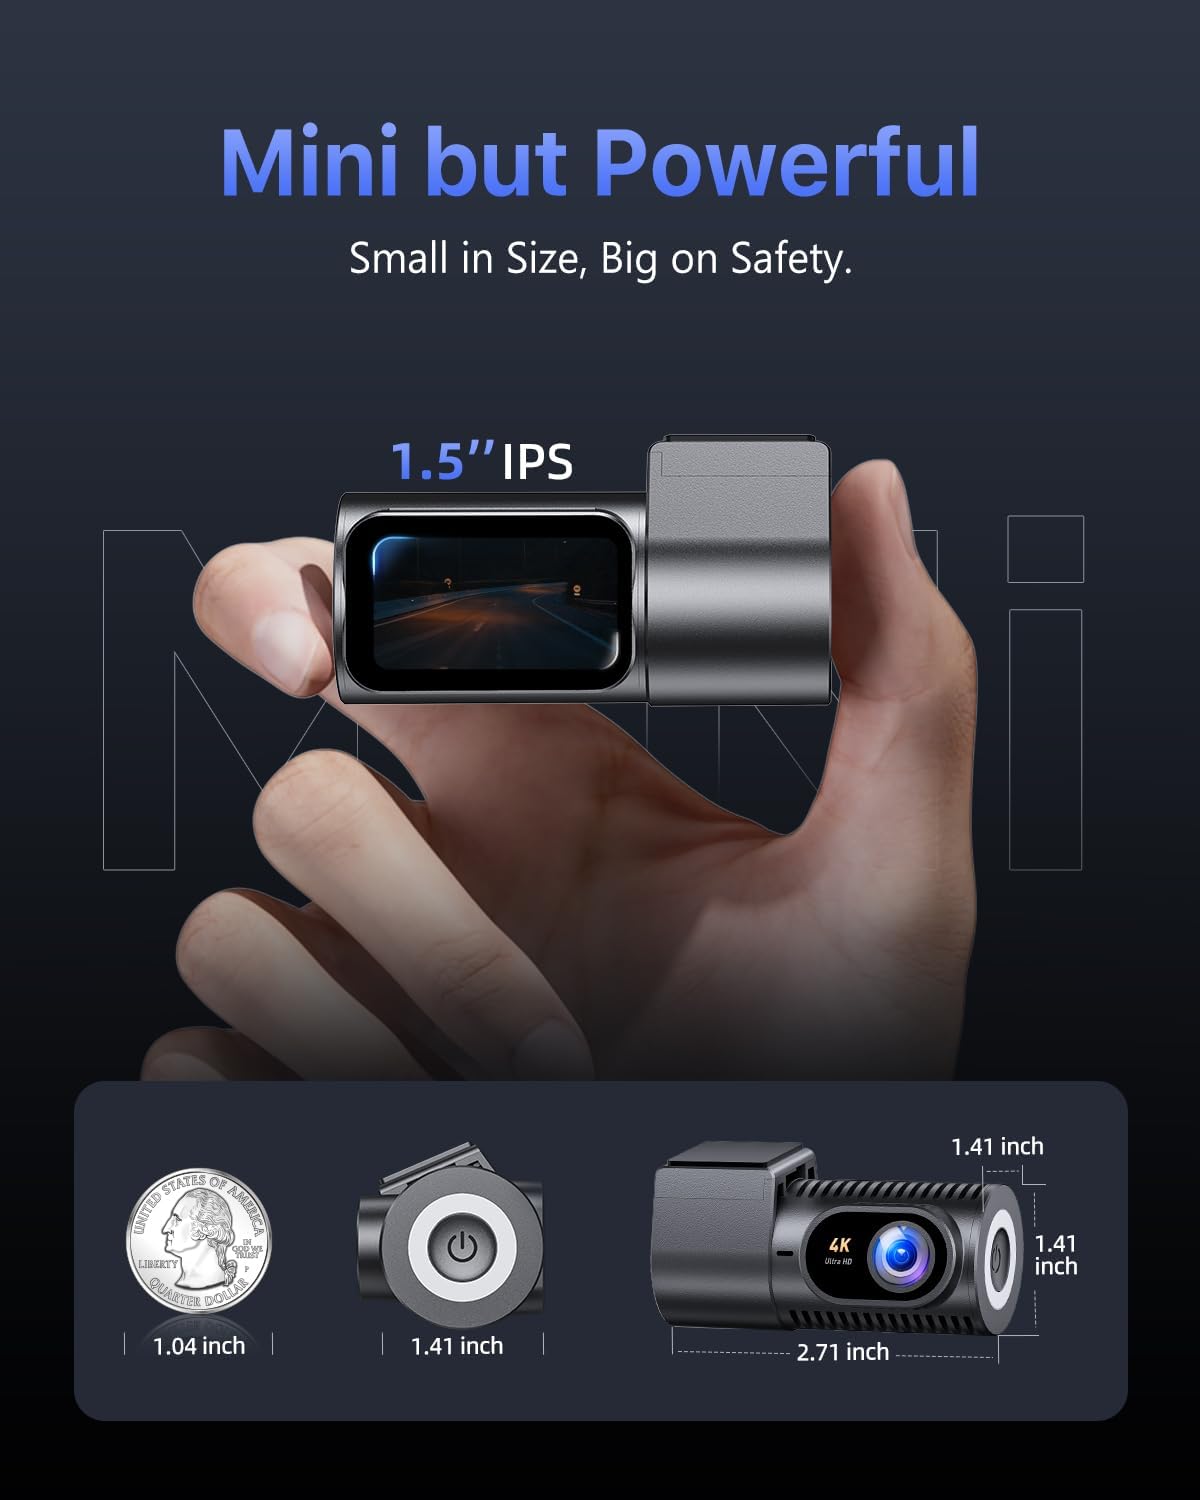
Figure 3.1: Compact design and dimensions of the Cievie C200 Dash Cam.
- Tamanho compacto: Measuring approximately 1.41 x 2.71 x 1.41 inches, it mounts discreetly behind your rearview espelho.
- Tela IPS de 1.5": Provides clear live playback and easy menu navigation directly on the device.
- Rotação de 360°: The lens offers full 360-degree rotation for flexible recording angles, capturing either the road ahead or the vehicle's interior.
4. Guia de configuração
4.1 Montagem da câmera veicular
- Clean the windshield area where you intend to mount the dash cam. Ensure it is free of dust and grease.
- Apply one of the electrostatic stickers to the cleaned area on the windshield. This helps protect your windshield and makes removal easier.
- Attach the car mount with the 3M adhesive tape to the electrostatic sticker. Press firmly for 30 seconds to ensure a secure bond.
- Deslize a câmera veicular no suporte até ouvir um clique.
4.2 Conexão de Energia
- Connect the USB-C cable to the dash cam's power port.
- Route the power cable along the edge of the windshield and dashboard using the provided cable clips and installation tool to keep it tidy and out of the way.
- Plug the car charger adapter into your vehicle's 12V power outlet (cigarette lighter socket).
4.3 Instalação do cartão SD
The Cievie C200 comes with a 64GB SD card pre-installed. If you need to replace it, ensure the dash cam is powered off before inserting or removing the SD card. Use a Class 10 or higher U3 speed micro SD card (up to 256GB supported).
4.4 Instalação do aplicativo e conexão Wi-Fi
The dash cam features 5.8GHz WiFi for fast footage download and app control. Download the GKU GO app from your smartphone's app store (iOS/Android) by scanning the QR code below or searching for 'GKU GO'.
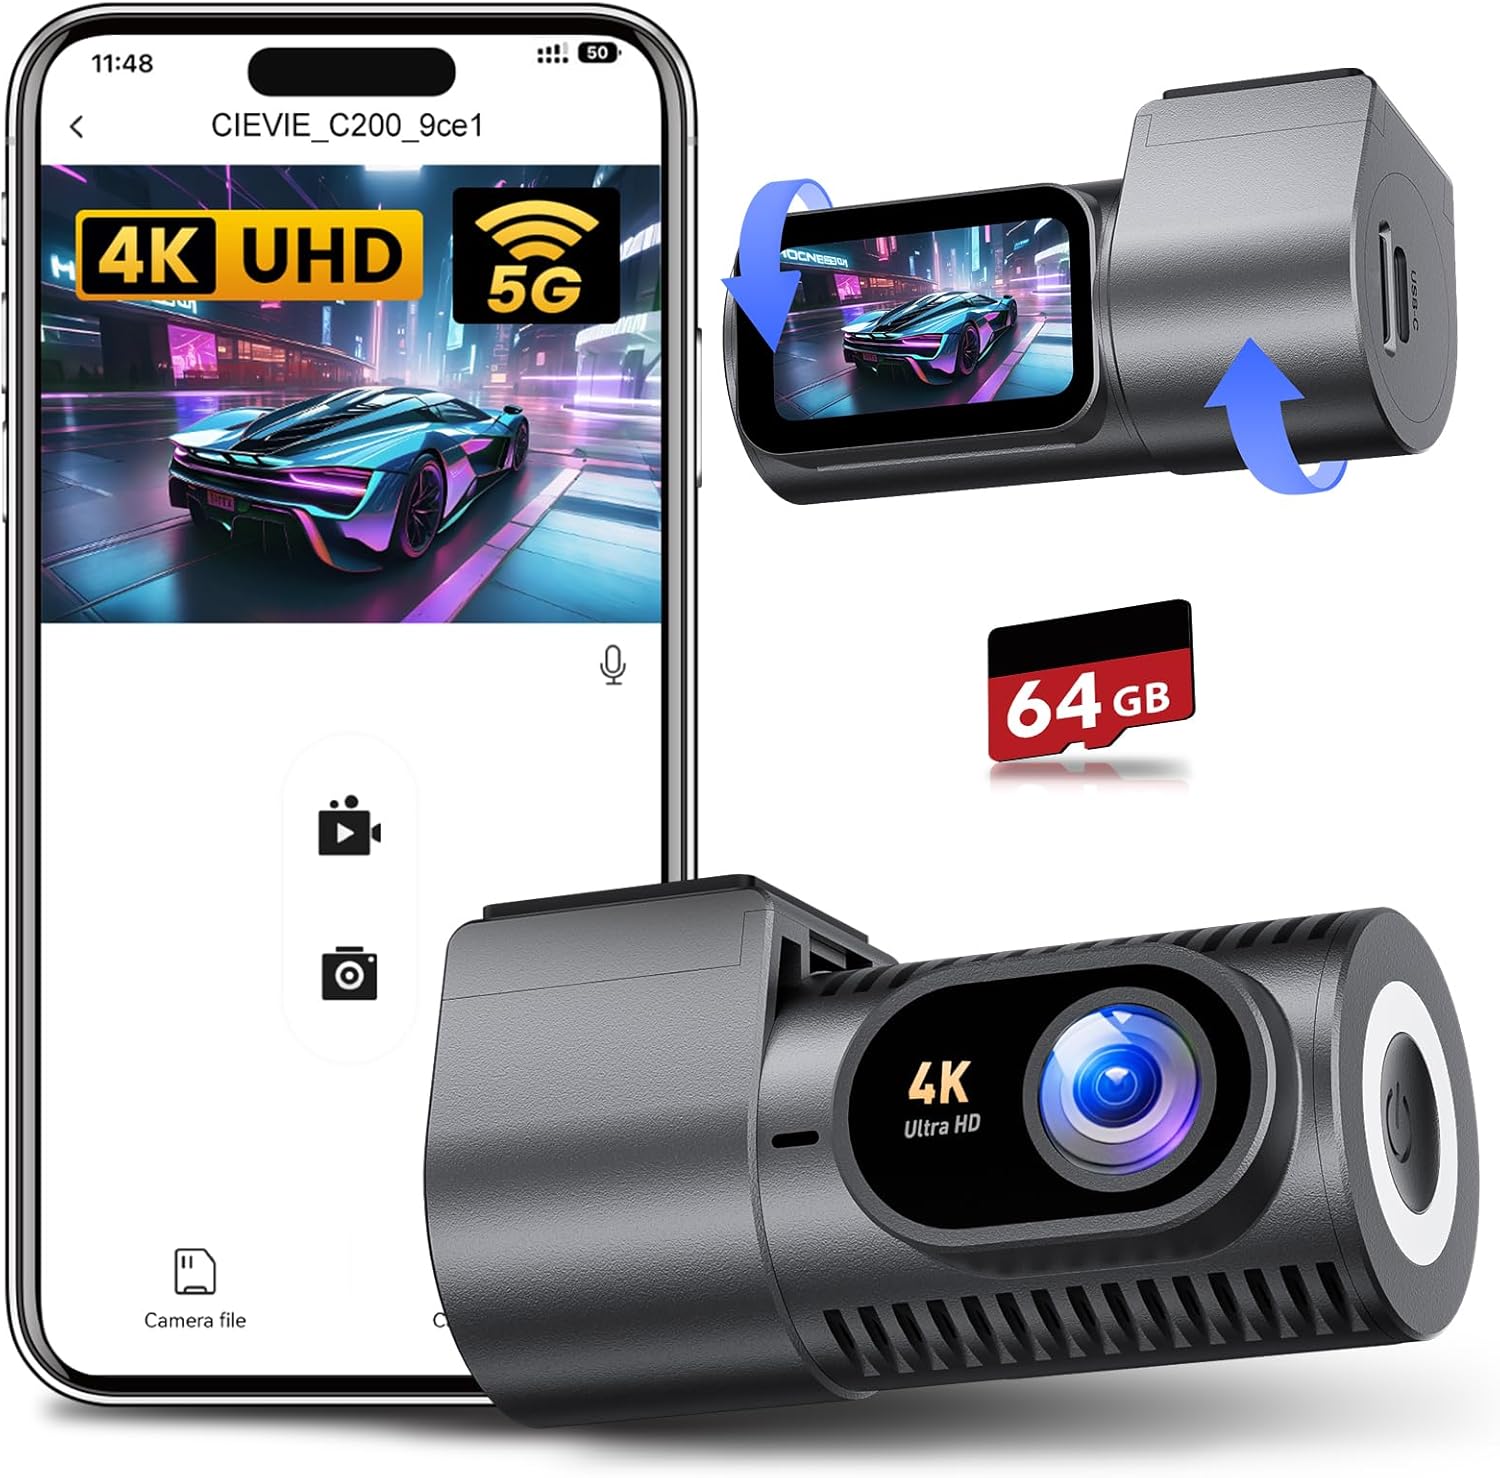
Figure 4.1: Cievie C200 Dash Cam connected to the GKU GO mobile application.

Figure 4.2: Scan this QR code to download the GKU GO app.
- Certifique-se de que a câmera veicular esteja ligada.
- Open the GKU GO app on your smartphone.
- Select 'Add Camera' and then 'Connect Device'.
- Go to your phone's Wi-Fi settings and connect to the dash cam's Wi-Fi network (e.g., CIEVIE_C200_xxxxxx). The default password is 12345678.
- Return to the GKU GO app. You can now view foo vivotage, download clips, and adjust settings.
Tip: For optimal connection stability, temporarily disable VPN and CarPlay/Android Auto on your phone if you experience issues.
5. Instruções de operação
5.1 Modos de gravação
The Cievie C200 records in stunning 4K UHD resolution with a 170° wide-angle lens, capturing multiple lanes of traffic and minimizing blind spots.
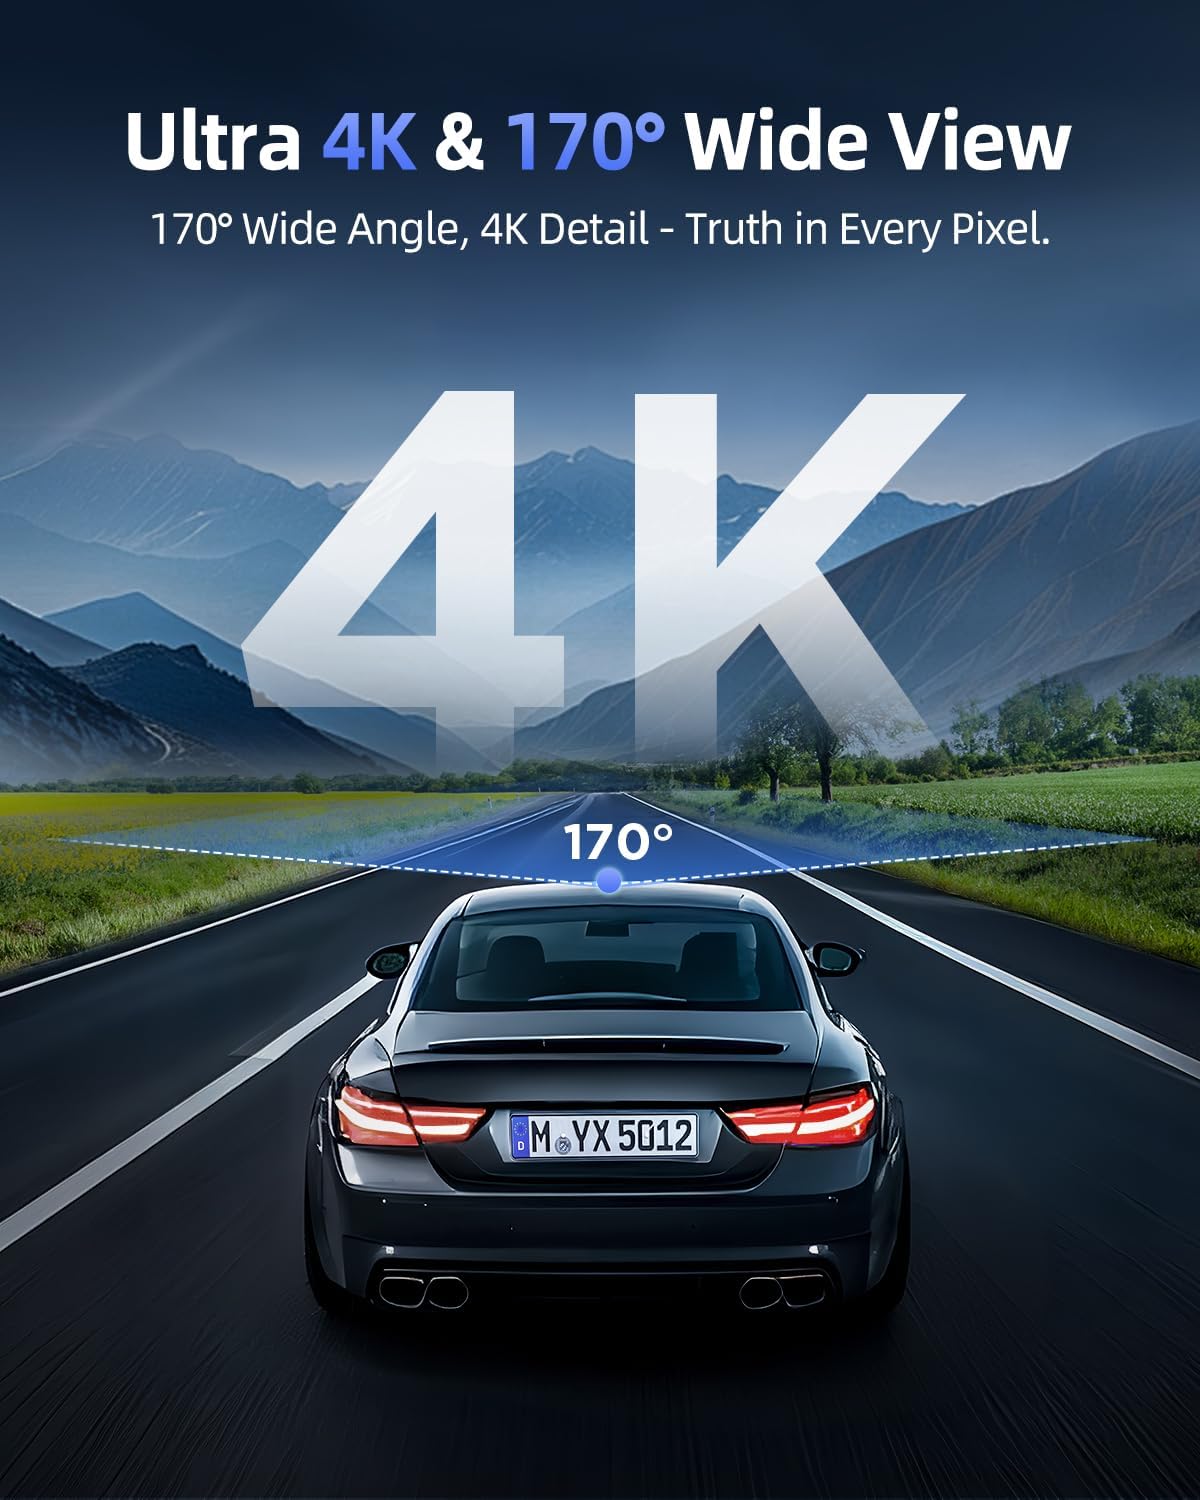
Figure 5.1: The 4K UHD resolution and 170° wide-angle lens capture extensive road details.
5.2 Gravação de Loop
The dash cam continuously records. When the SD card is full, the oldest unlocked footage is automatically overwritten by new recordings. This ensures you always have the most recent events captured.
5.3 G-Sensor & One-Touch Lock
The built-in G-Sensor automatically detects sudden impacts or collisions. When an event is detected, the corresponding video footage is automatically locked to prevent it from being overwritten, serving as critical evidence. You can also manually lock footage by pressing the emergency button on the dash cam.

Figure 5.2: Key recording features including loop recording, G-Sensor lock, and the pre-installed 64GB SD card.
5.4 360° Rotatable Design
The unique 360° rotatable lens allows you to easily switch between recording the front view of your vehicle and the interior cabin. This is useful for capturing passenger interactions or securing evidence from different angles.
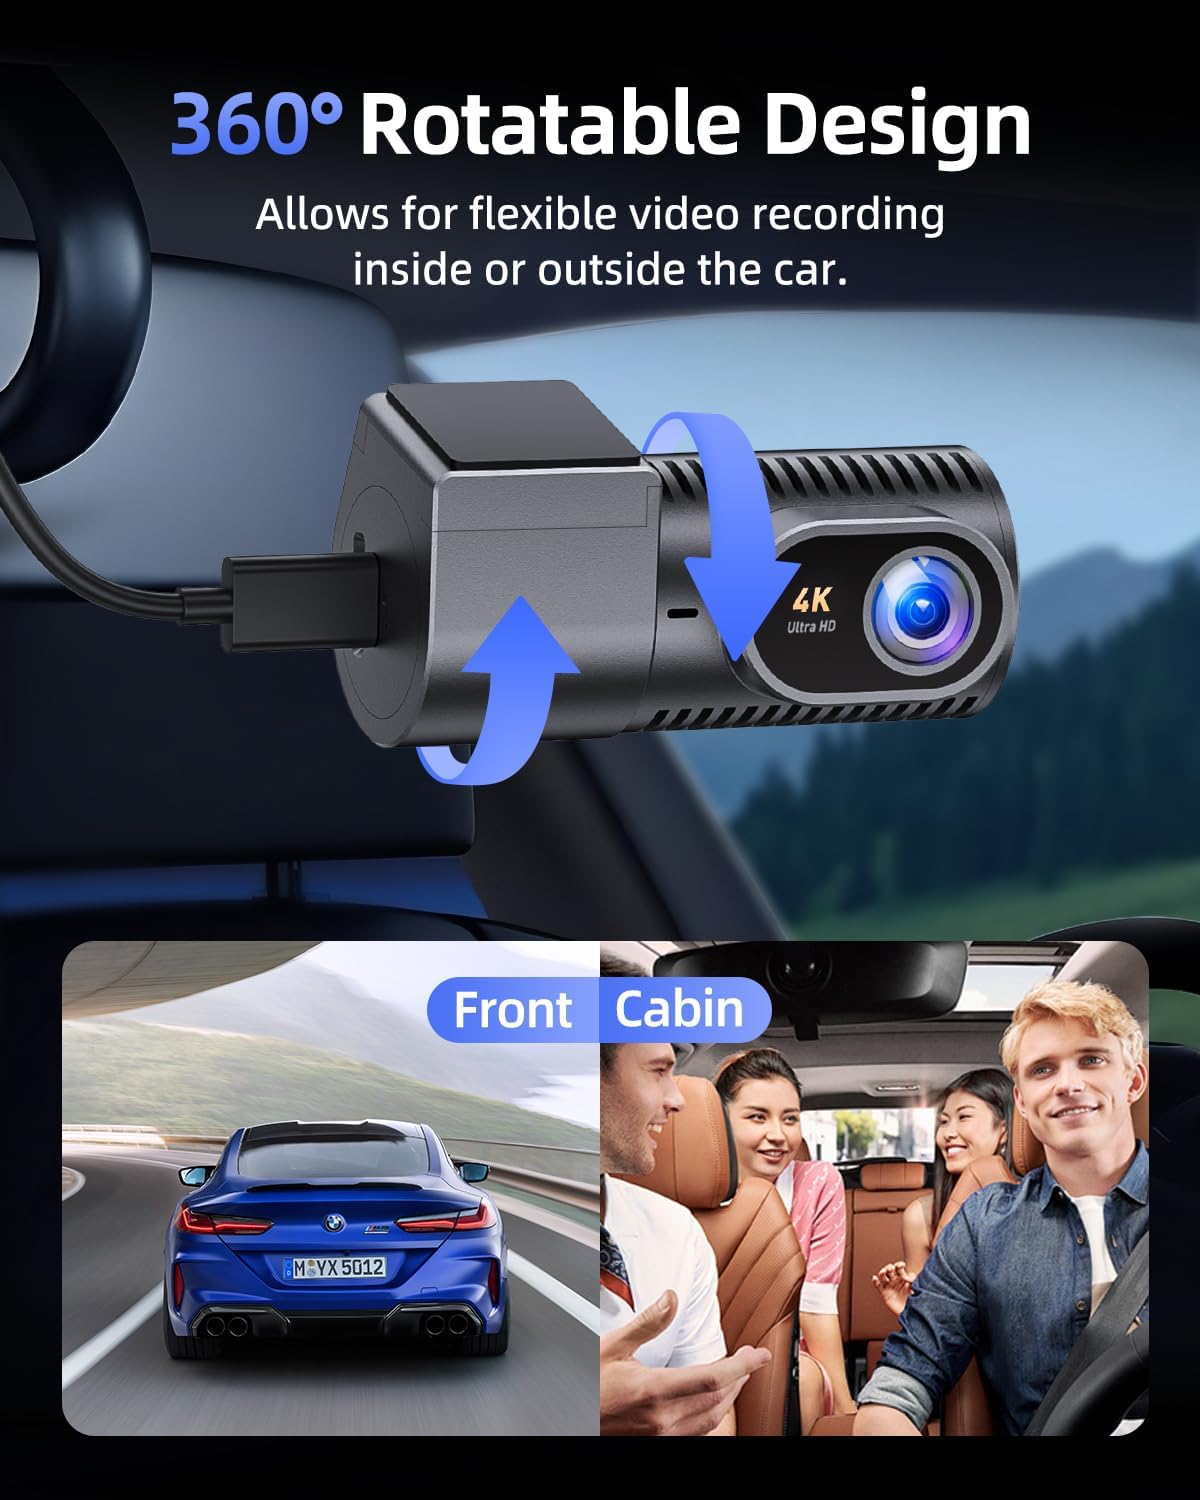
Figure 5.3: The 360° rotatable design provides flexible recording options for both exterior and interior views.
5.5 Super Visão Noturna
Equipped with an F2.0 aperture and WDR (Wide Dynamic Range) technology, the C200 delivers enhanced night vision capabilities. It captures clear and vivid details even in low-light conditions or during adverse weather like rain.
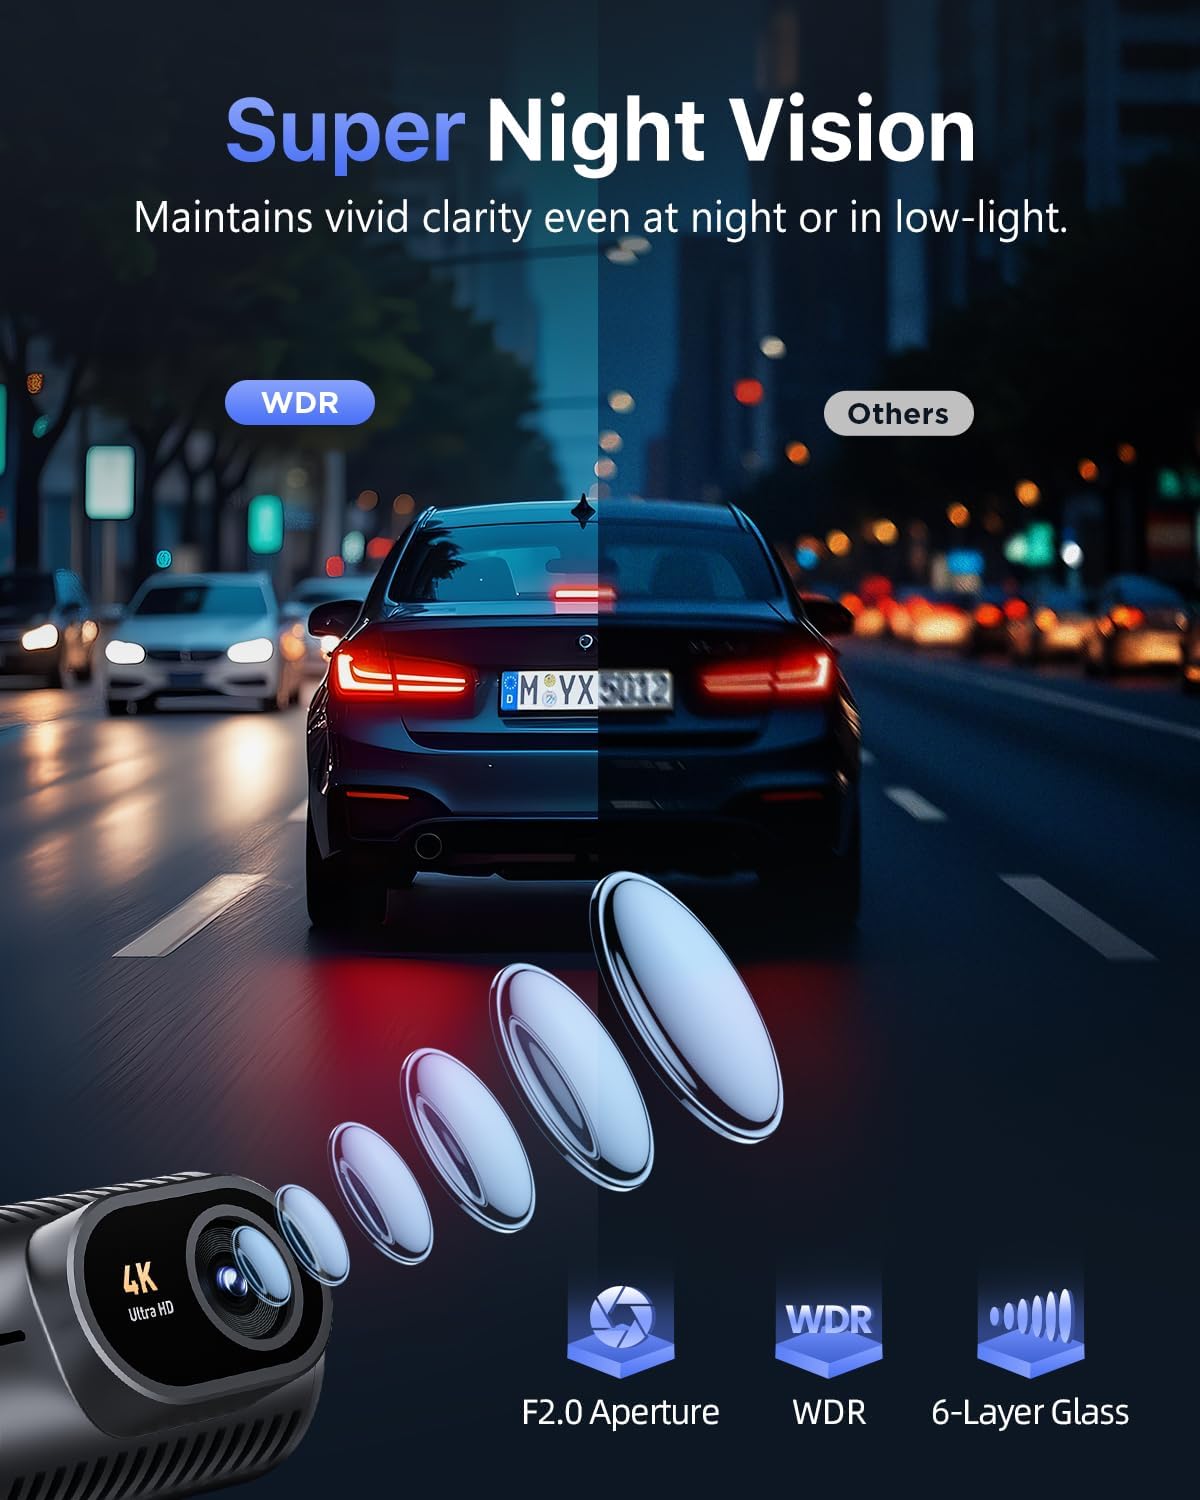
Figure 5.4: Super Night Vision with F2.0 aperture and WDR ensures clear recordings in challenging light conditions.
5.6 Screen Auto-Off
To minimize distractions during driving, the dash cam's 1.5" IPS screen can be set to automatically dim or turn off after 30s, 60s, or 180s. The blue indicator light will remain on to confirm recording is active.
Monitor de estacionamento 24 horas por dia, 7 dias por semana, 5.7
Protect your vehicle around the clock with two parking surveillance modes:
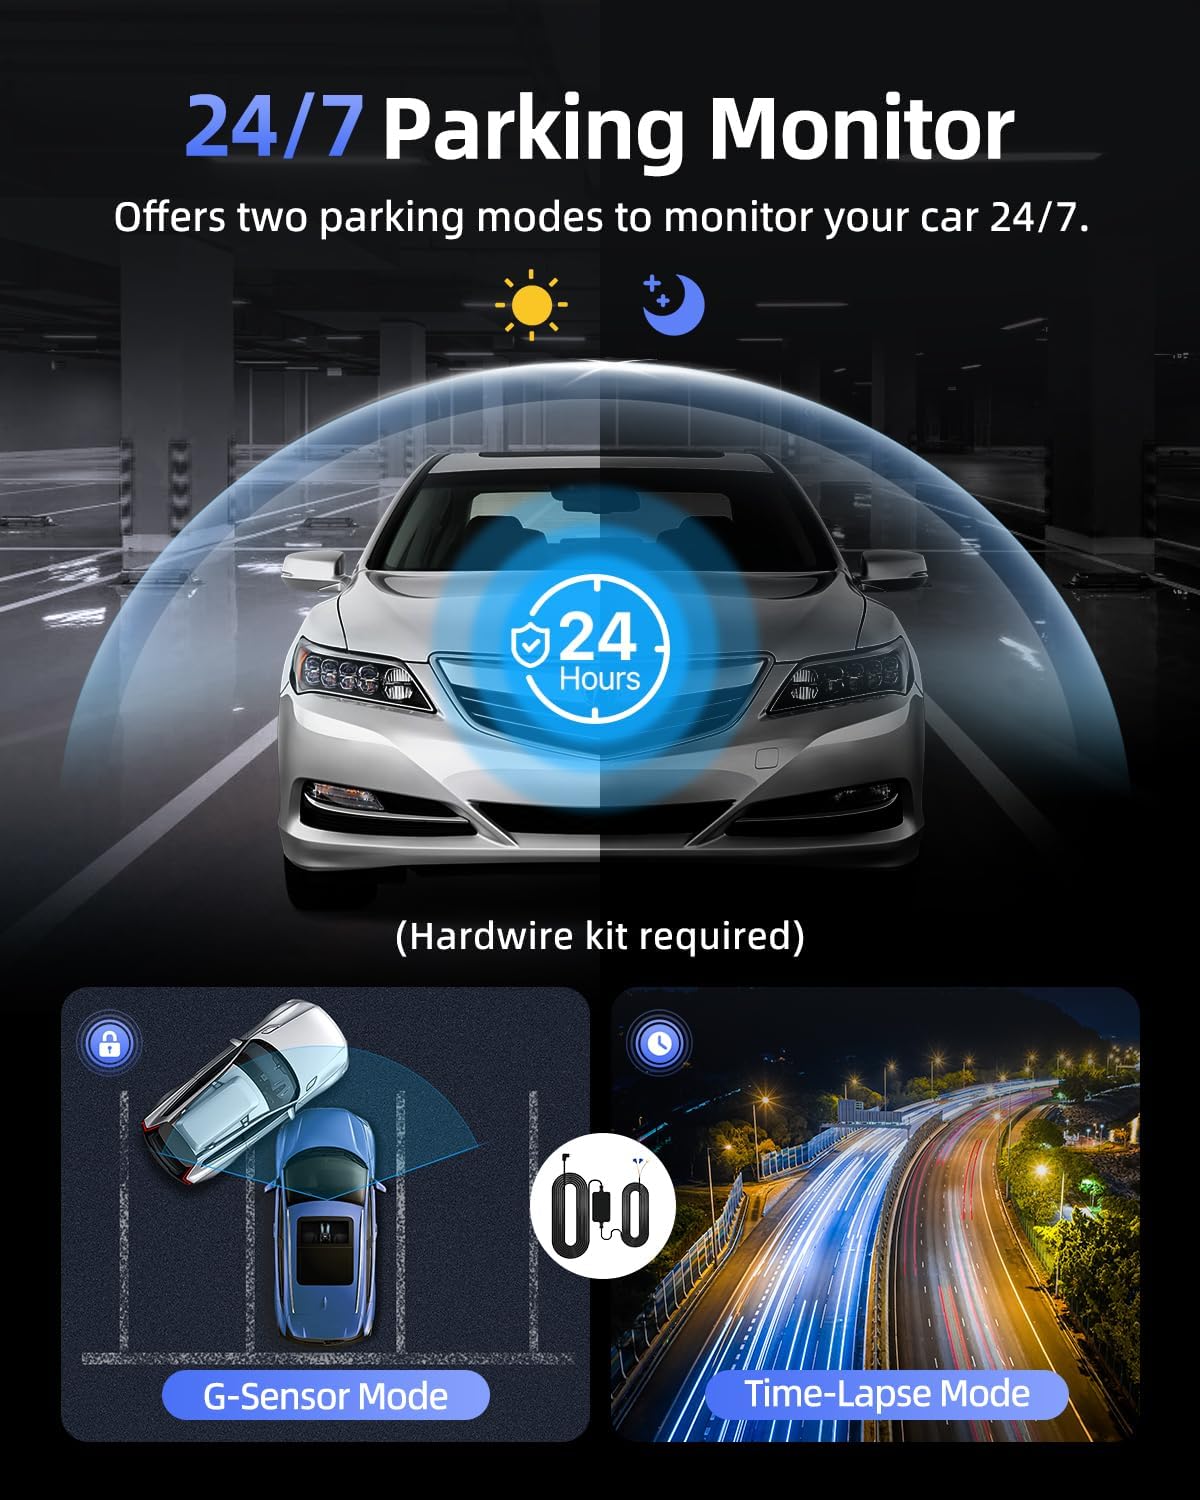
Figure 5.5: The 24/7 Parking Monitor offers two modes for continuous vehicle protection.
- Modo G-Sensor: If an impact is detected while parked, the dash cam will automatically power on and record a short video, then lock it as an emergency file.
- Modo de lapso de tempo: Records continuously at a low frame rate (e.g., 1/2/5fps) to save storage space while providing comprehensive coverage.
Note: Both parking modes require an optional hardwire kit (sold separately) to provide continuous power to the dash cam when the vehicle is off.
6. Manutenção
6.1 Formatação do cartão SD
It is recommended to format the SD card regularly (e.g., once a month) to ensure optimal performance and prevent data corruption. You can format the SD card via the GKU GO app or by connecting the SD card to a computer and formatting it to FAT32.
6.2 Limpeza
Use a soft, dry cloth to clean the dash cam's lens and body. Avoid using abrasive cleaners or solvents that could damage the device.
6.3 Extreme Weather Durability
The Cievie C200 is built with high-grade aluminum alloy construction, allowing it to withstand extreme temperatures from -4°F to 185°F (-20°C to 85°C) without issues, ensuring reliable operation in various climates.
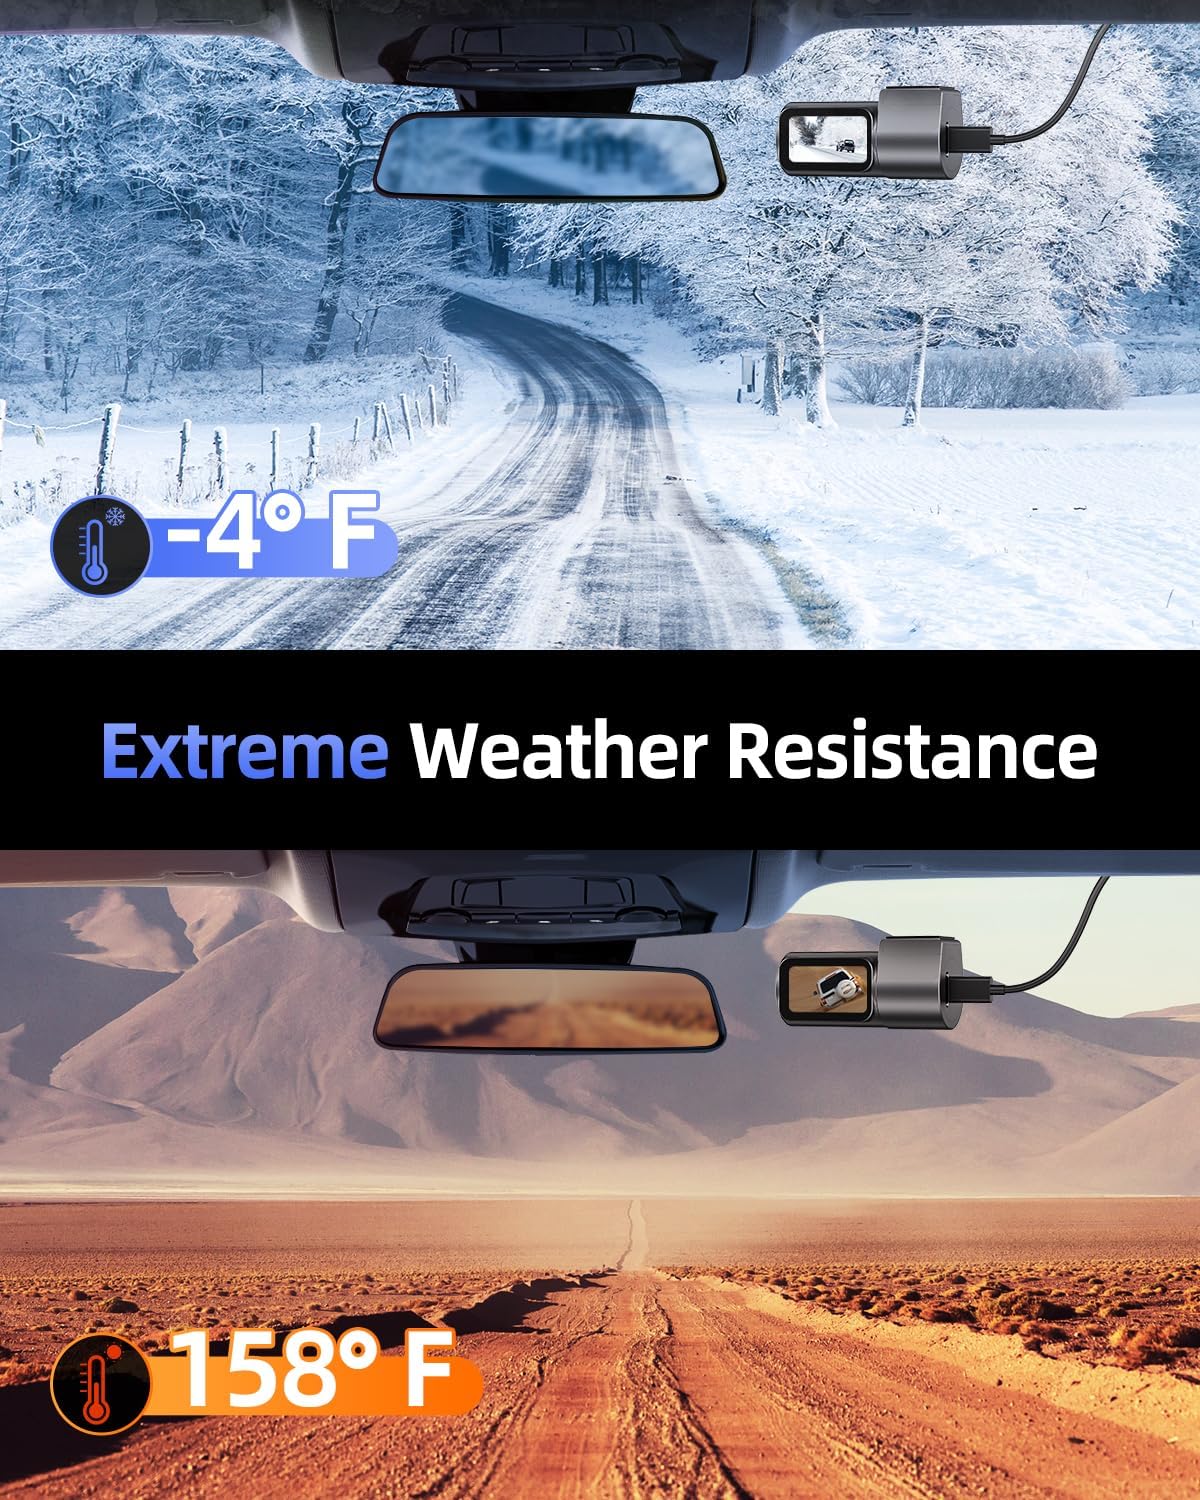
Figure 6.1: The Cievie C200 is designed for durability in extreme hot and cold conditions.
7. Solução De Problemas
- A câmera do painel não liga: Ensure the power cable is securely connected to both the dash cam and the car's 12V outlet. Check if the vehicle's 12V outlet is functioning.
- Problemas de conexão Wi-Fi: Make sure the dash cam is powered on. Try restarting both the dash cam and your phone. Temporarily disable VPN or CarPlay/Android Auto on your phone. Ensure you are within the Wi-Fi range (up to 6 meters/19 feet).
- Footage Not Saving/Corrupted: Format the SD card regularly. Ensure you are using a high-quality Class 10 U3 micro SD card. If issues persist, try a different SD card.
- Screen Turns Off Automatically: This is a normal feature (Screen Auto-Off). The blue indicator light confirms recording is active. You can adjust the auto-off time in the app settings.
- Monitor de estacionamento não funciona: Ensure the optional hardwire kit is correctly installed and connected to a constant power source. Check the settings in the GKU GO app to ensure parking mode is enabled.
8. Especificações
| Recurso | Detalhe |
|---|---|
| Dimensões do produto | 1.42 x 2.72 x 1.42 polegadas |
| Peso do item | 1.9 onças |
| Número do modelo | C200 |
| Tecnologia de Conectividade | Wi-Fi (5.8 GHz) |
| Resolução de captura de vídeo | 4K (3840x2160) |
| Mostrar | 1.5'' IPS Display |
| Ângulo da lente | Ângulo amplo de 170° |
| Armazenar | Includes 64GB SD Card (Supports up to 256GB) |
| Características especiais | Loop Recording, G-Sensor, 24/7 Parking Monitor, Super Night Vision, 360° Rotation, Built-In Speaker, Remote App Control |
| Temperatura de operação | -4°F a 185°F (-20°C a 85°C) |
| Tipo de montagem | Suporte para pára-brisa |
9. Garantia e suporte
Cievie stands behind the quality of its products. Your Cievie Dash Cam C200 comes with:
- Garantia de 12 meses: Cobertura para defeitos de fabricação.
- 30 Days Free Return/Money Back: Para sua tranquilidade.
- Suporte ao cliente 24 horas por dia, 7 dias por semana: Dedicated support team available to assist you.
For customer support or technical assistance, please contact us via email at support@cievie.co.
Planos de proteção também estão disponíveis para cobertura estendida:
- Plano de proteção de 2 anos
- Plano de proteção de 3 anos
- Proteção Completa (plano mensal que cobre compras elegíveis)


