Sanyo DRW-500 DVD Recorder/Player Instruction Manual
Model: DRW-500
Introdução
This manual provides comprehensive instructions for the safe and efficient operation of your Sanyo DRW-500 DVD Recorder/Player. Please read this manual thoroughly before using the device and retain it for future reference. The Sanyo DRW-500 allows you to record television programs and home videos onto DVD-R/RW discs, as well as play back DVD-Video and Audio CD discs.
Informações importantes de segurança
AVISO: PARA REDUZIR O RISCO DE INCÊNDIO OU CHOQUE ELÉTRICO, NÃO EXPONHA ESTE APARELHO À CHUVA OU UMIDADE.
Sempre siga as precauções básicas de segurança ao usar este produto para reduzir o risco de incêndio, choque elétrico e ferimentos.
Não obstrua as aberturas de ventilação. Instale de acordo com as instruções do fabricante.
Não instale perto de fontes de calor, como radiadores, registros de calor, fogões ou outros aparelhos (incluindo amplificadores) que produzem calor.
Proteja o cabo de alimentação para que não seja pisado ou comprimido, principalmente nos plugues, nas tomadas de conveniência e no ponto de saída do aparelho.
Utilize somente acessórios/anexos especificados pelo fabricante.
Encaminhe todos os serviços de manutenção para pessoal de serviço qualificado. A manutenção é necessária quando o aparelho foi danificado de alguma forma.
Conteúdo da embalagem
Por favor, verifique se todos os itens estão presentes na caixa:
Sanyo DRW-500 DVD Recorder/Player Unit
Controle remoto
Cabo RCA de áudio/vídeo
Cabo de alimentação
Manual de Instruções (este documento)
Produto acimaview
Familiarize yourself with the front and rear panels of your Sanyo DRW-500.
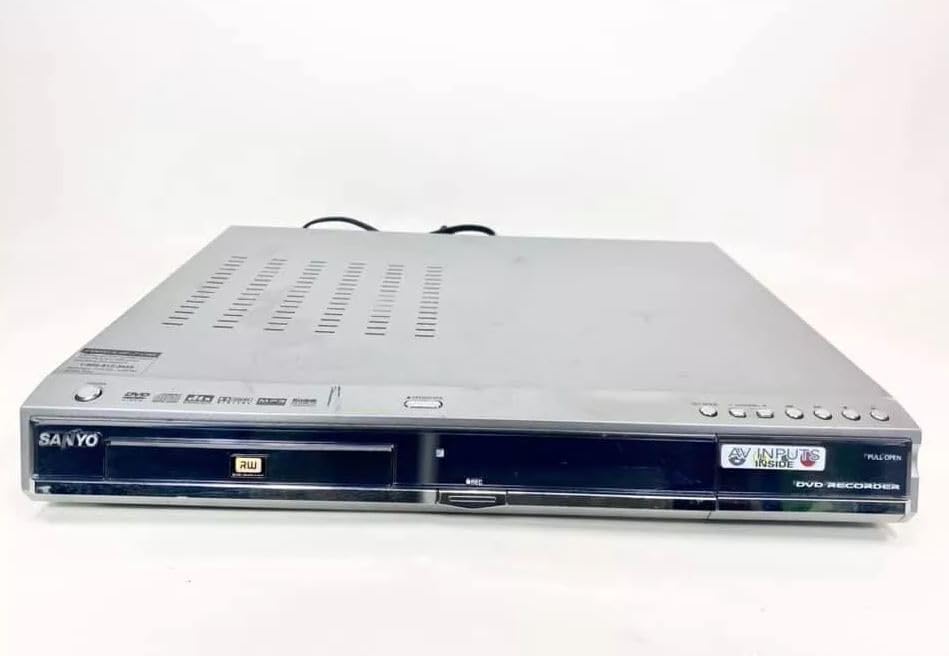
Figura 1: Front Panel of Sanyo DRW-500. Shows the disc tray, power button, play/pause, stop, record buttons, and the display screen.
Controles do painel frontal:
Botão de energia: Liga ou desliga a unidade.
Botão ABRIR/FECHAR: Abre e fecha a bandeja do disco.
Botão REPRODUZIR: Inicia a reprodução do disco.
Botão de parada: Stops disc playback or recording.
Botão RECORD: Inicia a gravação.
EXIBIÇÃO: Exibe o status atual, a hora e as informações de rastreamento.
Conexões do painel traseiro:
AUDIO/VIDEO OUT (RCA): Connects to your TV's audio/video input.
S-VIDEO OUT: Provides higher quality video output to compatible TVs.
AUDIO/VIDEO IN (RCA): Connects to external devices like VCRs or camcorders for recording.
ENTRADA DE ENERGIA: Conecta o cabo de alimentação.
Configurar
1. Conectando a uma televisão
There are two primary ways to connect your Sanyo DRW-500 to a television:
Option A: RCA (Composite Video) Connection
Connect one end of the RCA audio/video cable (red, white, yellow) to the AUDIO/VIDEO OUT jacks on the rear of the DRW-500.
Connect the other end of the RCA cable to the corresponding AUDIO/VIDEO IN jacks on your television. Ensure colors match (yellow to yellow for video, red to red for right audio, white to white for left audio).
Select the correct input channel on your TV (e.g., Video 1, AV1, Input 1).
Connect an S-Video cable (not included) from the SAÍDA S-VÍDEO jack on the DRW-500 to the S-Video input on your television.
Connect a separate RCA audio cable (red, white) from the SAÍDA DE ÁUDIO jacks on the DRW-500 to the corresponding audio input jacks on your television. S-Video only carries video, not audio.
Select the correct input channel on your TV (e.g., S-Video, Input 2).
2. Conexão de energia
Conecte o cabo de alimentação fornecido ao ENTRADA DE ENERGIA port on the rear of the DRW-500.
Conecte a outra extremidade do cabo de alimentação a uma tomada elétrica padrão.
3. Initial Setup and Clock Setting
Upon first power-on, the unit may prompt you to set the clock and other basic settings. Follow the on-screen instructions using the remote control.
Instruções de operação
Reproduzindo um DVD ou CD
Pressione o PODER botão para ligar a unidade.
Pressione o ABRIR/FECHAR botão para abrir a bandeja do disco.
Coloque um disco de DVD ou CD na bandeja com o lado da etiqueta voltado para cima.
Pressione o ABRIR/FECHAR botão novamente para fechar a bandeja.
A reprodução deve começar automaticamente. Caso contrário, pressione o JOGAR botão.
Use the remote control for functions like Pause, Stop, Fast Forward, Rewind, and Chapter Skip.
Recording to DVD-R/RW
The Sanyo DRW-500 can record from various external sources connected to its AUDIO/VIDEO IN tomadas.
Recording from a TV/Cable Box:
Connect the audio/video output of your TV or cable box to the AUDIO/VIDEO IN jacks on the rear of the DRW-500.
Insert a blank recordable DVD (DVD-R or DVD-RW) into the disc tray.
Select the correct input source on the DRW-500 using the SELEÇÃO DE ENTRADA button on the remote control (e.g., L1, L2).
Tune your TV/cable box to the desired program.
Pressione o REGISTRO button on the DRW-500 or its remote control to start recording.
Pressione o PARAR botão para encerrar a gravação.
Recording from a VCR or Camcorder:
Connect the audio/video output of your VCR or camcorder to the AUDIO/VIDEO IN jacks on the rear of the DRW-500.
Insira um DVD gravável virgem na bandeja de discos.
Select the correct input source on the DRW-500 using the SELEÇÃO DE ENTRADA botão no controle remoto.
Start playback on your VCR or camcorder.
Pressione o REGISTRO button on the DRW-500 or its remote control to start recording.
Pressione o PARAR botão para encerrar a gravação.
Finalizando um disco
For recorded DVD-R/RW discs to be playable on other DVD players, they must be "finalized."
Insert the recorded DVD-R/RW disc into the DRW-500.
Acesse o MENU no controle remoto.
Navigate to the "Disc Settings" or "Setup" menu.
Select the "Finalize Disc" option.
Confirm the action. The finalization process may take several minutes. Do not interrupt power during this process.
Note: DVD-RW discs can be unfinalized and re-recorded multiple times. DVD-R discs, once finalized, cannot be recorded on again.
Manutenção
Limpeza da unidade
Sempre desconecte a unidade da tomada antes de limpá-la.
Use um pano macio e seco para limpar a parte externa da unidade.
Não utilize produtos de limpeza líquidos, aerossóis ou solventes químicos fortes, pois estes podem danificar o acabamento.
Cuidados com o disco
Manuseie os discos pelas bordas para evitar marcas de dedos na superfície de gravação.
Guarde os discos em seus estojos quando não estiverem em uso para evitar arranhões e acúmulo de poeira.
Limpe os discos sujos com um pano macio e sem fiapos, limpando suavemente do centro para as bordas.
Solução de problemas
Problema
Possível causa
Solução
Sem energia
Cabo de alimentação não está conectado corretamente.
Verifique a conexão do cabo de alimentação à unidade e à tomada da parede.
Sem imagem ou som
Incorrect TV input selected. A/V cables not connected properly.
Select the correct input on your TV. Ensure A/V cables are securely connected to the correct input/output jacks.
O disco não reproduz
Disc is dirty or scratched. Disc is inserted incorrectly. Incompatible disc format.
Clean the disc. Insert the disc with the label side up. Ensure the disc is a compatible format (DVD-Video, Audio CD, recorded DVD-R/RW).
Não pode gravar
No blank recordable disc inserted. Disc is full or protected. Incorrect input source selected.
Insert a blank DVD-R or DVD-RW. Use a new disc or erase a DVD-RW. Select the correct input source (e.g., L1, L2).
Recorded disc won't play on other players
Disc not finalized.
Finalize the disc using the "Finalize Disc" option in the unit's menu.
Especificações
Recurso
Detalhe
Modelo
DRW-500
Fabricante
Sanyo
Compatible Disc Formats (Playback)
DVD-Video, CD-Audio, DVD-R, DVD-RW (finalized)
Recordable Disc Formats
DVD-R, DVD-RW
Saída de vídeo
Vídeo composto (RCA), S-Vídeo
Saída de áudio
RCA estéreo
Compatibilidade de entrada de vídeo
NTSC
Tecnologia de Conectividade
AUXILIAR (RCA)
Recurso especial
Design compacto
Fonte de energia
AC 120V, 60Hz (typical for US models)
Garantia e Suporte
This product is covered by a limited manufacturer's warranty. Please refer to the warranty card included with your purchase for specific terms and conditions. For technical support or service inquiries, please contact Sanyo customer service through their official website ou as informações de contato fornecidas na sua documentação de garantia.
Please note that warranty terms may vary by region and retailer. Keep your proof of purchase for warranty claims.