1. Introdução
This manual provides detailed instructions for the operation and maintenance of your KEPLUG MX9 Sunrise Alarm Clock. This device combines a digital alarm clock, a sunrise simulation wake-up light, a dimmable bedside night light, and a white noise machine with 30 soothing sounds. Please read this manual thoroughly before use to ensure proper functionality and safety.
2. Informações de segurança
- Certifique-se de que o dispositivo esteja colocado em uma superfície plana e estável.
- Não exponha o dispositivo à água ou umidade excessiva.
- Use only the provided power adapter and cable.
- Mantenha fora do alcance de crianças e animais de estimação.
- Não tente desmontar ou reparar o dispositivo por conta própria. Contate pessoal qualificado para assistência técnica.
- Desligue o dispositivo durante tempestades com raios ou quando não for utilizado por longos períodos.
3. Conteúdo da embalagem
Verifique se todos os itens estão presentes na embalagem:
- Despertador KEPLUG MX9 Sunrise
- Adaptador de energia
- Cabo de energia
- Manual do usuário (este documento)
4. Produto acabadoview
Familiarize yourself with the main components and control buttons of your KEPLUG MX9 Sunrise Alarm Clock.

Imagem 1: Frente view of the KEPLUG MX9 Sunrise Alarm Clock, showing the main light dome, digital time display, and control buttons at the base.
The device features a large light dome, a digital time display, and several touch-sensitive buttons for control:
- Botão de alarme: Used to set and activate alarms.
- Botão de tempo: Used to set the current time and 12/24-hour format.
- Botão Soneca/Luz: Activates snooze during an alarm, or turns on/off and adjusts the night light.
- Botão Mais (+): Increases values (time, volume, brightness) or navigates options.
- Botão Menos (-): Decreases values (time, volume, brightness) or navigates options.
- Botão de nota musical: Selects soothing sounds or white noise.
5. Configuração
5.1 Conexão de Energia
- Connect the power cable to the DC input port on the back of the alarm clock.
- Conecte o adaptador de alimentação a uma tomada elétrica padrão.
- The digital display will illuminate, indicating the device is powered on.
5.2 Ajustando a hora atual
- Pressione e segure o Botão de tempo for 3 seconds to enter time setting mode. The hour digits will flash.
- Use o Mais (+) or Minus (-) Buttons para ajustar a hora.
- Pressione o Botão de tempo Para confirmar a hora e passar para a configuração dos minutos, os dígitos dos minutos piscarão.
- Use o Mais (+) or Minus (-) Buttons para ajustar o minuto.
- Pressione o Botão de tempo a third time to confirm the minutes and select 12-hour or 24-hour format.
- Use o Mais (+) or Minus (-) Buttons para selecionar seu formato de hora preferido.
- Pressione o Botão de tempo one last time to exit time setting mode.
6. Instruções de operação
6.1 Setting an Alarm (Sunrise Simulation & Sound)
The KEPLUG MX9 allows you to set multiple alarms with customizable sunrise simulation and sound options.
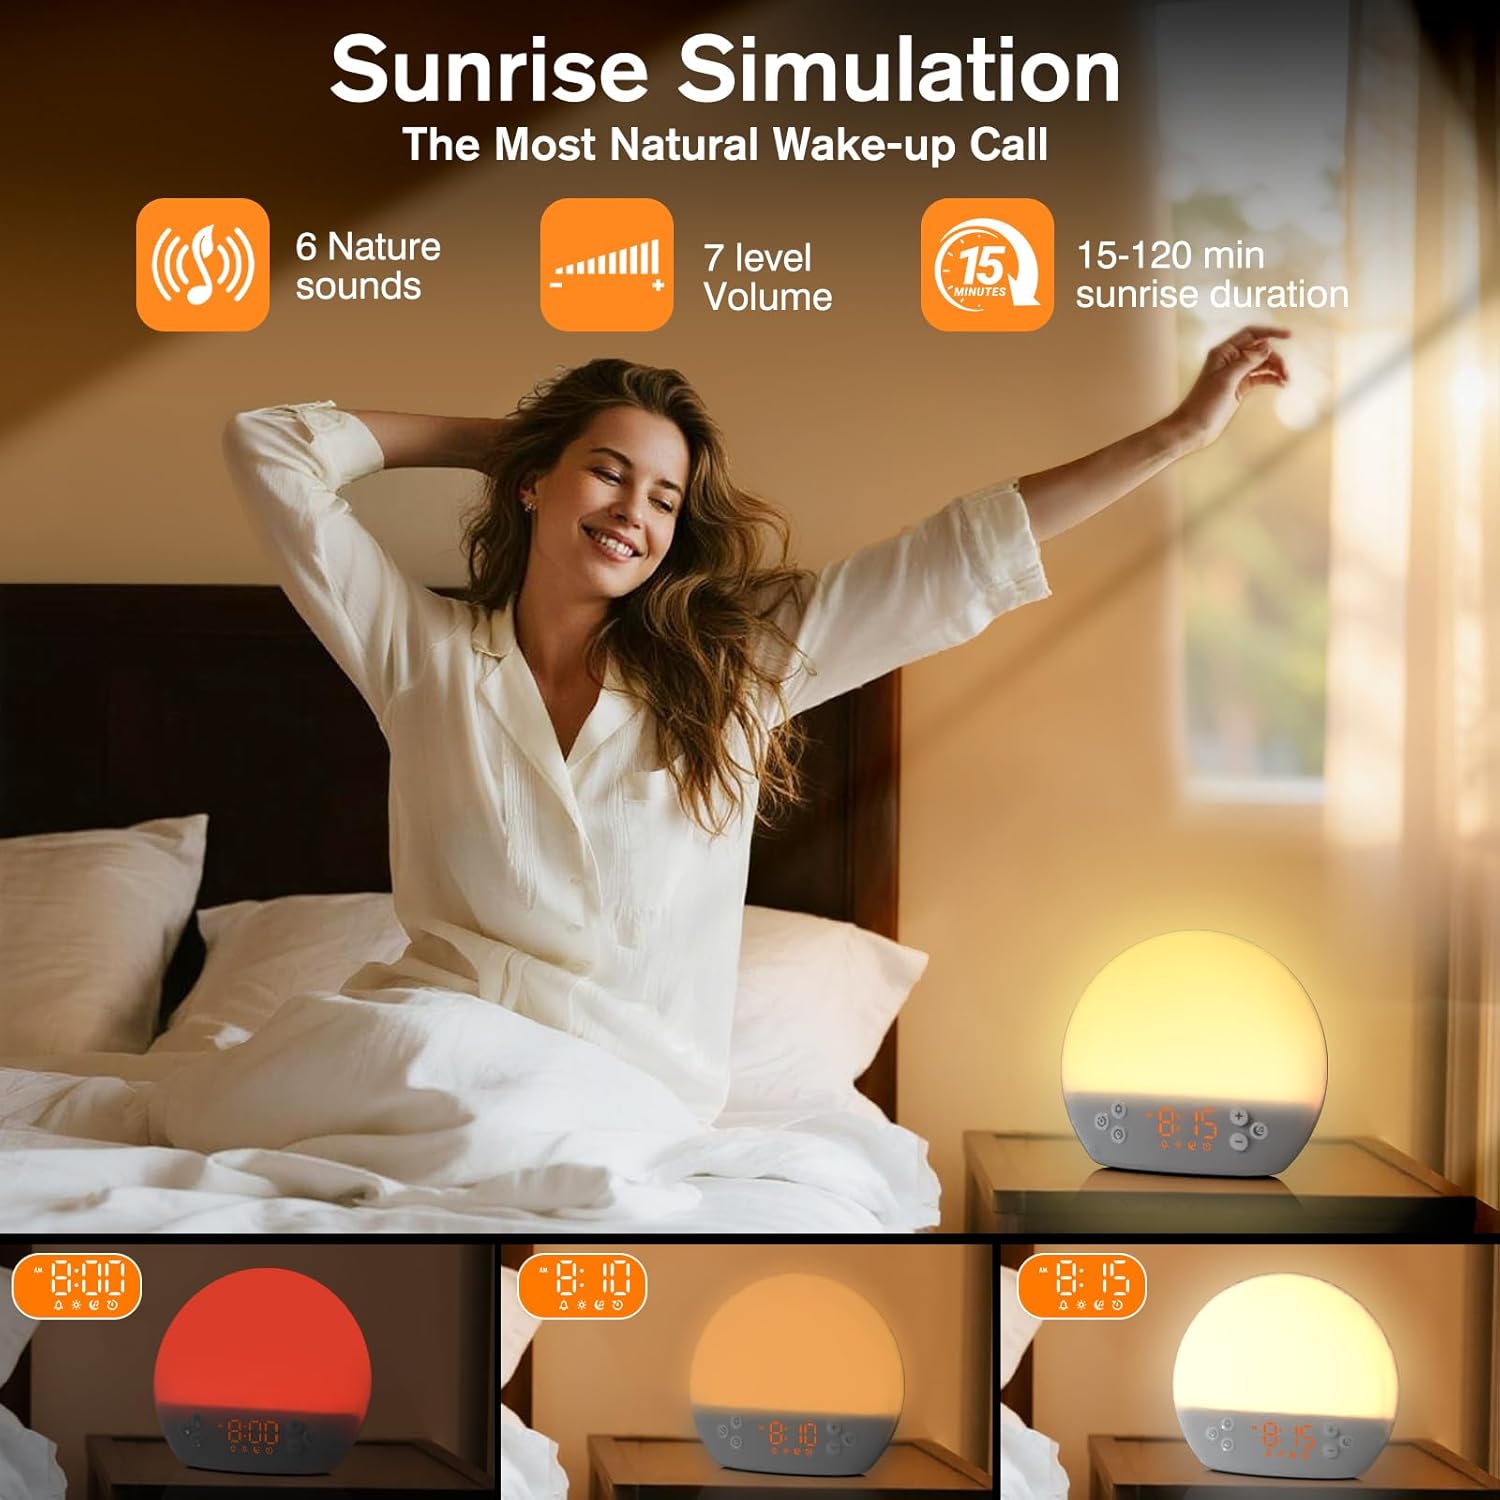
Image 2: Illustration of the sunrise simulation feature, where the light gradually brightens over a set period, mimicking a natural sunrise.
- Pressione o Botão de alarme to select an alarm slot (e.g., Alarm 1, Alarm 2).
- Pressione e segure o Botão de alarme for 3 seconds to enter alarm setting mode. The alarm hour digits will flash.
- Use o Mais (+) or Minus (-) Buttons para definir a hora de alarme desejada.
- Pressione o Botão de alarme to confirm the hour and set the minutes.
- Use o Mais (+) or Minus (-) Buttons para definir o minuto de alarme desejado.
- Pressione o Botão de alarme to confirm minutes and set the sunrise duration (15-120 minutes). This is the time before the alarm sound when the light will gradually brighten.
- Use o Mais (+) or Minus (-) Buttons to select the sunrise duration.
- Pressione o Botão de alarme to confirm duration and select the wake-up sound.
- Use o Mais (+) or Minus (-) Buttons to cycle through the available wake-up sounds (e.g., nature sounds, melodies).
- Pressione o Botão de alarme to confirm the sound and set the alarm volume.
- Use o Mais (+) or Minus (-) Buttons to adjust the alarm volume (7 levels).
- Pressione o Botão de alarme one last time to save the alarm settings and activate the alarm. An alarm icon will appear on the display.
6.2 Função de soneca
Quando o alarme tocar, pressione o Botão Soneca/Luz to activate the snooze function. The alarm will pause for 9 minutes and then sound again. You can snooze multiple times.
6.3 Turning Off an Alarm
To turn off a sounding alarm, press any button other than the Botão Soneca/Luz. To deactivate an alarm completely, press the Botão de alarme until the alarm icon disappears from the display.
6.4 Night Light / Bedside Lamp Função
The device can function as a dimmable night light with various colors.
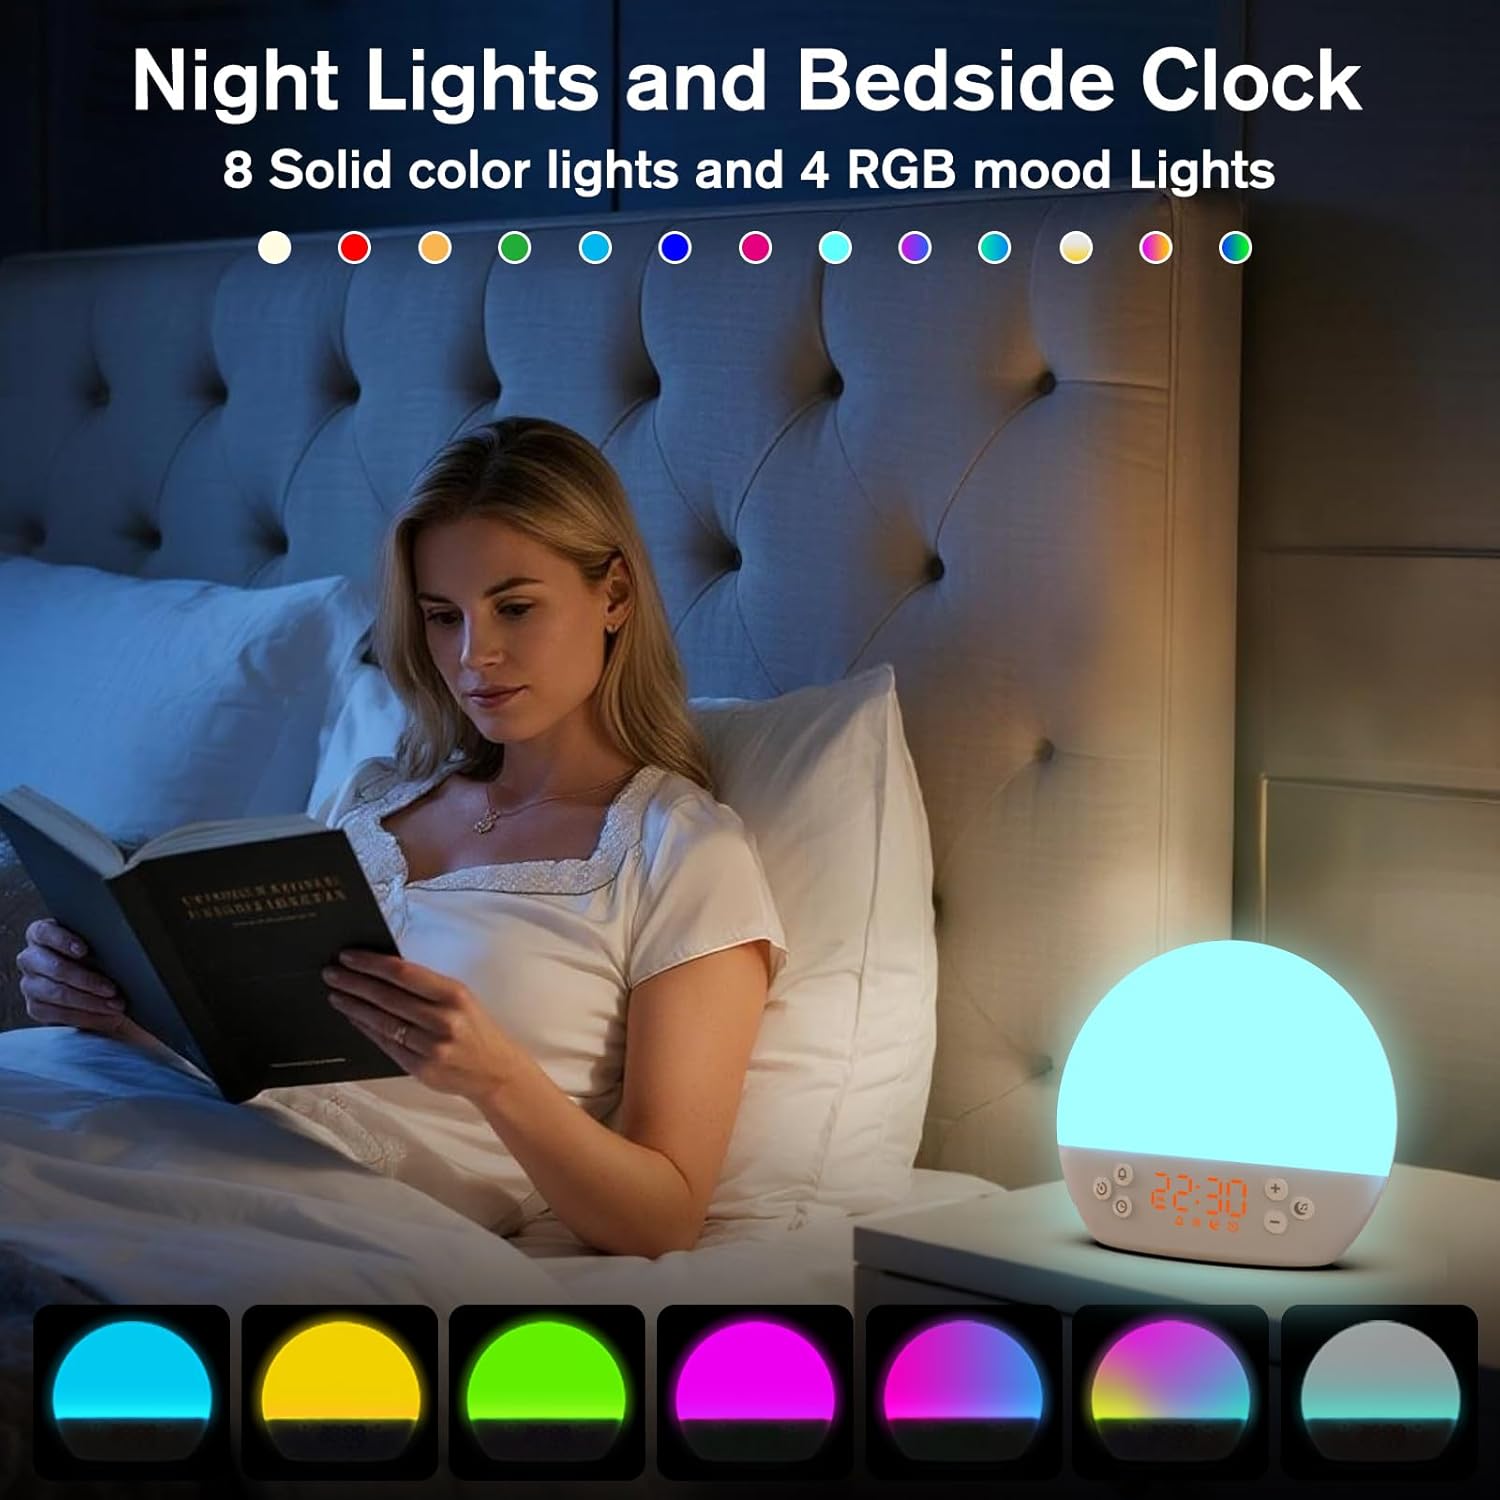
Image 3: The alarm clock used as a bedside lamp, displaying various solid colors and mood lighting options.
- Pressione o Botão Soneca/Luz once to turn on the light.
- Pressione o Botão Soneca/Luz repeatedly to cycle through different solid colors (8 options) and RGB mood lights (4 options).
- To adjust the brightness of the selected light, press and hold the Botão Soneca/Luz, então use o Mais (+) or Minus (-) Buttons to increase or decrease brightness. Release the Botão Soneca/Luz quando terminar.
- Pressione e segure o Botão Soneca/Luz novamente para apagar a luz.
6.5 White Noise Machine & Soothing Sounds
The device offers 30 soothing sounds for relaxation or sleep aid.

Image 4: Visual representation of the 30 smooth sounds for sleep, including white noise, nature sounds, and lullabies.
- Pressione o Music Note Button to turn on the sound machine. It will start playing the last selected sound.
- Pressione o Music Note Button repeatedly to cycle through the 30 available sounds.
- Use o Mais (+) or Minus (-) Buttons para ajustar o volume do som.
- To set a timer for the sound playback, press and hold the Music Note Button. The timer options (e.g., 15 min, 30 min, 60 min, continuous) will appear. Use the Mais (+) or Minus (-) Buttons to select a duration. The sound will automatically turn off after the selected time.
- Pressione e segure o Music Note Button novamente para desligar a máquina de som.
6.6 Sunset Simulation (Sleep Aid)
The sunset simulation feature gradually dims the light and can play soothing sounds to help you fall asleep.
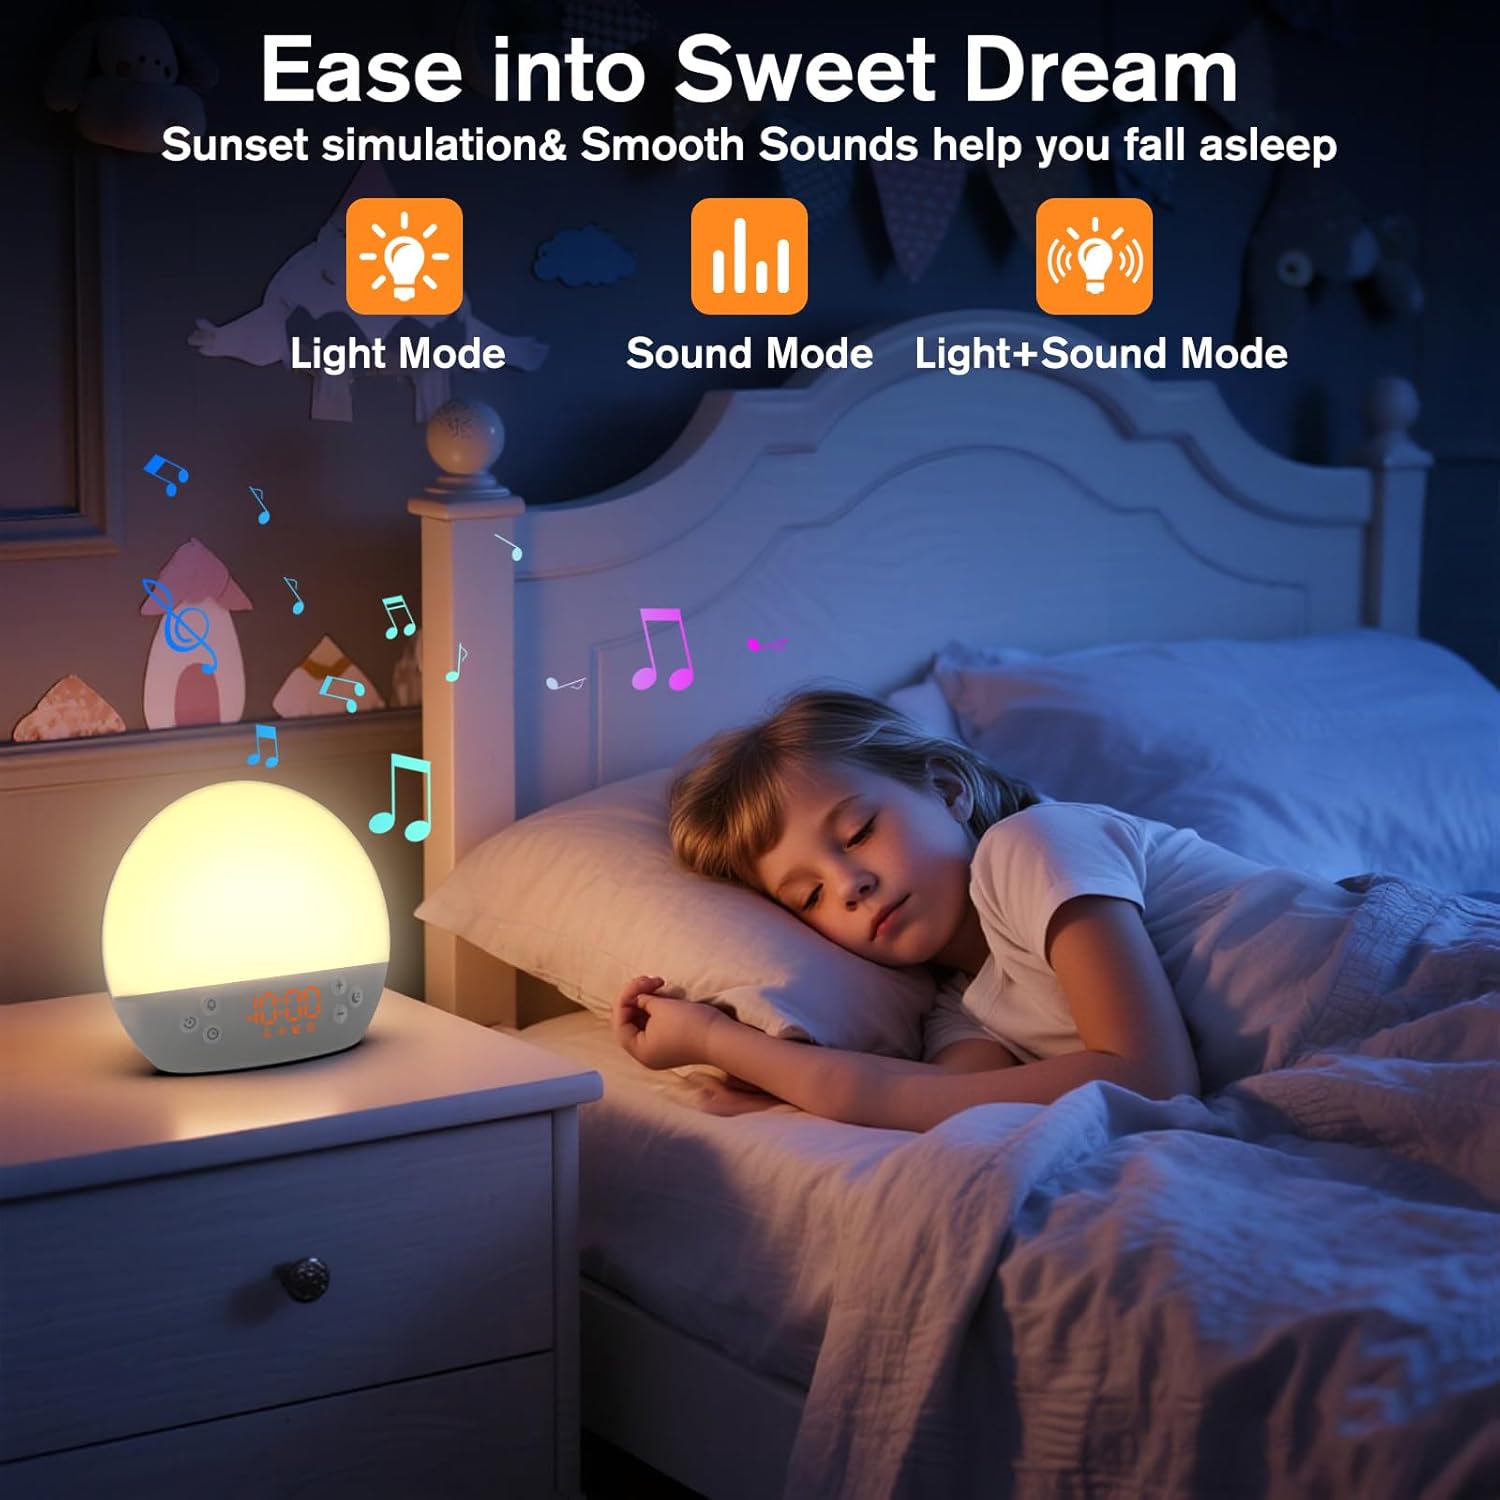
Image 5: The alarm clock in sunset simulation mode, providing a calming light and sound environment to aid sleep.
- To activate sunset simulation, press and hold the Botão de tempo until the sunset icon appears.
- Use o Mais (+) or Minus (-) Buttons to set the duration of the sunset simulation (e.g., 15, 30, 60 minutes).
- Pressione o Botão de tempo to confirm the duration. You can then choose to have light only, sound only, or both light and sound.
- Use o Mais (+) or Minus (-) Buttons to select the desired mode (Light Mode, Sound Mode, Light+Sound Mode).
- If Light+Sound Mode is selected, you can choose a specific soothing sound and adjust its volume.
- Pressione o Botão de tempo again to start the sunset simulation. The light will gradually dim, and sounds will fade out over the set duration.
6.7 Ajuste de brilho da tela
The brightness of the digital time display can be adjusted to your preference.
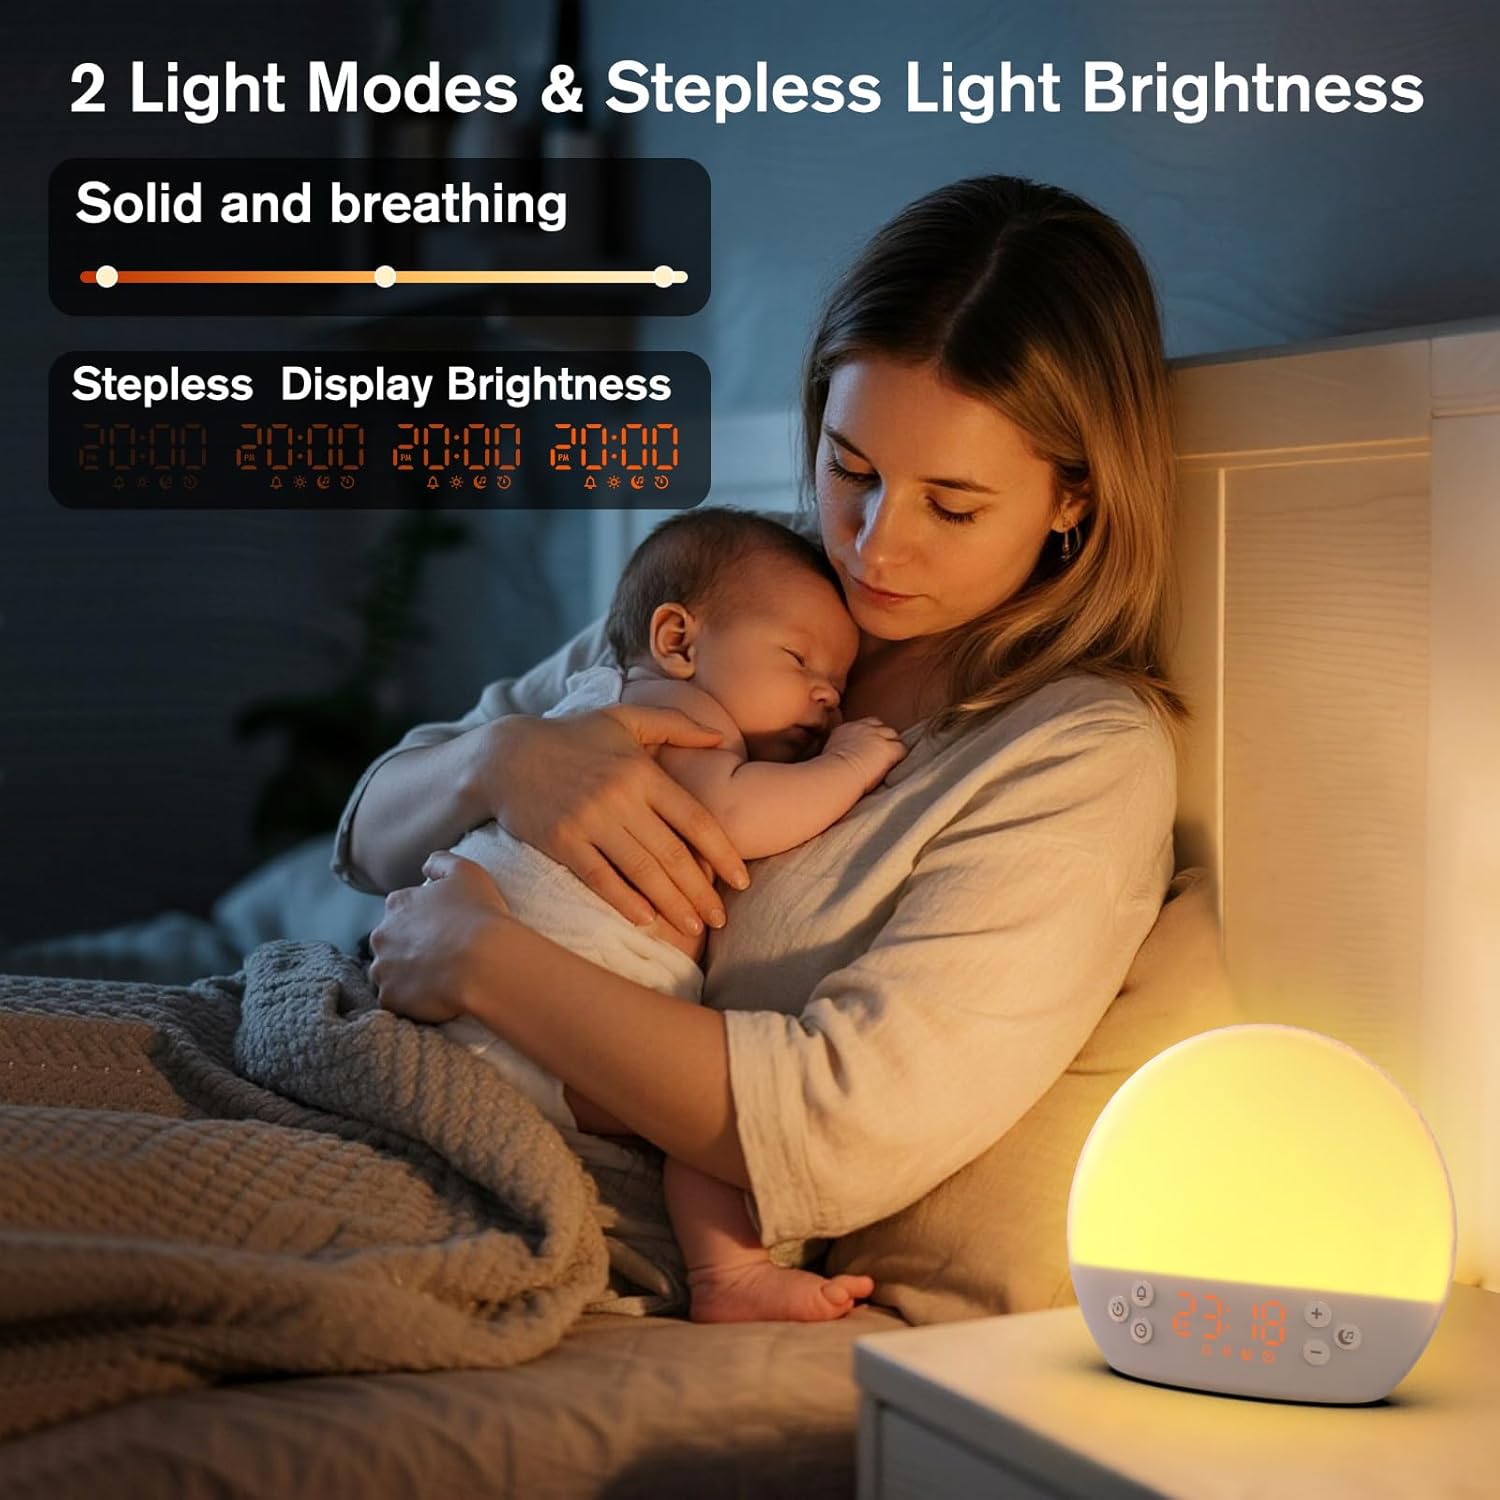
Image 6: The alarm clock demonstrating stepless display brightness adjustment, from very dim to bright.
Para ajustar o brilho da tela, pressione brevemente o Botão de tempo (do not hold). Each press will cycle through different brightness levels (e.g., bright, medium, dim, off). Select the level that suits your environment.
7. Manutenção
- Limpeza: Desligue o aparelho da tomada antes de limpar. Use um pano macio e seco para limpar a superfície. Não use produtos de limpeza abrasivos ou solventes.
- Armazenar: If not in use for an extended period, unplug the device and store it in a cool, dry place.
8. Solução De Problemas
| Problema | Possível causa | Solução |
|---|---|---|
| O dispositivo não liga. | O cabo de alimentação não está conectado corretamente ou a tomada está com defeito. | Verifique a conexão do cabo de alimentação. Tente usar outra tomada. |
| O alarme não dispara. | Alarm not activated or volume is too low. | Ensure the alarm icon is visible on the display. Increase alarm volume during setup. |
| A luz não acende. | Light function is off or brightness is set to minimum. | Pressione o Botão Soneca/Luz to turn on. Adjust brightness using Mais (+) or Minus (-) Buttons while holding the Botão Soneca/Luz. |
| Não está havendo reprodução de som. | Sound machine is off or volume is too low. | Pressione o Music Note Button to turn on. Increase volume using Mais (+) Botão. |
| Time display is too bright/dim. | Display brightness setting needs adjustment. | Pressione brevemente o Botão de tempo to cycle through display brightness levels. |
9. Especificações
| Recurso | Detalhe |
|---|---|
| Nome do modelo | MX9 |
| Marca | KEPLUG |
| Material | Plástico |
| Cor | Branco |
| Fonte de energia | Elétrico com fio |
| Peso do item | 258 gramas (9.1 onças) |
| Dimensões do produto | 2.36 x 5.59 x 6.3 polegadas (6 x 14.2 x 16 cm) |
| Número de fontes de luz | 2 |
| Recurso especial | Volume ajustável |
| Sunrise Simulation Duration | 15-120 minutos |
| Sons calmantes | 30 opções |
| Níveis de volume do alarme | 7 níveis |
10. Garantia e Suporte
Your KEPLUG MX9 Sunrise Alarm Clock is covered by a standard manufacturer's warranty. For specific warranty details, please refer to the product packaging or contact KEPLUG customer support. If you encounter any issues not covered in the troubleshooting section, or require further assistance, please reach out to our customer service team through the retailer where you purchased the product or visit the official KEPLUG website para obter informações de contato de suporte.


