1. Introdução
This manual provides detailed instructions for the installation, operation, and maintenance of the OOYCYOO 60A MPPT Solar Charge Controller, Model EC60A. This device is designed to efficiently manage power flow from solar panels to various battery types, including 12V, 24V, 36V, and 48V systems.
Leia atentamente este manual antes da instalação e utilização para garantir o funcionamento correto e a segurança.
2. Principais características
- 60A MPPT Charging: Utilizes Maximum Power Point Tracking technology for efficient solar energy conversion.
- Multi-Stage Carregamento: Apresenta um 4-stage battery charging algorithm (Bulk Charge, Boost Charge, Float Charge, Equalization) for optimal battery health.
- Volume Amplotage Suporte: Automatically detects and supports 12V, 24V, 36V, and 48V battery systems.
- Alto consumo de energia fotovoltaica: Supports solar panel open circuit voltage up to 160VDC and input power up to 2800W (for 48V systems).
- Compatibilidade da bateria: Compatible with various battery types including AGM, Gel, Flooded, and Lithium (LFP), with pre-set and user-defined charging parameters.
- Alta eficiência: Tracking efficiency not less than 98.1% and peak conversion efficiency up to 98%.
- Proteção Avançada: Includes PV over current/power, PV short circuit, PV reverse polarity, night reverse charging, battery reverse polarity, over voltage, over discharge, overheating, lithium battery low temperature, load short circuit, load overload, and TVS high voltage transientes.
- Tela LCD: Integrated blacklight LCD for monitoring system status, including KWH charge amount.
- Arrefecimento Eficiente: Die-cast aluminum construction with built-in cooling fan for effective heat dissipation.
3. Instruções de segurança
Observe as seguintes precauções de segurança durante a instalação e operação:
- Certifique-se de que todas as conexões estejam corretas e seguras antes de ligar a energia.
- Conecte sempre primeiro a bateria, depois o painel solar e, por último, a carga. Desconecte na ordem inversa.
- Não desmonte nem tente reparar o controlador por conta própria. Contate pessoal qualificado para assistência técnica.
- Instale o controlador em uma área bem ventilada, longe de materiais inflamáveis e da luz solar direta.
- Utilize equipamento de proteção individual (EPI) adequado ao trabalhar com sistemas elétricos.
- Garantir que o sistema voltage não excede o volume máximo de entrada do controladortage (160 VCC).
4. Produto acabadoview
The OOYCYOO 60A MPPT Solar Charge Controller features a robust design with an intuitive LCD display and clearly labeled terminals for easy connection.

Figura 4.1: Frente view of the OOYCYOO 60A MPPT Solar Charge Controller, showing the LCD display, control buttons, and terminal connections.

Figura 4.2: Detalhado view of the controller highlighting the LCD display, control buttons (SET, A, B, C, D), 5-second reset function, and clearly marked Solar Panel, Battery, and Load terminals.
4.1. Components and Interface
- Tela LCD: Shows real-time system parameters such as PV input voltage, bateria voltage, load output, and charging status.
- Control Buttons (A, B, C, D, SET): Used for navigating menus, adjusting settings, and confirming selections.
- Terminais para painéis solares: Connect positive and negative leads from the solar array.
- Terminais da bateria: Connect positive and negative leads to the battery bank.
- Terminais de carga: Connect positive and negative leads to DC loads.
5. Instalação e configuração
5.1. Montagem do Controlador
Mount the controller vertically on a wall or a stable surface in a dry, well-ventilated indoor location. Ensure adequate clearance around the unit for proper airflow and heat dissipation. Avoid direct sunlight, high temperatures, and humid environments.
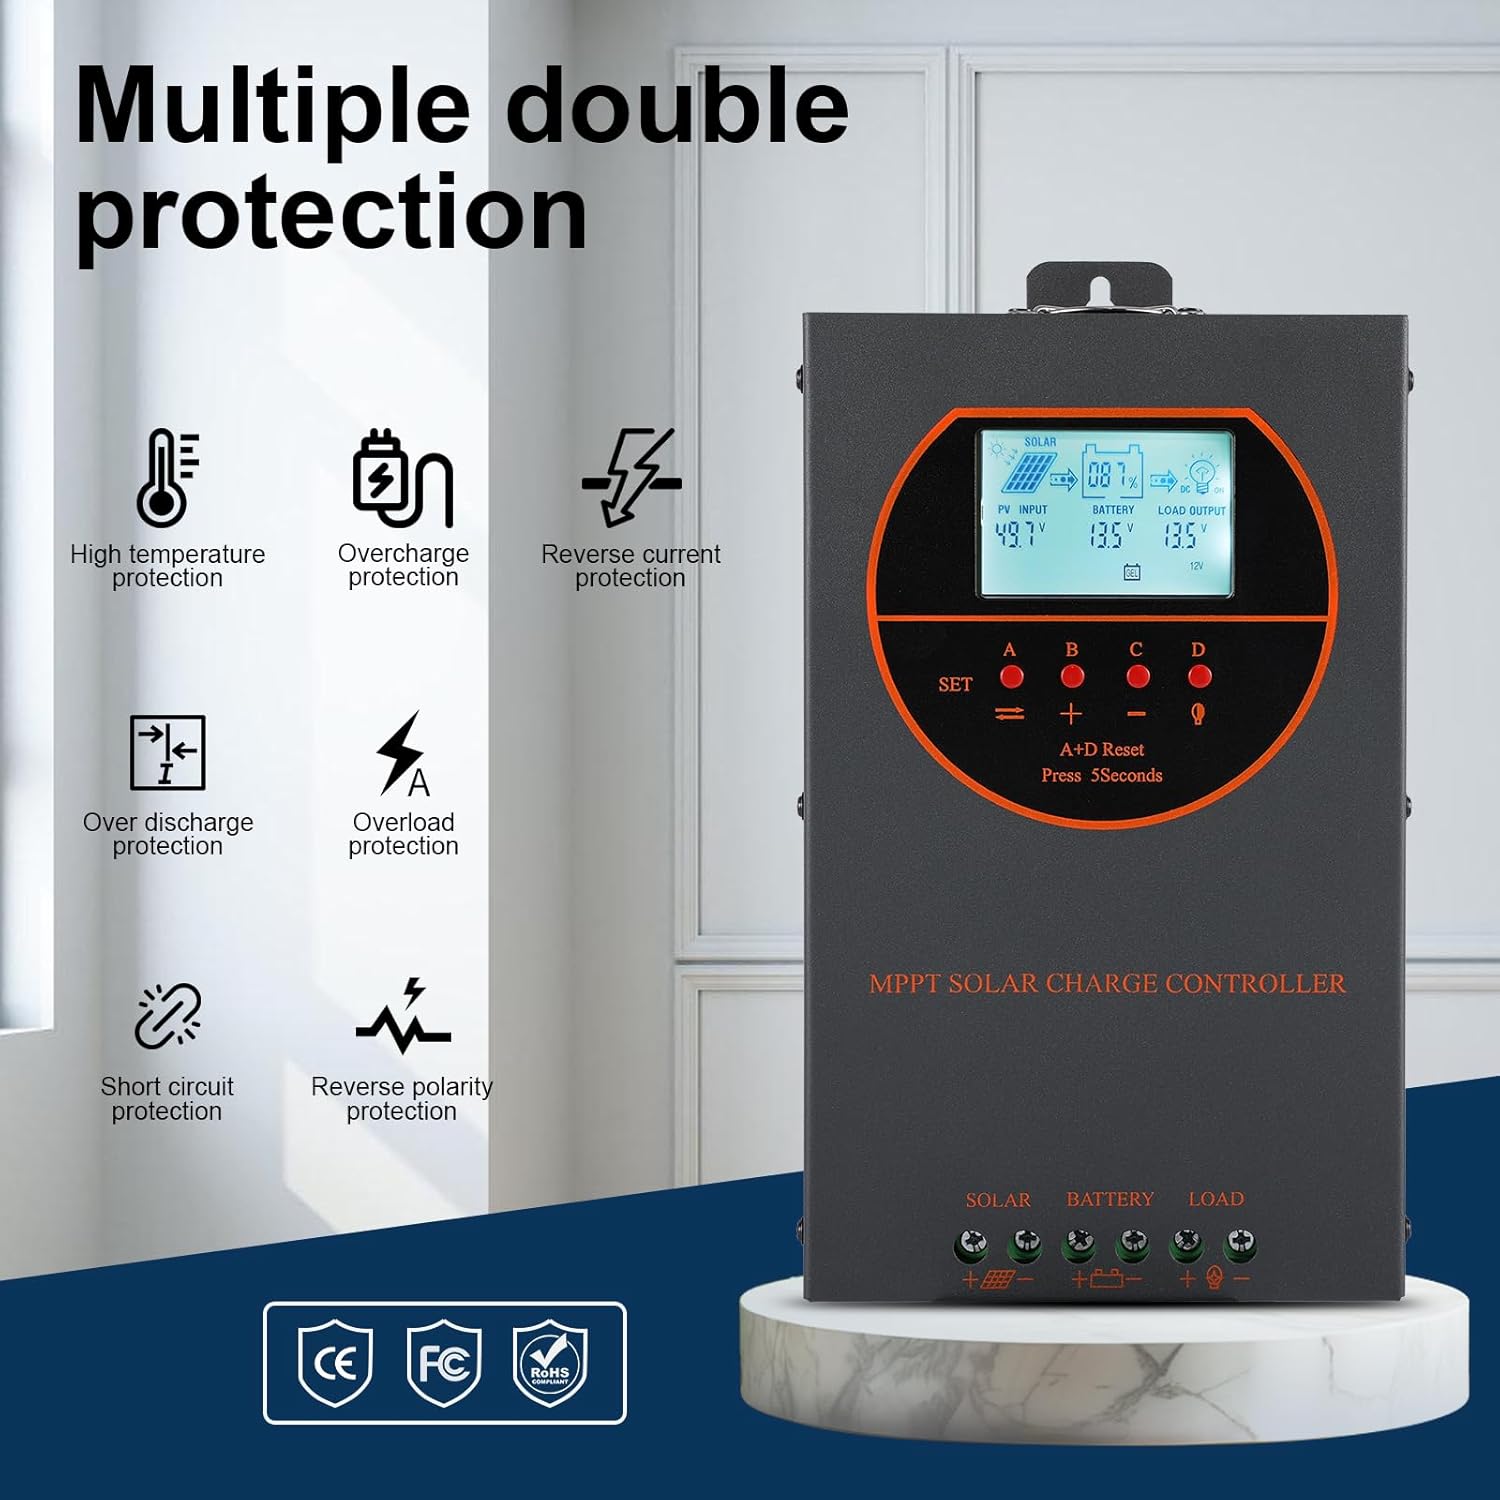
Figure 5.1: Dimensions of the OOYCYOO 60A MPPT Solar Charge Controller, showing approximate measurements of 14cm (5.5in) width, 5.5cm (2.2in) depth, and 23cm (9.1in) length.
5.2. Sequência de Fiação
Follow this wiring sequence carefully to prevent damage to the controller or other components:
- Conecte a bateria: Connect the positive and negative terminals of the battery to the corresponding battery terminals on the controller. Ensure correct polarity. The controller will automatically detect the battery voltage (12V/24V/36V/48V).
- Conecte o painel solar: Connect the positive and negative leads from the solar panel array to the corresponding PV input terminals on the controller. Ensure correct polarity.
- Conecte a carga CC (opcional): Connect the positive and negative leads of your DC load to the corresponding load terminals on the controller.
Importante: Ao desmontar o sistema, sempre conecte primeiro a bateria e, em seguida, desconecte primeiro o painel solar.

Figure 5.2: Illustrative wiring diagram showing connections from solar panels to the controller, then to the battery, and finally to DC and AC loads via an inverter. This diagram also shows the possibility of connecting two 60A controllers in parallel for increased capacity.
5.3. Volume do sistematage and Power Configuration
The controller automatically identifies the battery system voltage. Ensure your solar panel array's open circuit voltage (Voc) and maximum input power are within the specified limits for your battery system:
| Sistema de bateria | Máx. Vol. Circuito Aberto PVtage (Voc) | Potência máxima de entrada PV |
|---|---|---|
| 12V | ≤72 V | 720 W |
| 24V | ≤108 V | 1440 W |
| 36V | ≤144 V | 2100 W |
| 48V | ≤160 V | 2800 W |

Figure 5.3: Diagram illustrating the connection of multiple PV modules in series to the controller, with a table detailing recommended system parameters for 12V, 24V, and 48V systems, including battery float voltage, sob voltage proteção, recuperação voltage, and maximum input power.
6. Operação
6.1. Visor LCD e indicadores
The LCD display provides real-time information about the solar charging system. Key indicators include:
- Entrada fotovoltaica: Exibe o vol atualtage and power from the solar panels.
- Bateria: Mostra a carga atual da bateria.tage e status de carregamento.
- Saída de carga: Indicates the status of the DC load output.
- KWH: Displays the total accumulated charge in kilowatt-hours.
6.2. Seleção do tipo de bateria
The controller is compatible with various battery types. You can select the appropriate battery type through the controller's settings menu to ensure optimal charging. Supported types include:
- GEL
- Assembleia Geral Anual
- USER (user-defined parameters)
- SEL (Sealed)
- FLD (Flooded)
- LI (Lithium)
- LiFePO4

Figure 6.1: Diagram illustrating the controller's strong adaptability to various battery types (GEL, AGM, USER, SEL, FLD, LI, LiFePO4) and a graph showing the 4-stage charging process: Bulk Charge, Constant Charging (Boost), and Float Charge.
6.3. Charging Algorithm
O controlador utiliza um 4-stage charging algorithm to maximize battery life and performance:
- Carga em massa: Delivers maximum current to rapidly charge the battery to approximately 80% capacity.
- Carga de reforço: Charges the battery at a higher voltage to ensure full charge and equalization.
- Taxa de flutuação: Mantém a bateria em um nível seguro.tage para evitar a autodescarga e a sobrecarga.
- Equalização: Periodicamente, sobrecarrega baterias inundadas para equilibrar o volume das células.tages and prevent sulfation. (Applicable to flooded batteries only, if enabled).
7. Manutenção
A manutenção regular garante a longevidade e o desempenho ideal do seu controlador de carga solar:
- Verifique as conexões: Inspecione periodicamente todas as conexões da fiação para verificar se estão bem apertadas e se há corrosão.
- Controlador limpo: Keep the controller clean and free from dust. Use a dry cloth to wipe the exterior. Ensure ventilation openings are not obstructed.
- Desempenho do monitor: Regularly check the LCD display for normal operating parameters. Note any unusual readings.
- Inspeção da bateria: Inspect batteries for any signs of damage, leakage, or corrosion. Clean battery terminals as needed.
8. Solução De Problemas
This section addresses common issues you might encounter with the OOYCYOO 60A MPPT Solar Charge Controller.
8.1. Problemas e soluções comuns
| Problema | Possível causa | Solução |
|---|---|---|
| Sem monitor/Controlador não liga | Bateria desconectada ou com baixa voltagemtage; polaridade inversa. | Verifique as conexões da bateria e voltage. Ensure correct polarity. Charge battery if voltage é muito baixo. |
| Sem carregamento solar | Solar panel not connected; reverse polarity; low sunlight; PV over-voltage / atual. | Check solar panel connections and polarity. Ensure sufficient sunlight. Verify PV voltage and current are within limits. |
| Carregar não está funcionando | Load not connected; load short circuit; overload; battery low voltage. | Check load connections. Inspect for short circuits or overloads. Ensure battery has sufficient charge. |
| Superaquecimento do controlador | Poor ventilation; excessive load/PV input. | Ensure adequate airflow around the controller. Reduce load or PV input if consistently overheating. |
8.2. Funções de proteção
The controller includes multiple protection features to safeguard the system:
- Sobrecorrente/potência fotovoltaica
- Curto-circuito PV
- Polaridade reversa PV
- Carregamento reverso noturno
- Polaridade reversa da bateria
- Bateria acima de voltage
- Bateria descarregada
- Battery Overheating, Controller Overheating
- Temperatura baixa da bateria de lítio
- Curto-circuito de carga
- Sobrecarga de carga
- TVS de alto volumetage Transientes

Figure 8.3: Visual representation of the multiple protection features integrated into the controller, including low voltage, overheat, short circuit, reverse protection, overload, and overcurrent protection.

Figura 8.4: interno view of the controller, highlighting key components such as copper coil transformers and capacitors, which contribute to its robust performance and protection features.
9. Especificações técnicas
| Parâmetro | Especificação |
|---|---|
| Corrente de carga nominal | 60A |
| Vol Nominal do Sistematage | 12V/24V/36V/48V DC Auto Identifying |
| Bateria Voltage Alcance | 9 V~55 V |
| Máx. Vol. Circuito Aberto PVtage | 160 VCC |
| Potência máxima de entrada fotovoltaica (sistema de 12V) | 720 W |
| Potência máxima de entrada fotovoltaica (sistema de 24V) | 1440 W |
| Potência máxima de entrada fotovoltaica (sistema de 36V) | 2100 W |
| Potência máxima de entrada fotovoltaica (sistema de 48V) | 2800 W |
| Terminal de alimentação | 6-12 AWG |
| Dimensões (C*L*A) | 11 x 6 x 2.5 polegadas (aproximadamente 27.9 x 15.2 x 6.3 cm) |
| Peso | 4.07 libras (aproximadamente 1.8 kg) |
| Eficiência de rastreamento | ≥98.1% |
| Eficiência de conversão máxima | Até 98% |
| Resfriamento | Die-cast aluminum housing, built-in cooling fan |
| Tipos de bateria suportados | AGM, Gel, Flooded, Lithium (LFP), Sealed, User-defined |
| Material | Alumínio |
| Número do modelo do item | EC60A |
| UPC | 750864834470 |
10. Suporte e Contato
For technical support, warranty claims, or further assistance, please contact OOYCYOO customer service through the retailer where the product was purchased or visit the official OOYCYOO store on Amazon:

