1. Introdução
The GOYOJO GH192 is a handheld thermal imaging camera designed for various inspection tasks, including mechanical maintenance, home HVAC, and electrical inspections. It features a 240x240 super IR resolution, a 2MP visual camera, and fusion imaging capabilities to provide detailed and accurate thermal data. This manual provides essential information for the safe and effective operation of your device.
2. O que está na caixa
Please check the contents of your package upon receipt:
- Thermal camera body
- Wrist strap lanyard
- Cabo USB-C
- Manual de instruções

Figure 2.1: Package Contents of the GH192 Thermal Imaging Camera.
3. Recursos do Produto
- Dual Light Fusion Imaging: Equipped with a 2MP visible light camera and an infrared camera, the GH192 offers a 2.8" 240x320 IPS display and a 25Hz frame refresh rate. This enables faster response and more detailed inspections by outlining target objects upon activation. Note: Enable "File Transfer" in settings before exporting images.
- Auto Temperature Tracking + Temperature Alarm: The imager automatically captures center point temperature and locks onto high/low temperatures within a range of -4°F to 1022°F. It features 3-point heat tracking (target temp, minimum temp, maximum temp). High-temperature and low-temperature alarms provide clear alerts on the screen for temperature abnormalities.
- 3 Image Modes And 6 Color Palettes: Choose from Fusion, Thermal, and Conventional Light modes. Six adjustable color palettes are available: White Hot, Black Hot, Iron Red, Rainbow, Red Hot, and Fusion, allowing selection based on specific work needs.
- Design durável e portátil: Offers up to 8 hours of runtime and USB-C charging. It is 6.6ft drop-resistant and IP54 rated, ensuring durability for tough use.
- Professional-Grade Accuracy: Provides a precision of ±2°C. Emissivity can be adjusted based on materials (e.g., wood, bricks) and object distance can be modified for accurate temperature readings across various surfaces. Suitable for home inspections, facility maintenance, HVAC troubleshooting, and electrical/mechanical system checks.

Figure 3.1: Dual Camera and Fusion Imaging.

Figure 3.2: Automatic Temperature Tracking and Alarms.
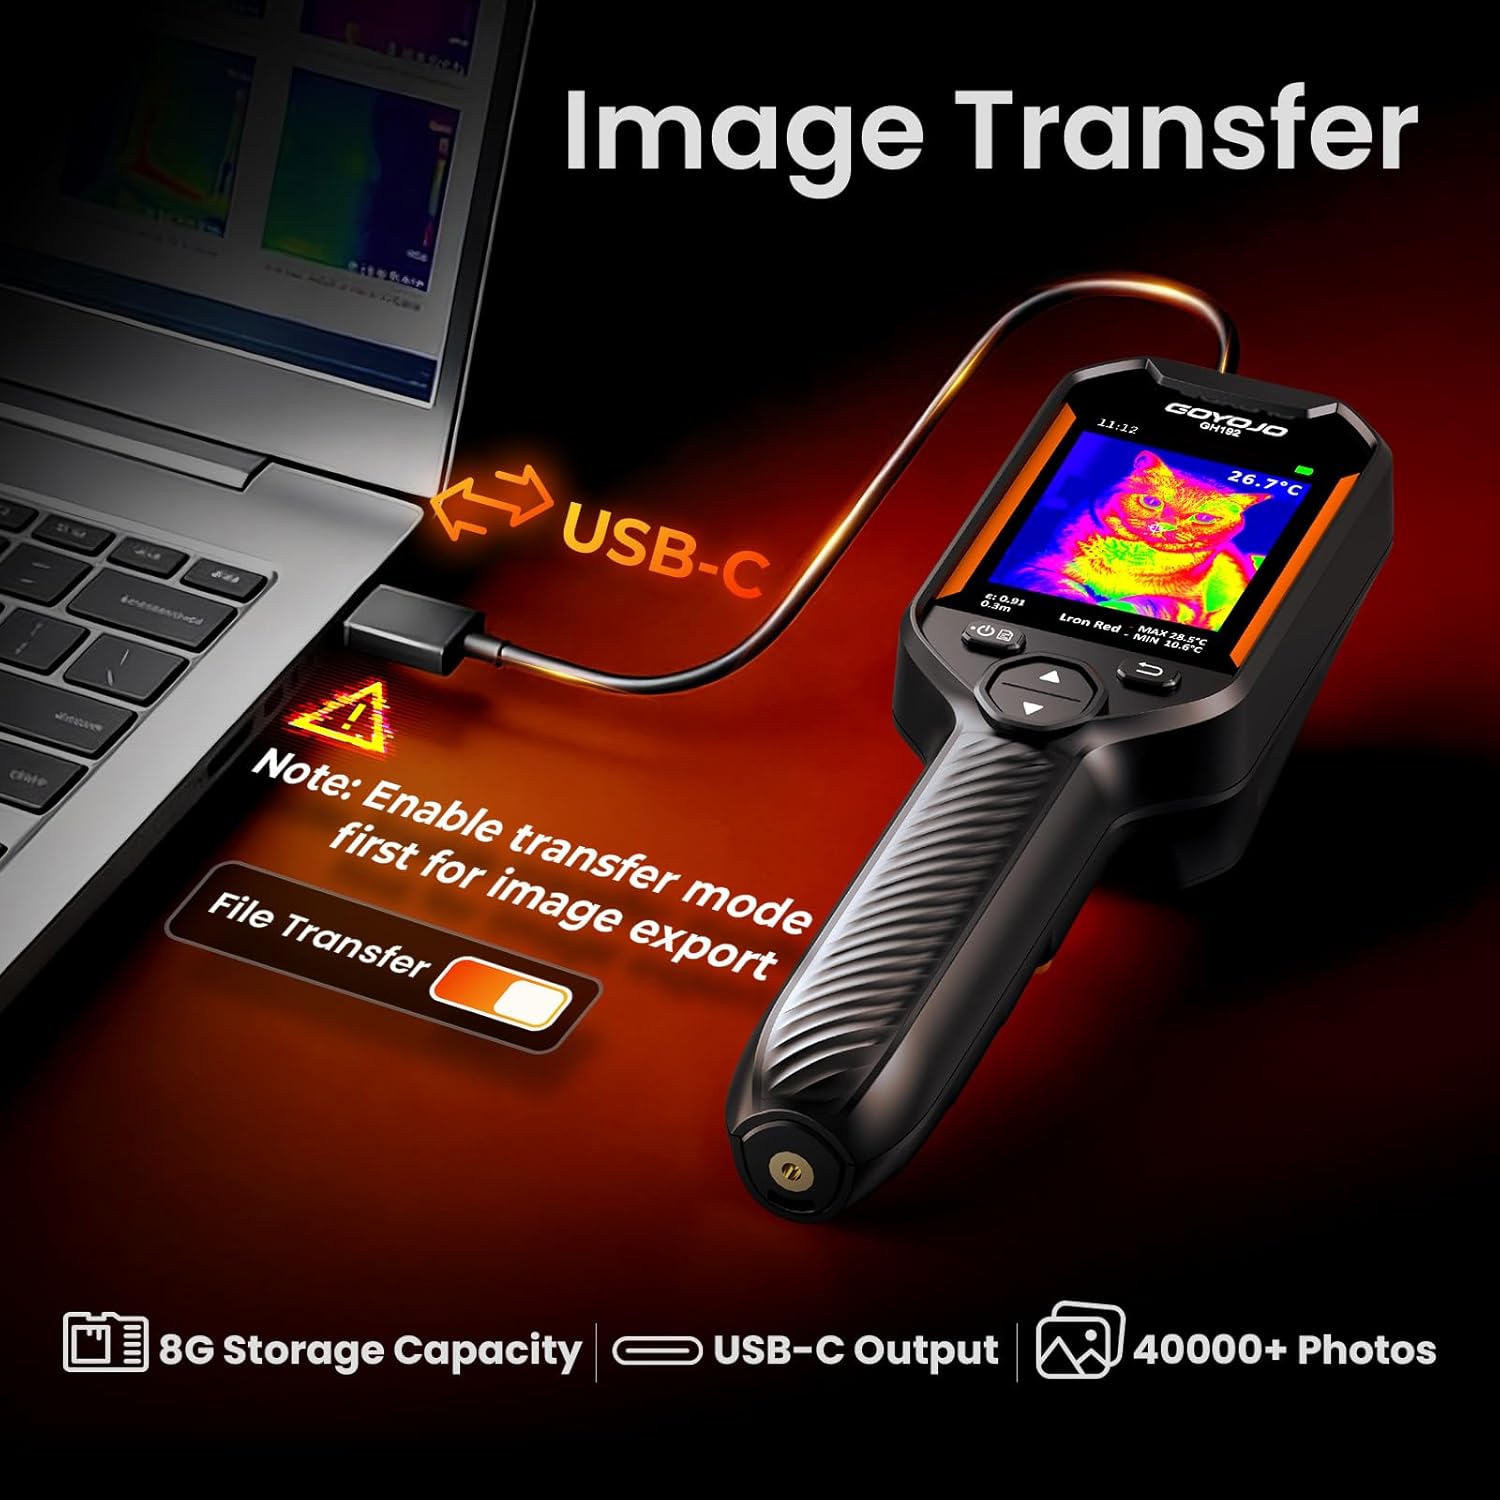
Figure 3.3: Versatile Color Palettes.
4. Configuração
4.1 Carregando o dispositivo
Before first use, fully charge the GH192 using the provided USB-C cable. Connect the USB-C end to the camera's charging port and the USB-A end to a compatible power adapter (not included) or a computer USB port. The battery indicator on the display will show charging status.
4.2 Ligar/Desligar
- To power on: Press and hold the power button (usually located on the side or front panel) until the display lights up.
- Para desligar: Pressione e mantenha pressionado o botão liga/desliga até que o dispositivo desligue.
4.3 Configurações iniciais
Ao ligar o aparelho pela primeira vez, pode ser necessário configurar algumas definições básicas:
- Linguagem: Navigate to "Settings" > "More Settings" > "Language" to select your preferred language.
- Hora e data: Set the correct time and date for accurate timestampleitura de imagens.
- Unidades de temperatura: Choose between Celsius (°C) or Fahrenheit (°F) in "Settings" > "More Settings" > "Temperature Units".

Figure 4.1: Enabling File Transfer in Settings.
5. Instruções de operação
5.1 Navegando na Interface
The GH192 features intuitive button controls:
- Botão Ligar/Confirmar: Powers the device on/off and confirms selections in menus.
- Botão Voltar: Volta para a tela ou menu anterior.
- Up/Down Navigation: Used to scroll through menu options or adjust settings.
- Botão de gatilho: Captures and saves images.

Figura 5.1: Dispositivo sobreview e controles.
5.2 Modos de Imagem e Paletas de Cores
To switch between image modes (Fusion, Thermal, Conventional Light) or change color palettes (White Hot, Black Hot, Iron Red, Rainbow, Red Hot, Fusion), use the navigation buttons or access the "Palettes" option in the settings menu.
The Fusion mode overlays thermal data onto visible light images for enhanced detail and easier identification of heat sources.
Video 5.1: Demonstration of different image modes and color palettes on the GOYOJO Thermal Camera.
5.3 Adjusting Emissivity and Distance
For accurate temperature readings, adjust the emissivity setting based on the material being inspected. Navigate to "Settings" > "Emissivity" and select from predefined materials (e.g., Human Skin, Printed Circuit Board, Cement Concrete, Ceramic, Rubber, Paint, Wood, Asphalt, Brick, Sand, Soil, Cotton, Cardboard, White Paper, Water) or set a custom value. Adjust the object distance in "Settings" > "Distance" for optimal focus and accuracy.

Figure 5.2: Emissivity Settings for Different Materials.
5.4 Alarmes de temperatura
Enable and configure high/low temperature alarms in "Settings" > "Temperature Alarms". When a target's temperature exceeds or falls below the set thresholds, a visual alert will appear on the screen.
6. Manutenção
- Limpeza: Use a soft, dry cloth to clean the device body. For the lens, use a lens cleaning cloth and solution. Do not use abrasive cleaners.
- Armazenar: Guarde a câmera em um local fresco e seco, longe da luz solar direta e de temperaturas extremas.
- Cuidados com a bateria: For long-term storage, ensure the battery is charged to approximately 50%. Recharge periodically to maintain battery health.
7. Solução De Problemas
- Dispositivo não liga: Ensure the battery is sufficiently charged. Connect to a power source using the USB-C cable.
- Leituras de temperatura imprecisas:
- Check and adjust the emissivity setting for the material being inspected.
- Verify the object distance setting is appropriate.
- Certifique-se de que a lente esteja limpa e livre de obstruções.
- Não é possível transferir files para PC:
- Garantir "File Transfer" is enabled in "Settings" > "More Settings".
- Use the provided USB-C cable and ensure it's securely connected.
- Tente uma porta USB diferente em seu computador.
- Screen is too dim/bright: Adjust brightness in "Settings" > "More Settings" > "Brightness".
Vídeo 7.1: Reavaliação detalhadaview and demonstration of the GOYOJO Thermal Imaging Camera, including settings and various applications.
8. Especificações
| Número do modelo | GH192 |
| Resolução de RI | 240x240 pixels |
| Câmera Visual | 2MP |
| Mostrar | 2.8" 240x320 IPS LCD |
| Taxa de quadros | 25Hz |
| Faixa de temperatura | -4°F a 1022°F (-20°C a 550°C) |
| Precisão | ±2°C |
| Armazenar | 8GB Internal (40,000+ photos) |
| Duração da bateria | 8 horas de duração |
| Carregando | USB-C |
| Resistência à queda | 6.6 pés (2m) |
| Classificação IP | IP54 |
| Dimensões do produto | 10 x 4 x 3 polegadas |
| Peso do item | 9.2 onças |
9. Garantia e Suporte
For warranty information, technical support, or service inquiries, please refer to the contact details provided in the included warranty card or visit the official GOYOJO website. Guarde o recibo de compra como comprovante para solicitações de garantia.


